GREGORY'S GIRL


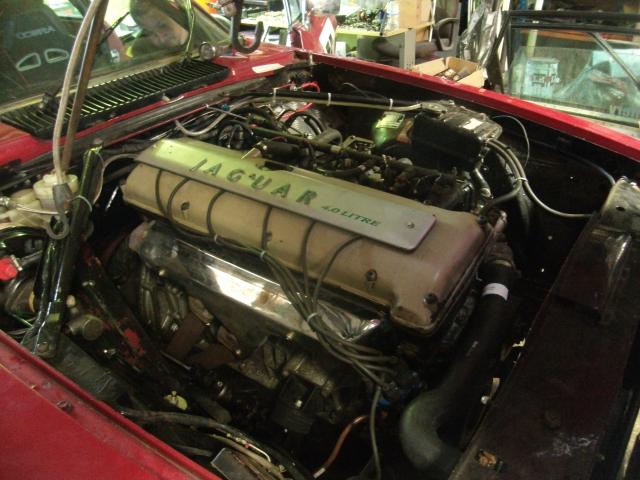
We retain the Jaguar method of power distribution, but in reverse. Jaguar runs the power cable under the car to the brass bolt fitting that bridges across the car and comes through the bulkhead into the cockpit on both sides. We run the power cable through the car and use that fitting to take power into the engine bay. The fitting itself is perfectly fine, it’s just back to front for us! We can’t find the bolt in his many boxes of plastic bags, but then some of those plastic bags are marked “spaghetti Bolognese” so it’s a strange hunt in the first place. Faster to pull one from our stocks than to search for it.
To a certain degree we’re chasing the wiring. If David wires the headlights, we fit the headlights. If he wants to wire in the fan, we have to fit the fan. With this in mind, our now-traditional modification to the car’s demister. XJS fans thrown away, a single plastic X300 blower is torn off the handy spares car on the garden, and adapted with hacksaw and alloy plates to feed the old air distribution plenum with the ends suitably blanked off to create a screen-only blower. It has worked on the last 3 cars, so…
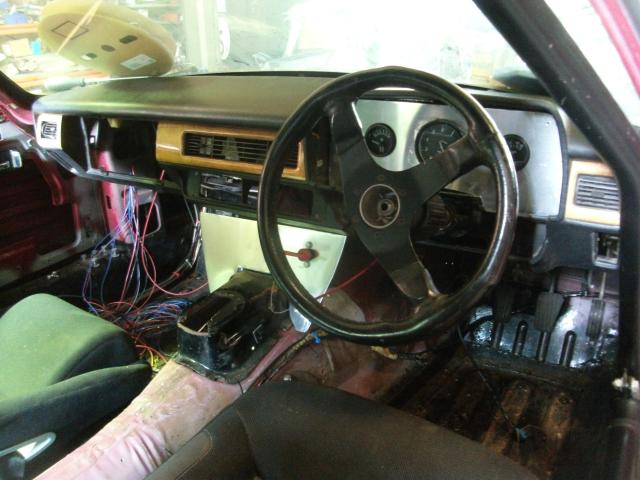
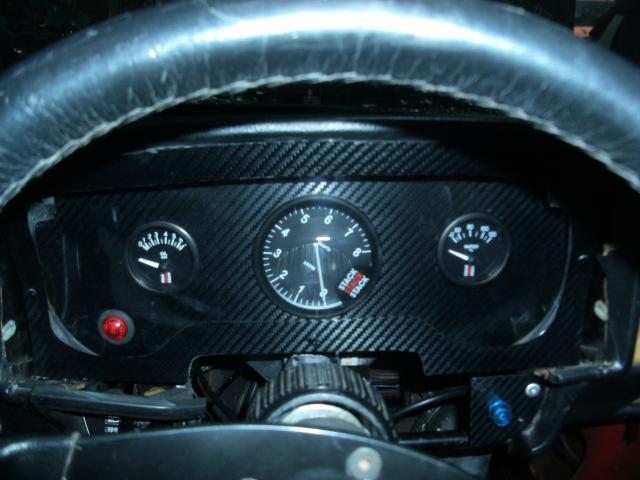
Fitted, the dash can go in. The dash has to be in for the David to do the complicated bit. Then the traditional committee meeting about where all the various controls, buttons, dials and switches are to go. We’re swapping most of the instruments in this car. The regs say you have to keep the dash pod, which is fine, but you can fit additional instruments. A query to the rule-makers, and this is clarified. So long as you keep the dash pod itself, you can swap all the instruments in there.
Hmm. Ok, a bit of head scratching, and bespoke rev counter, oil and water gauges, and a single scary oil pressure warning light are fitted to an alloy plate, which with casual violence is made to fit within a brutalised original pod, with the standard faceplate made to fit over the lot, but with a lexan cover to make it look a bit like a facelift dash. The overall effect is that of a Jaguar dash that has had some custom gauges fitted, which is what it is. It is actually very nice, if we say so ourselves.
We can show David's face, because it's small and blurred. The photo, not his face.
Why fit all the bespoke gauges? Well, to be fair, when is the last time you trusted an XJS instrument pod? I raced at Oulton Park once when the entire instrument binnacle went mad, temperature went to full, oil pressure to zero, the rev counter dropped to half revs, and I drove the race on the shift light, sniffing for signs of an engine cooking itself. You don’t want that, trust me, it’s un-nerving. Even a class A car is entitled to some proper dials.
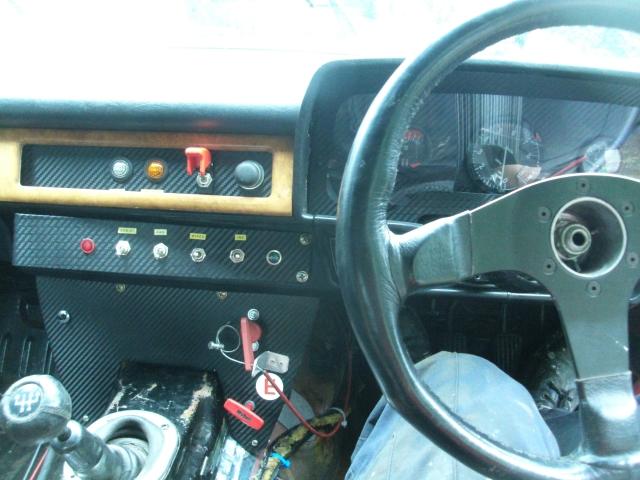
We’re deleting the stalks for wiper and indicators. The lack of clutter on the column is neater, and more purposeful. How often do you need to reach for those stalks? In theory, once per race, if that. No harm then in swapping them for switches. The quality of some of the switches that came out was a little alarming.
It's well past Easter, but it still needed the bonnet. Nearly done, honest.
The new instrument and light layout takes time. By keeping the dash and column clean, only the important items are on display. Oil pressure, water temp, rpm, and a warning light. A shift light goes atop the dash pod, driven by the shiny new rev counter.
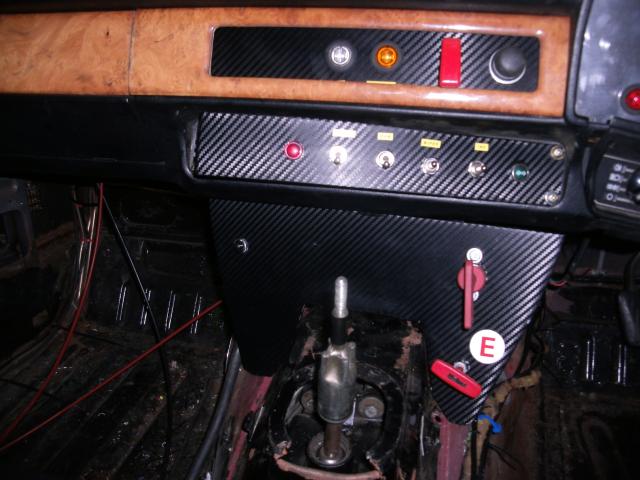
Primary electrics are kill switch, ignition and starter button. The latter two fit a bespoke aluminium plate which replaces the old air vents in the centre of the dash. Two warning lights join them, water level warning, and reverse warning. John correctly identified that you can’t get a reliable water temp reading if the water has all fallen out, so he’d like to know there is some in. The old header tank has the necessary sender for that. The reverse warning light is one of those little touches that we add to our own cars. Instead of powering the reversing lights (when was the last time you reversed your racing car at night?) we use it to put a warning light on the dash, to avoid that moment of panic on the grid about whether you got first gear or accidentally snicked reverse. You don’t want to set off backwards at 2500rpm, people get grumpy.
The tier below, the original site of the various buttons, will now house the new switchgear. After trying his seating position out to see what he can reach, this panel is stepped out to angle it towards the driver a little. This panel contains the indicators, wipers, fan, demist, and charge light. It may seem odd to relegate the charging light to being of tertiary importance, but if you get that light you don’t retire the car, do you? Well then.
The loss of the heater, as usual, mandates another alloy plate to fill the void, off which the kill switch and extinguisher pull is mounted. The 4 aluminium plates made took a fair amount of time to construct, file and drill. There was actual measuring to get the switches to operate with the wood trim refitted. The whole thing is then smothered in 3M fake carbon vinyl, with care to get the grain to all run in the same direction to satisfy the owner’s obsession with order and neatness. And of course, then we refit the wood trim.
The glovebox inner has been deleted, and the now-customary alloy shelf is fitted in there, both to mount the wiring to, and to anchor the bottom of the dashboard. I’ve driven a car with the dash falling out, and it’s pretty disconcerting, you don’t want that.
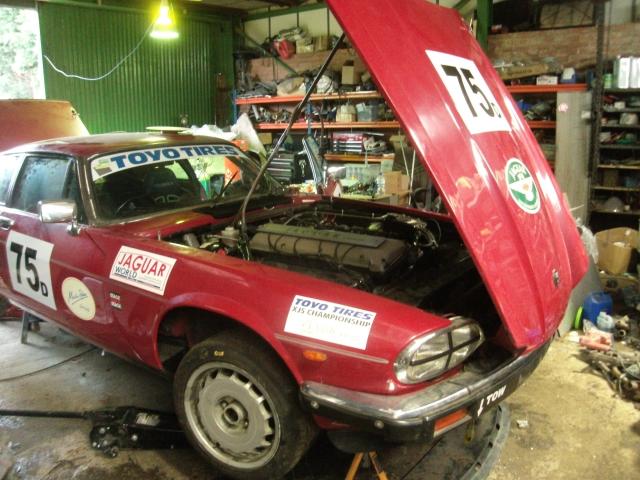
Fully assembled, fan belt fitted, coolant loaded. Gearbox oil in, engine oil in, we have a drivetrain. David supplies sparks. One can of fuel added, and she bursts quickly to life. Tim the timing light adds suitable advance. Not a bad start. Ba-dum tish.
The battery was moved, and the old clamp thrown away. We swap that for a simple load strap. Whilst messing about, we knocked all the plugs out of the boot, and tidied the plumbing a little. Water drain hoses go missing for the hell of it. A small amount of welding to a jacking point is swiftly accomplished.
Wiring complete, we pack a David off home. The lower grille is damaged and rusted. Cutting the fins out of it is the only solution, as the mouth of the car requires protective mesh fitting anyway. We are a bit obsessive about mesh, but then we’ve had some close calls over the years, which mesh has prevented becoming a disaster, we’ve seen stones hole aluminium mesh like bullets, and we have seen people remove the mesh and lose an engine to a stone, so we’re going to suggest we’re right. Put heavy mesh in, keep the rocks out.
Bonnet refitted. It arrived tie-wrapped in place for transport. We like tie-wraps, but that’s going a bit far. Chin spoiler and undertray refitted. We don’t usually get to play with these.
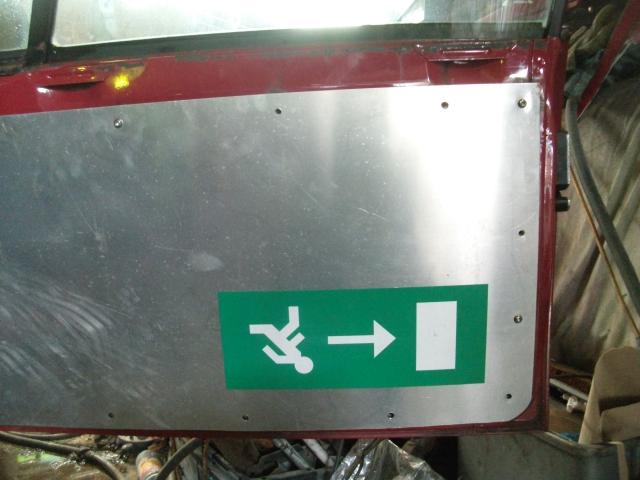
That leaves us with a running car, and a more general messing about needed. I stripped out the passenger door. Regs don’t say the windows have to work, they need only be glass. The motor climbs out to go back in the spares boxes he sent, the window is jammed firmly up. Both door locks disappear, and the locking mechanisms are disabled. Driver’s door window does operate, and is wired for it, and for fun we reattach the broken door handle so that it actually operates. It’s the little touches…
Front and rear towing eyes are rubbish, and are swapped. The big panic years ago that changer everyone to fabric towing eyes did leave a few people with some pretty dire kit, but things have improved a bit in the 5 years since.
The car loses the front towing lugs which we’re messing about. It’s all weight. Still atop the bench is the numberplate we made up for when John hired “Megan” back in 2009. We can’t resist fitting it to his bootlid.
Brakes are disconnected, drained, and checked. Pistons removed, cleaned, and replaced, complete fluid swap and bleed. The brake pedal is amazing. Clutch hose and slave cylinder are replaced, a bespoke braided item for the former, and a cunning cheap replacement for the latter, given a seal kit for the Jaguar slave is currently unavailable.
Suspension is given a spanner check, and down on the deck she goes. A bounce on the car shows her to be comedically stiffly sprung. The brief is not to change parts, however, but we can advise on alternatives. Camber is uneven front to rear and wheel to wheel. That, however, is something that John himself will want to play at, so it’s an advisory role again, and Bear will give lessons on camber and castor. We’d wind the castor on, but we’ve removed the power steering, and until we know how he copes it would be daft to add load to the front end. We write a long to-do list.
Suddenly, it’s together again. Interior screwed in, bulkheads sealed up, on the deck wearing her old T1R tyres and ready for testing.
At this point the ECU committed suicide for no reason other than old age, it euthanized itself. Baffled, we tried the ECU on Helen, which still uses the same system. Definitely the ECU, same symptom on both cars. He has a spare ECU. That one is very dead, and won’t even run the fuel pump. Crap.
A swift trip down the M1 picks up two more. The chap had 5, but on testing on a car he had handy more than one was dead, one of them with the same symptoms as the one that has just killed itself at home. We didn’t buy that one. The new one fitted, Gregory’s girl roars back to life.
Boxes repacked, he gets one more box of crap back than he sent up, because that’s what happens.
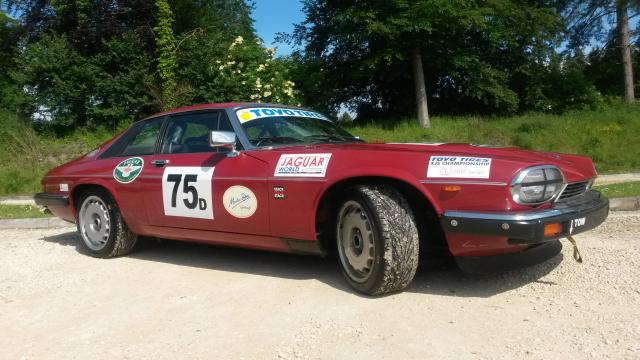
Project completed with hours to spare, literally, whole thing done in 2 weeks start to finish, she’s loaded and heading for testing at Brands Hatch, with a complimentary set of 888s to try out. Gratifyingly, John was delighted by everything, including all the bits we’d not consulted him about, and the car ran faultlessly all day. A fast project in Kutuka terms, and one more car back on the grid. We could do with more projects being like this one!
PART 2
Wiring is advancing fast.
Bespoke interior panels in production. It takes bloody ages, but it's important to get right.
Preliminary layout complete.
David put the labels on wonky to annoy the neat and tidy owner...
Jaguar instrument pod, non-Jaguar instruments. Lexan and vinyl stickers make it look a lot more expensive than it is.
The finished article, getting a test sit. I won't be working for Aston Martin's design team anytime soon, but it's not bad.
The ECU failure required a swift dash here for a replacement. We didn't just steal it though, honestly.
No car leaves here without getting a little touch of our occasionally unusual humour. This only works if you roll it...
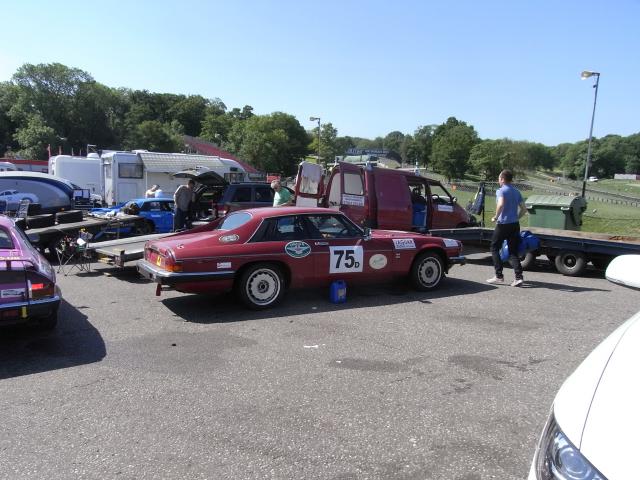
In testing at Brands Hatch with the other loons.
Success, another Jaguar XJS back in action.
And back home again for John to do the hard work, like take arty low-angle photos in an oasis.