KACEY - roadgoing 4 litre facelift.
KACEY 4 – THE REAR VIEW
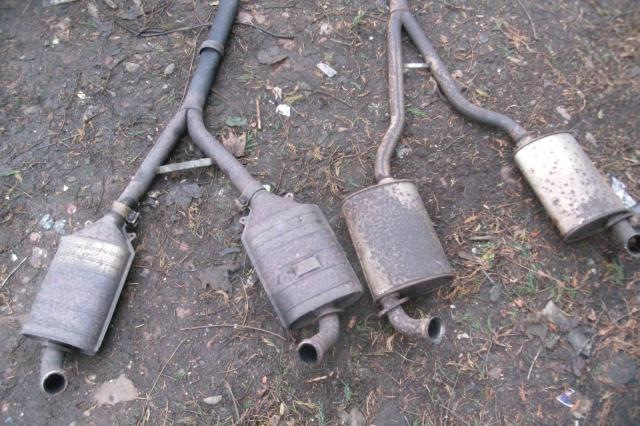
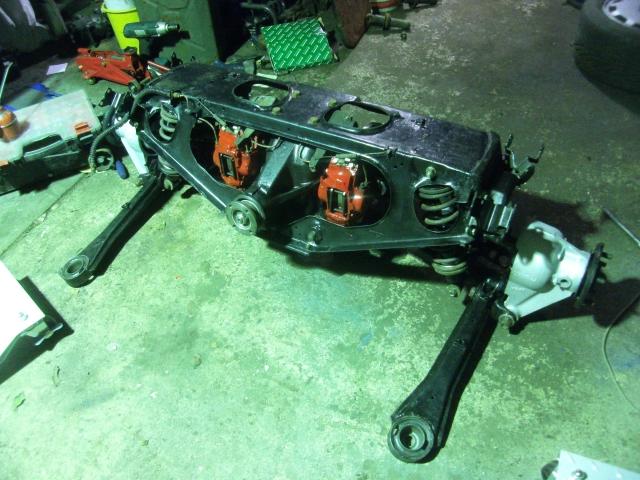
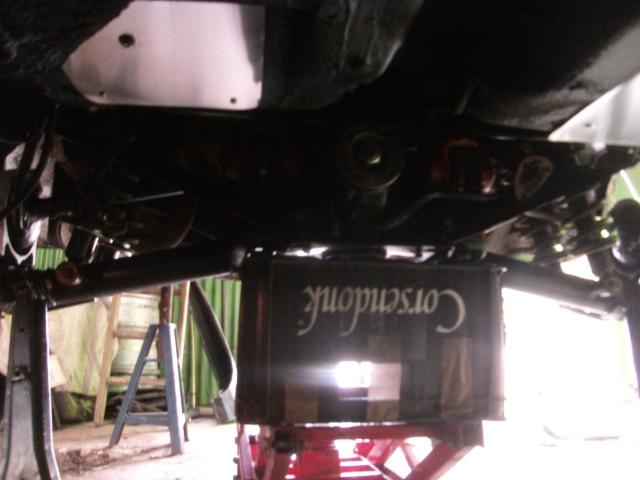
With her rear in the air, out comes the subframe in short order. Inboard brakes make for a slight complication, but not much. Both exhaust silencers tumble out a little too easily, their various attachments corroded away, and partially replaced at some point previously with a bolt and a jubilee clip. Not the first time we’ve seen that repair.
Naturally the radius arms lost their bushes in the process, but at their age who can complain. Actually, nothing rubber back here is in great shape. That’s ok, we like upgrading things.
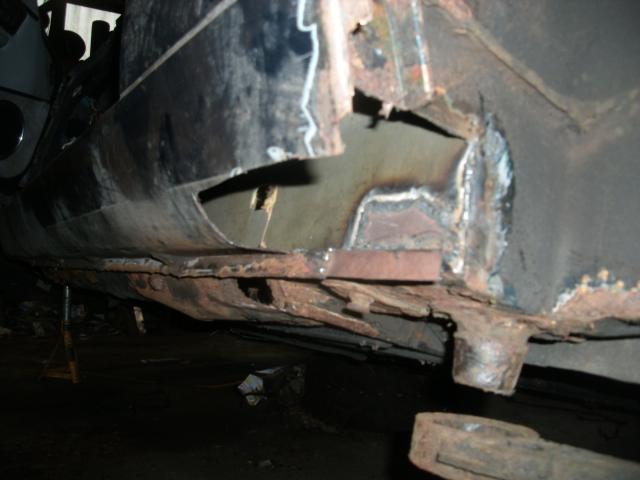
Repairs to the sill were quite swift. The actual jacking point and radius arm attachment were still intact, it was the outer skins that had gone. So we fixed them, as we always do. I could explain how, but you know how by now, we’ve done about ten of these by this point.
So, accept there was welding, putty and paint. There was.
We removed the large asbestos heat shield that goes under here. Breathing mask compulsory. Underseal applied to the now-exposed underside to protect, and seal in any dust. Well, I take my occasional chances with paint, but I don’t want the asbestos complications 30 years down the road thanks.
Aluminium heat shields, spacered off the car to create an air gap, are slipped into place where the central silencers will sit. Probably didn’t need them, but they don’t weigh anything and we know when thrashed an XJS track car will burn the paint off under the back seat, so just in case.
With the subframe out, we tackle the fuel leak, which appears to be due to old pipework. The car never used to smell of fuel, this may be a new issue. Either way, we threw the lines away for all new cunifer and braided flexi pipes. If you’re going to tackle an issue, do it right.
Anti roll bar refitted, new bushes and replated fittings.
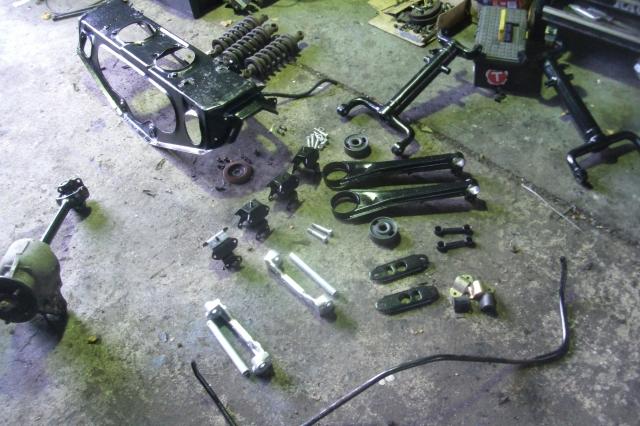
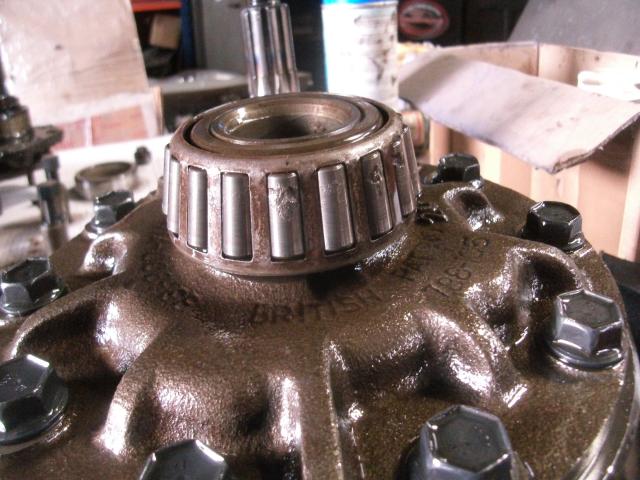
Subframe completely apart, and then Bear attacks the diff, takes that completely apart too. The diff needs work. Pinion seal leaking,bearings are worn, and the powerlock plates show some wear too. At 195000 miles we’ll forgive it. So, Bear does his trick, and reconditions the diff. He has his uses.
Everything is cleaned, scratched, ground, whatever, then painted. Radius arms get poly rear bushes, we had some spare because they’re the same as MGB rear leaf springs, and new metalastic fronts. The brakes had the pistons pulled, cleaned, and appeared to be in decent nick, so were simply rubber greased and replaced. One had clearly been sticking, but was coaxed back to life.
The handbrake pads, naturally, mostly fell apart and were swapped. A clean and paint, for fun, sand the pins so they slide better, chuck it all back together. However, I did make an error. I got the order wrong. How was I to know to fit the brakes to the diff first? We usually play with outboard brakes you know!
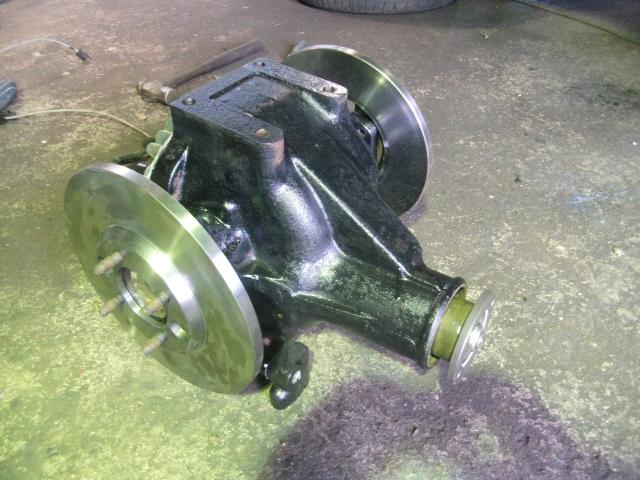
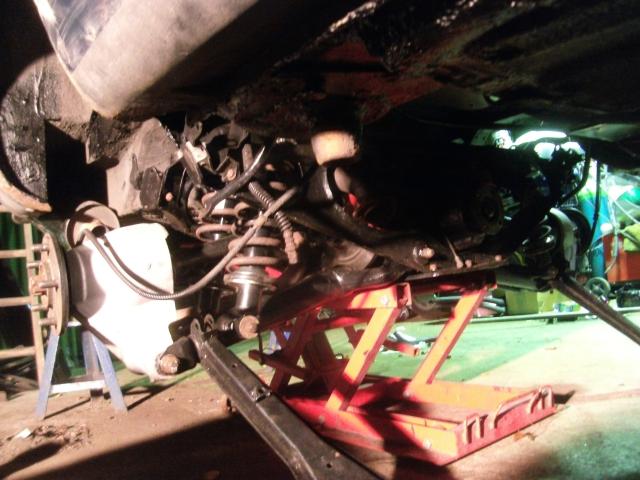
With all the bits thus tarted up, all is reassembled in one laborious Sunday. New discs, and a guess at the shims to achieve a hint of negative camber. We want one degree, because it will get some use. Diff leaped into cage easily, bottom arms less troublesome than usual despite the 32 chances to lose a seal or washer. Driveshafts, hubs, sorted. Fit the brakes, and they don’t. There was swearing, but I could not get the brakes into that subframe in one piece.
The assembly moves in a rather smoother manner than before. Because I’m feeling less stingy than usual, 4 new shocks. Not springs, I’m against renewing springs unless necessary, we have a very wet country and a lot of potholes, soft is good, you can still move at a fair old clip even if it looks like you’re riding a mattress.
Removing handbrake caliper from caliper allows you to assemble it on the job, but it’s still not simple. There is muttering and swear words. Done, plumbed, bottom plate back on, new butterflies, and slide it under the car, and that motorbike jack slips it into place with amazing ease. Reconnecting the handbrake did cost the tip of a glove finger, and that can stay in there forever, frankly. They were my best gloves too.
Radius arm/anti-roll droplinks had poor bushes, one end was replaced, the other was swapped for small spherical bearings with misalignment spacers to allow articulation. Cheaper, amazingly, than trying to get bushes for them, and should not lead to any additional noise.
Reconstruction now continues apace, X300 fans replaced the engine-driven fan and the small supplementary electric fan that is both: 1) rubbish and 2) seized solid. They are too big as they begin life, but by cutting their plastic frame on the diagonal they can be made to fit the XJS radiator very nicely. Two simple alloy brackets hang them off the radiator mounting panel, and there’s another small gain in efficiency made. Like we said earlier, an XJS, only a bit better.
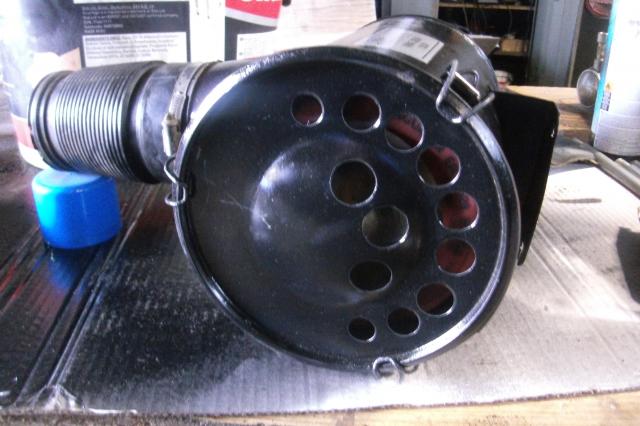
Air filter gains holes in the lid to draw air from that new headlight pod hole. We know from rolling road tests in the past that removing the lid can free up some horsepower in one of these asthmatic donkeys, this is a step towards it.
The exhausts, well both over-axle pipes and rear silencers were close to death, and had shed their mounting tabs. They all reached the scrap pile with enthusiastic velocity, replaced by items that last saw service on my beloved Helen when she was first built. The rest of the system was quite healthy, so was given a scurf and quick spray with high temperature paint, mostly to make it easier to see any holes, cracks or splits thay may be missed when staring at ten feet of rust-brown tube.
Exhaust fitted, a new engine bay heat shield fabricated. The chrome underbonnet shield was corroded and cracked, but an alloy equivalent can be easily made, it won’t stay this shiny and clean but function rather than form is the order of the day.
Brakes bled, pedal feel is good. Probably would be better if we put a pedal on the pedal though, it went in as a bare stalk, and you forget until you apply your foot for the first time.
There is a small amount of wiring to be done to bring the car back to life, like refitting the new ECU in the home occupied by the old ecu, and obviously discovering that it doesn’t fit behind that neatly carpeted metal panel. Why? Well, because though they are the same shape, one has the brackets on the sides, one has them top and bottom. You can’t rotate it through 90 degrees because then it doesn’t fit. *@#! Jaguar, was the unanimous opinion amongst those surveyed.* Modification occurred.
It is, for the record, the first time, ever, that I have had to re-stuff all the wiring and relays back into their original location, ever. Well, when you build a track car, you’d throw most of this away, including the cover plate. It is, for the record, a pain in the arse.
However, with electrical continuity restored, diff, gearbox, coolant and PAS refilled, we have a car that ought to be capable of movement again. The brakes work, the fuel flows without leakage, a small coolant dribble from an errant hose is traced, we’re good to go.
Time for those little finishing touches, like panels, bumpers…
*1 of 1 respondents surveyed agreed.
Ta-da. All it required was a day of hitting things, and a replacement spine.
You can't begin to imagine how much easier this job is with our special rear subframe jack, which is in no way a regular motorbike jack with a bent handle.
We had the car higher than usual, so extra height on the jack came from a Belgian beer crate. This gave us extra man-points.
Facelift on the left, pre-facelift on the right. Spot the difference(s)
Minor modifications to allow more air in. It might help. It might not. It will.
I can't help but feel something might be missing. And this paint match doesn't seem quite right.
The battery cable was slightly re-routed at this point. I could explain why, but then I'd have to kill you.
The inside of the rear arches were, obviously, attended to at this point. Even if you do nothing more than scrape off the old underseal and 20 years of mud, then re-primer the steel, it's worth doing. This needed a little more, but not much, fortunately. Just enough that the paint flakes off the wheelarch lip and will necessitate repainting some of the external bodywork. But then I've got to do the sills anyway, and the percentage of car that doesn't need paint is getting smaller.

Well, isn't that helpful. I'm fairly sure I left the exhaust out here somewhere.
I have a suspicion that this is not correct. Welding occurred.
Again, I'm not an expert in bearings, but I think if it appears you have been gnawing on them, they may be in trouble.
Some work happened, and the diff stopped leaking oil, and became freer. It's like magic.
World's largest Airfix kit. No instructions, paint and glue sold separately. Much of this was probably unnecessary, but whilst you're here....