KATY - PART IV
Always a multi-stage process, this time we’re trying something new. We recently successfully experimented with epoxy primer, and it’s getting a second outing here. The underside of the car takes a silver-ish coat of this plastic paint. It covers in one go, direct to bare metal, and it provides what ought to be a chip-resistant finish. How effective that is we will see as the season progresses, once it’s had its first skate through a gravel trap we’ll know the answer.
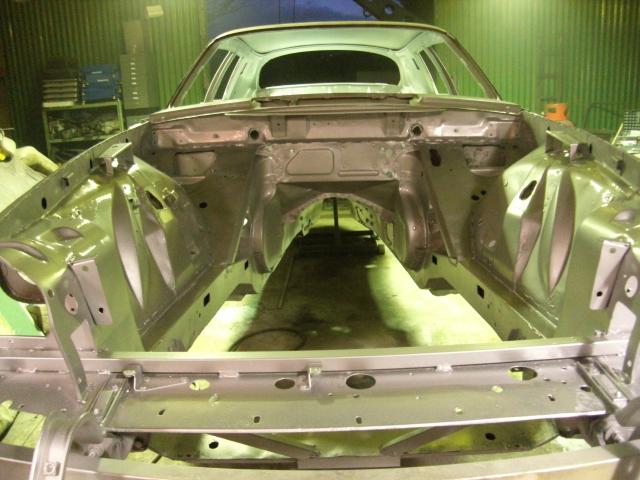
Topside it’s etch primer as usual in the interior, boot, and underbonnet. The boot doesn’t have to be quite as well finished, but we ran out of epoxy as Bear finished the fuel tank’s aperture, because he got obsessed with doing the underside so very thoroughly, so it will be gloss silver all round upstairs.
Etch primer presents very few problems. Covers well, bites in hard, dries fast, and it’s difficult to get it to run in a meaningful way, you can hosepipe this stuff around haphazardly.
Grey primer then follows. Not because it needs it, but because it acts as a barrier between etch and gloss, a lesson we learned the hard way. When painting Christine we went direct to gloss, and watched it simply sink into the etch leaving a dull finish, coat after coat, absorbing double the amount of topcoat that she should have. Well, now we know.
A quick rub of the grey, and a little filler for a couple of the welds we’d like to see disappear, the faffing about takes us a couple of days before an orgy of silver paint. The old car was painted in Mercedes Brilliant Silver. £45 per litre, plus lacquer. The paint place we use offers their own version, called Brilliant Silver, without the Mercedes. It’s £15 per litre. This car is getting the cheap version. It still needs the topcoat of lacquer, but we can see no discernible difference, it covers a little better, and this will make any later repairs, which we hope will be few, far cheaper.
Gloss and topcoat on New Year’s Day. Suddenly, about 7 weeks after we started, there is a car to work on. 8 weeks to go to the trackday deadline.
There is still the shell’s exterior to finish, of course, it must be prepped, but the outside is actually quite straight. It requires the wheelarch repairs to be disguised, then a flat back down before primer.
And the beauty to this approach is that with the innards and unders done, we can start bolting pieces on immediately whilst that is ongoing, there is no need to wait, Bear can get his headlight project underway, fuel lines etc can start to make an appearance. Construction can begin immediately.
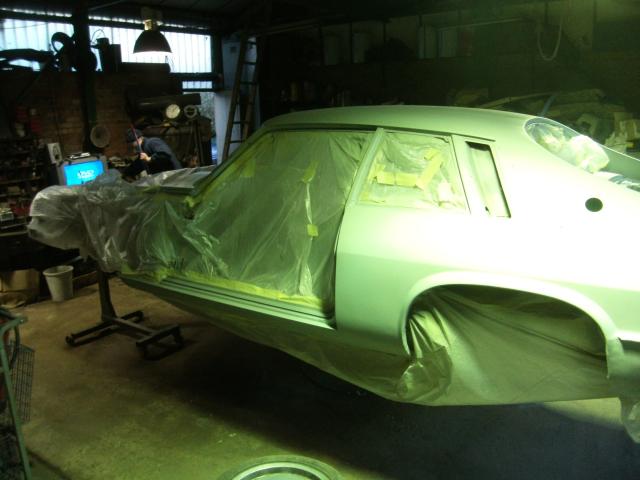
Except that it can’t, because we immediately wrap the whole car in plastic, anything that is finished is masked to prevent filler dust, overspray, water etc making a mess of it before we even start. It’s a lot of masking. A lot.
External prep takes a little longer than projected. The move to add a racing-style filler means deleting the old flap, which is welded to the car, filled flush, and a hole cutter put through it in what we hope is the right spot. It does make for a neat job.
Once the long job of the wheelarches is done, the shell is flatted back, by hand, and primered. Dry sanded to find the dents and hollows, the bit that takes the time really are the rear wings where wing meets bodykit. There was a lot of welding in this area, and it takes a good few evenings to get it straight again.
Once the primer is on, then the fun job of wet sanding a whole car, in January, in an unheated garage. I had a few things to say about the temperature of my fingers. Bear had sensibly caught flu and padlocked himself to the hearth in front of a roaring fire. With hindsight I think I would have preferred to do the same.
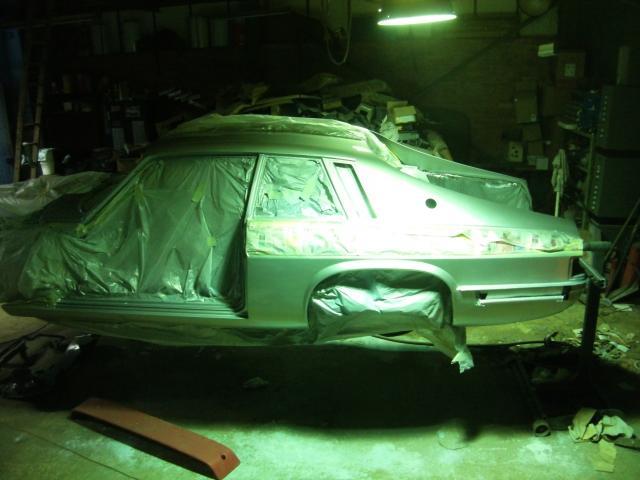
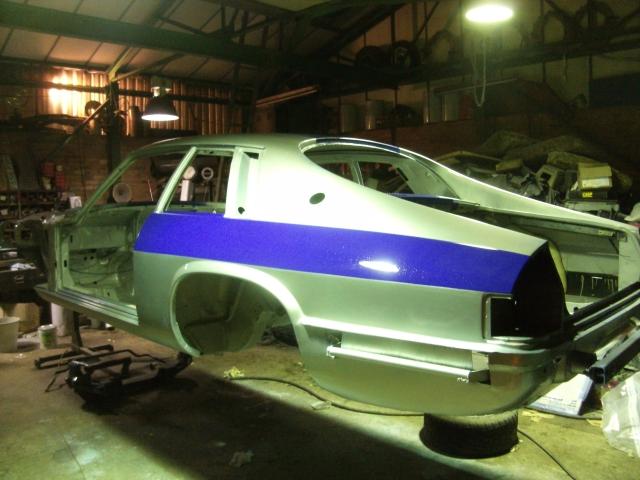
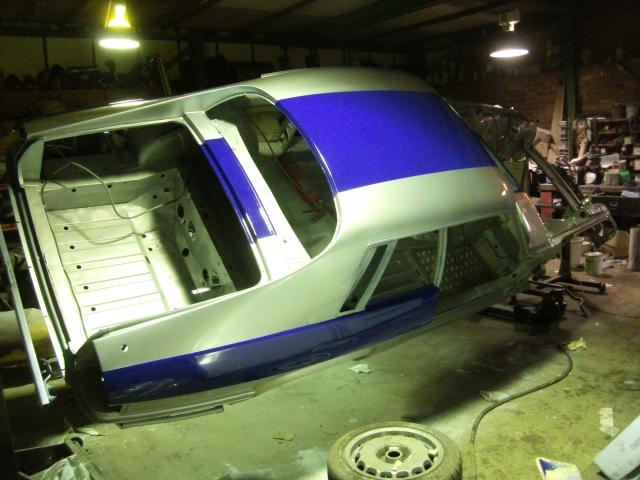
400 grit becomes 1000, and finally time for gloss. As a 2-colour car I masked off the stripes, painted the silver, then reversed the process for the blue. It actually made it easier to paint, especially with the car still on the giant hog-roast. A one-colour car makes the roof, rear wings and door apertures one giant and awkward piece to spray. This car is actually 4 smaller panels masked off from each other, which is far easier.
The blue element to the car is more pronounced than the old scheme, and both colours are a shade darker, the blue is the custom shade I specified for my own car, primarily because it’s simpler to keep all the in-house colours the same. The overall, slightly darker effect, is actually quite pleasing.
That takes care of the body. The panels, as ever, will be done separately, off the car. Getting the join in the blue paint on the panels to line up with the join on the shell, and each other, will be the tricky part.
Unmasked, construction can now commence.
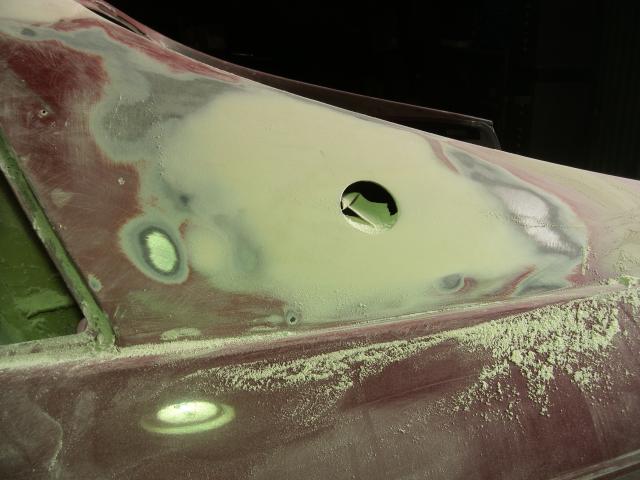

Deletion of the old fuel filler flap, and the subsequent fillering to erase its origins does take some time, but the result is worthwhile.
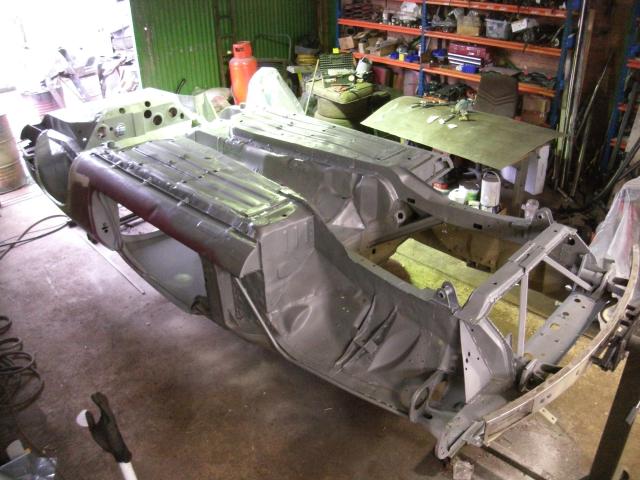
Bear gets busy with the epoxy for the underside.
It doesn't take long to make it look as if we had some sort of a plan all along.
There is an awful lot of work hidden beneath what now looks like a pretty standard car.
That is rather the point.
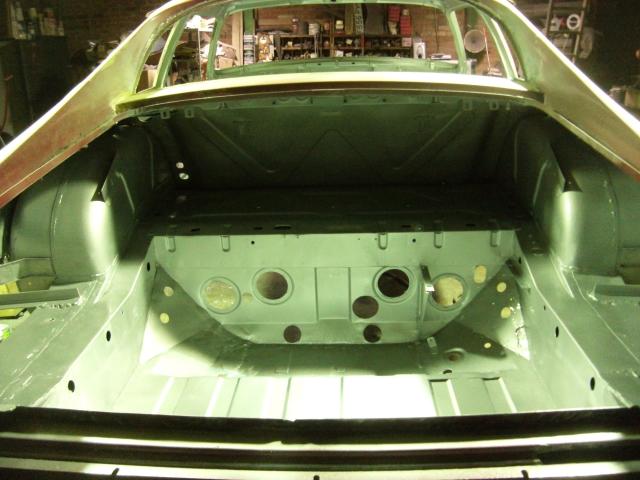
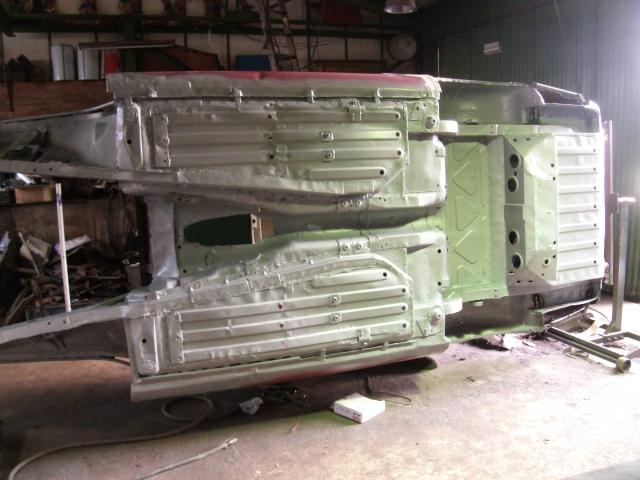
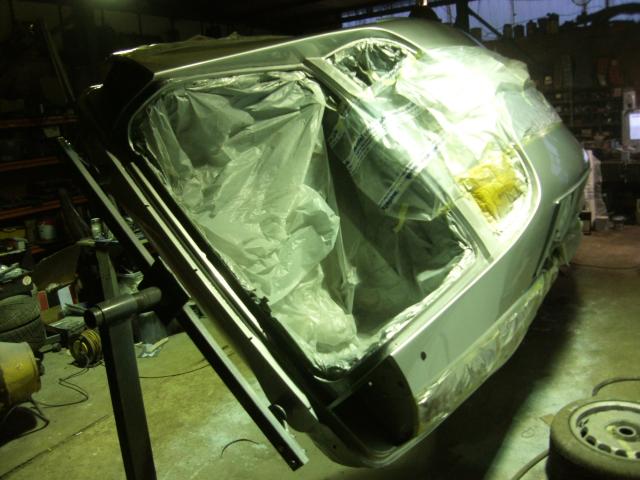
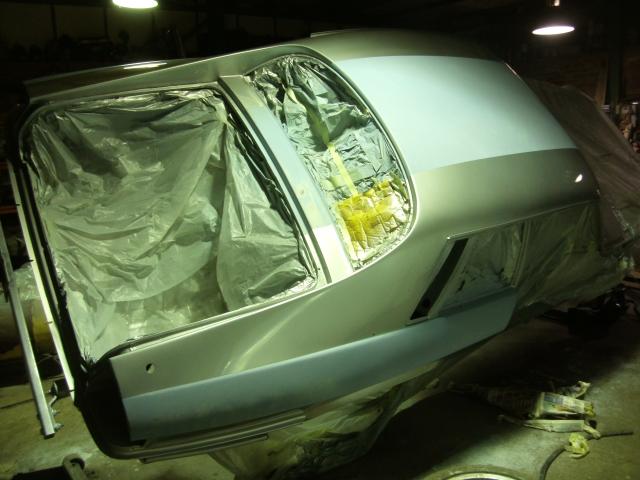
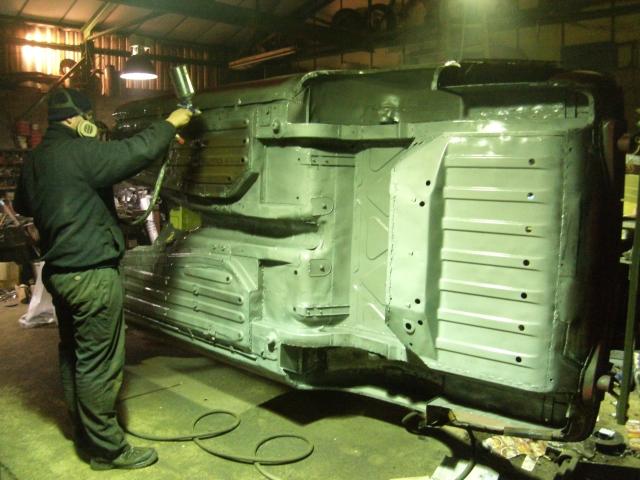
Inverted to assist with painting the interior.
And, well, if I'm honest, simply because I can.
Underbonnet in gloss at last.
Time to start bolting things to it.
Boot also in gloss and ready to accept shiny parts.
The aperture the tank sits in, however, is finished in the more rust-resistant epoxy.
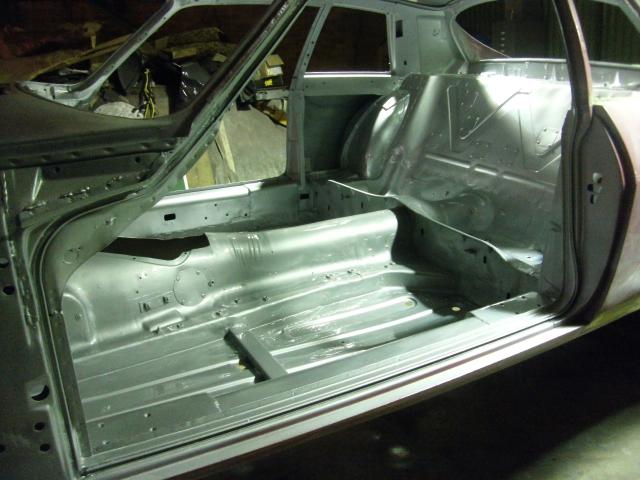
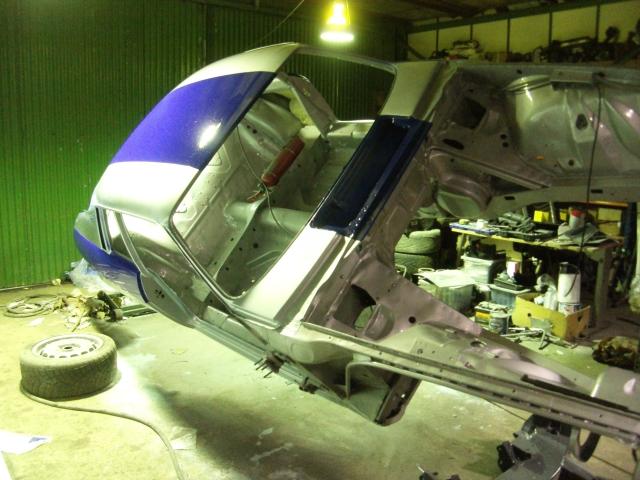
And so to the interior.
All those hours of welding and grinding swiftly covered in a bit of sparkle that make it look as if you did nothing at all.
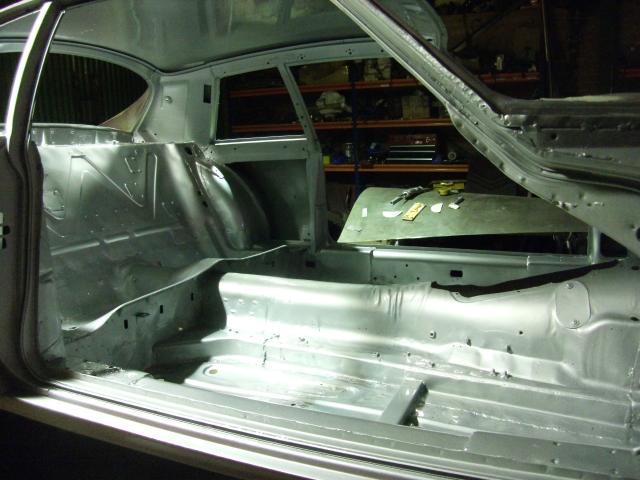
This might look a bit like the other shot, only from the other side.
The reason most shots are at night is because it's winter.
Masked underneath, interior, boot, and bonnet, which takes about 4 miles of plastic.
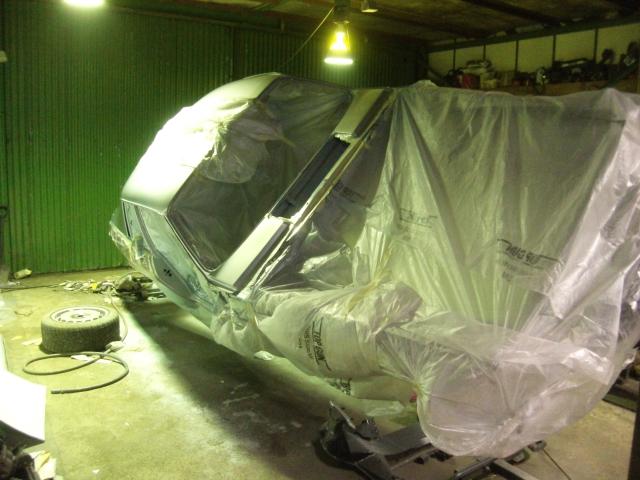
But the exterior has been primered.
Wet sanded and now masked, the blue stripes have also been masked off here. This took longer than it takes to read.
Time for some silver.
Silver and lacquer blown on under cover of night.
Everything looks good under the lights.
Of course half the garage is also now finished in a faintly metallic sheen too.
But most of it stuck to the car.
The stripe is then unmasked again, and when the silver has set enough, that is then masked off for the blue paint. It takes a while.
There are a few minor remedial jobs to do before we chuck parts at it in earnest. There is always something. The fuel filler hole appears to have shrunk and needs easing with a file. A couple of minor runs in the lacquer, tiny as they are, need to be flatted and cut. We may even give the paint a proper cut with a machine, once we've bought one, but it's not a priority right now.
The stripe is then unmasked again, and when the silver has set enough, that is then masked off for the blue paint. It takes a while.
Assembly has already started.
The extinguisher jumped in early, and the wiring has commenced. You don't get much.
Other than the question of what to do with a couple of hundred feet of multi-coloured plastic sheeting, painting now complete. Thank Christ for that, because we reall don't like this bit of the job, we're not great at it and it takes ages. We prefer the bits we can hit with hammers, or weld, or phone Dermott to ask him to make. On the other hand we are much, much cheaper than a bodyshop.
Not bad, if we do say so ourselves.
When I say "us" we have to concede that the Bear hasn't touched the paintwork at all, but it's a team effort.
The rush now is to assemble enough of the car that we can organise a David to come up and do the wiring. The facelift wiring into the older car shouldn't cause any issues, but whether it will present its own obstacle remains to be seen. Probably!
Enough of this frivolity, time to stick some parts on.
I blue myself again.
The car has a name by this stage, Philip weighed in early.
We let him do the heavy lifting on this build, you see.