LISTER XJ40
Part 10 - Hammer time!
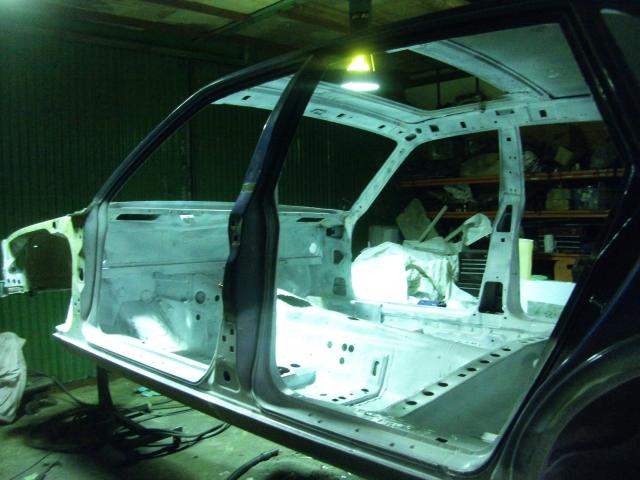
Modifications to this shell are less extensive than to some of the XJS we’ve done. Yes, we’ve moved the boot floor, but there is less of the additional bracing we do to the GT shell.
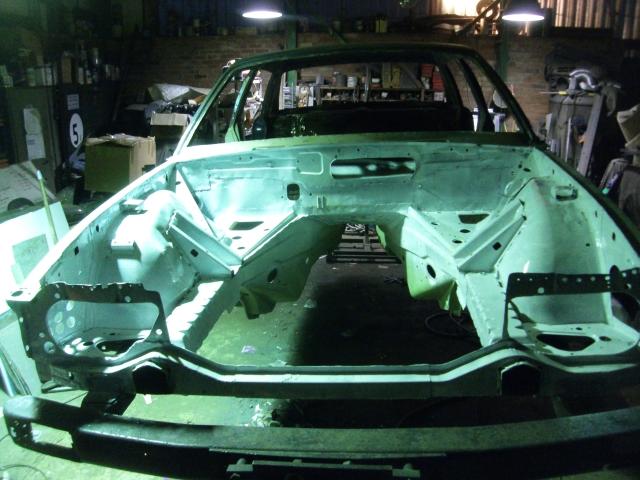
Partly this is because of what we view as a superior design to the front end. The thicker, boxy chassis sits higher, the upper rails are not that far distant, and the damper turrets are well braced from new. The front of the engine bay box is completed by a far superior beam than the XJS’ flimsy panel, so we don’t need to do much to the front end at all, just seam weld it and that ought to suffice.


There was supposed to be a screen pillar here. Anyone seen it?
It's OK, we found it. It just wanted a treatment. This took a little while. Points for naming the TV show.
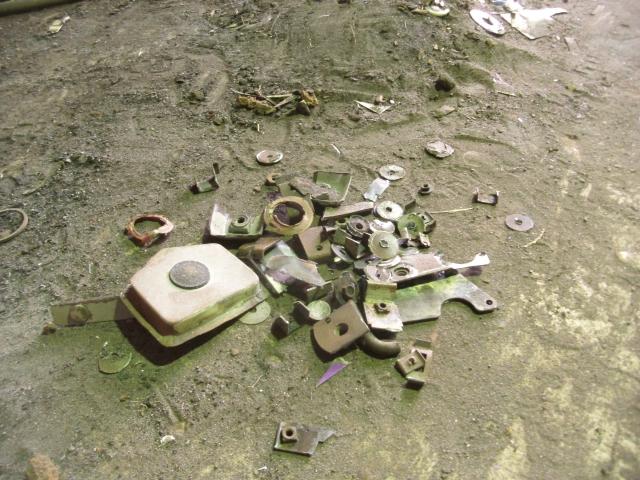
Clockwise from top: Didn't need these bits; cut these bits out; swept this lot up after it fell out of the shell; those bloody annoying trim spikes that are everywhere inside the XJ40. Well, no more!
Grinding time. I hate this bit. Dirty, loud, and painful. But, it's the last of it. Then we can do the sanding.
In primer. Sanding is dirty, cold, sometimes wet, and occasionally painful.
You'd never know that two months ago this was completely buggered.
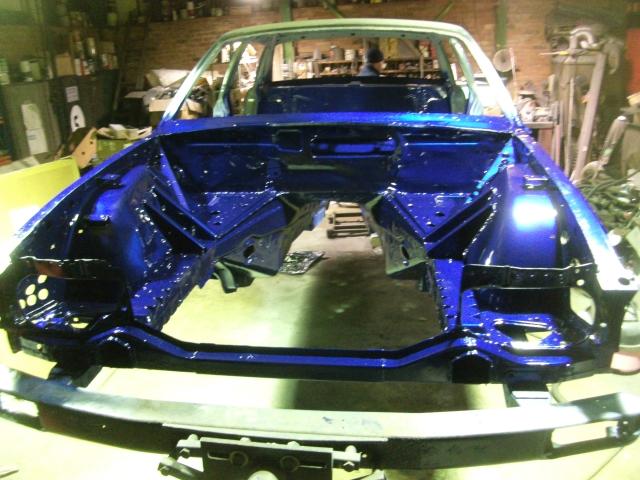
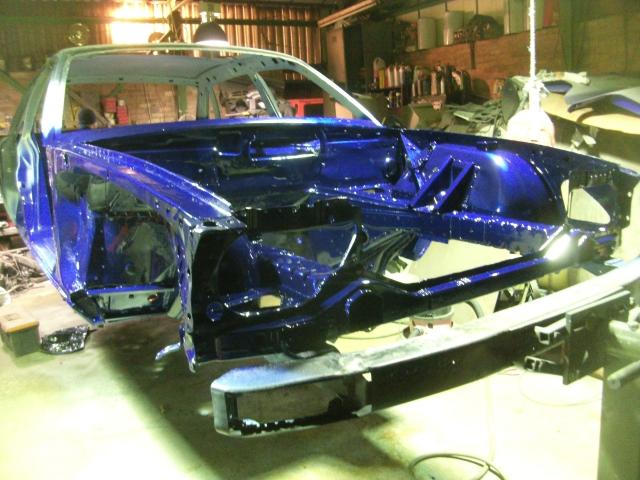
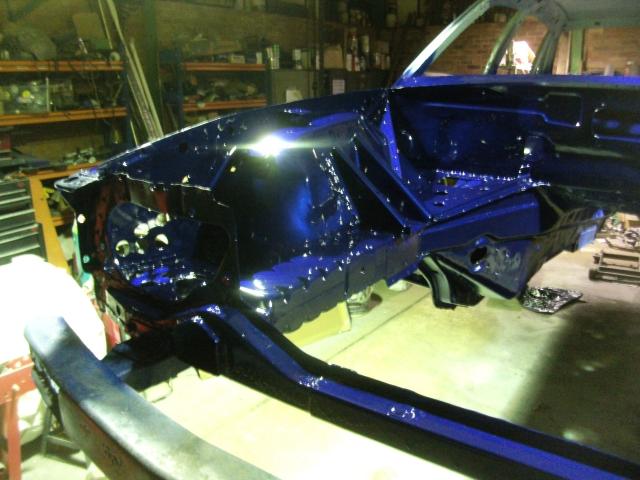
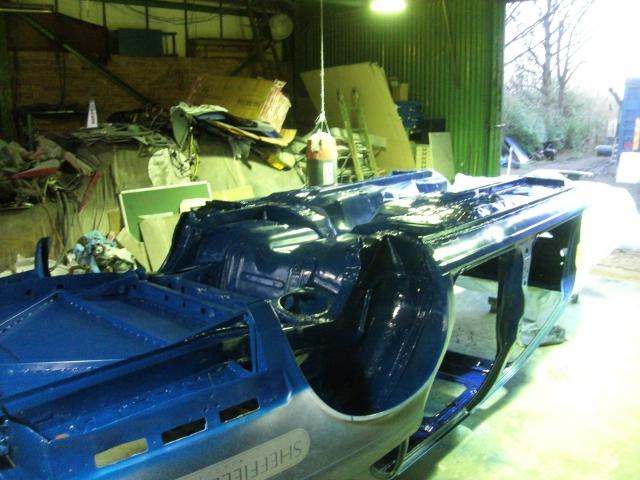
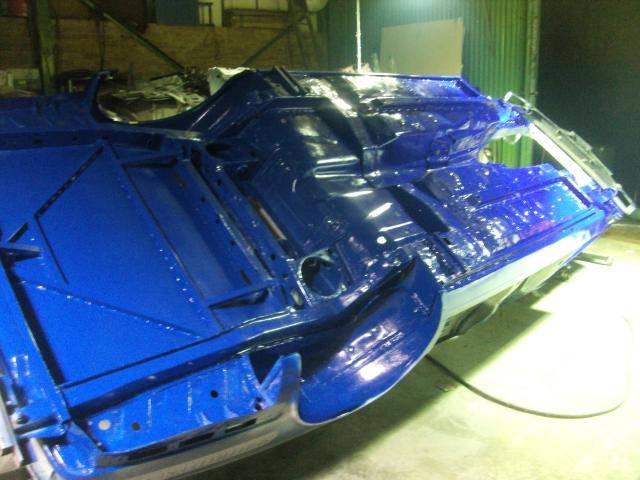
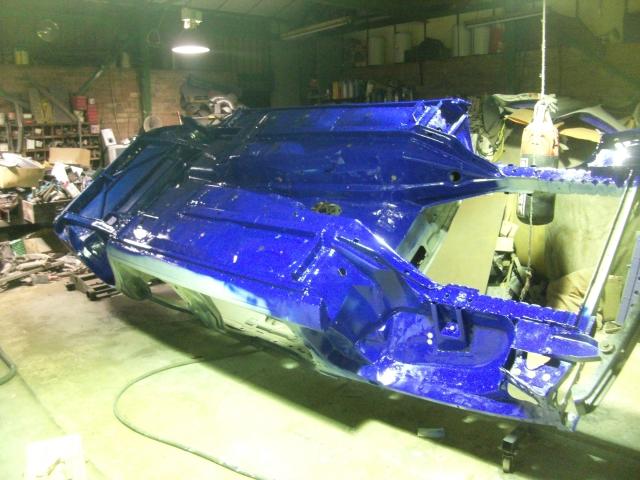
I blue Matt Jeffery.
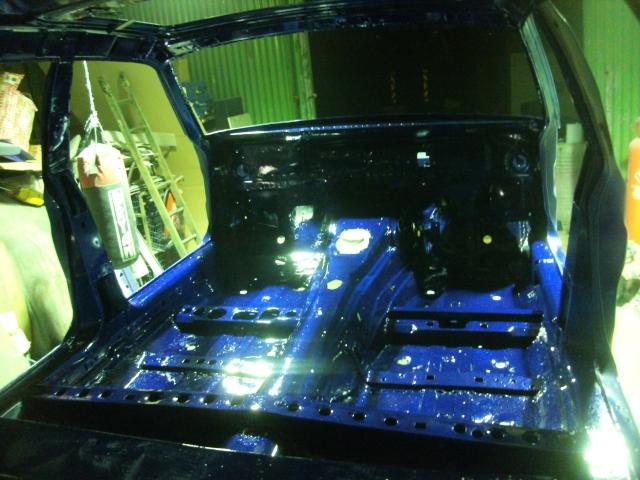
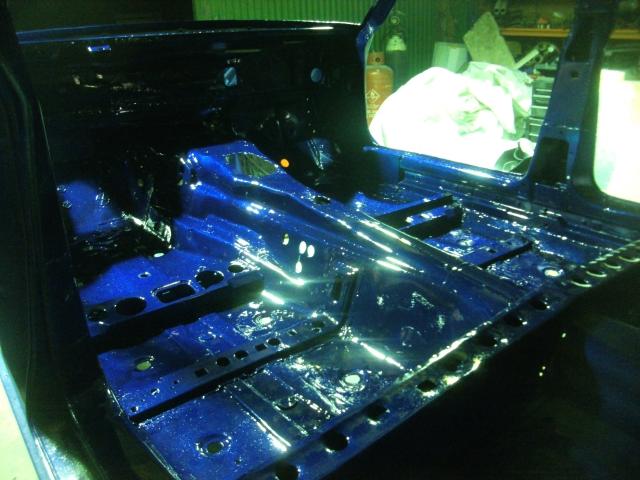
This delightful shade is called Gentian blue. Used underneath and as undercoat, because it's cheap.
But the wheelarches, for example, then get overcoated in Antigua blue, to match the outside.
Shiny, let's be bad guys.
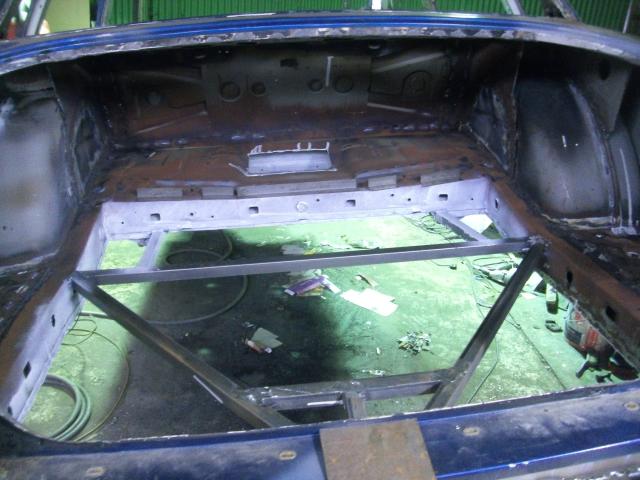
New boot floor construction offers rear impact protection and a place to get hold of the car to tow it with.
The rear end gains Bear’s now-traditional redesign of the boot floor, a box-section A frame and a sheet of steel that mimics the contours of the chassis legs to create a strangely-appealing smoothed cavern that seems much larger than the original car had. Early experiments at welding aluminium with the Mig welder are encouraging, so the tank is to be mounted not in steel, but aluminium. Such fabrication is not at all easy, but I'm prepared to squander part of my life on the attempt.
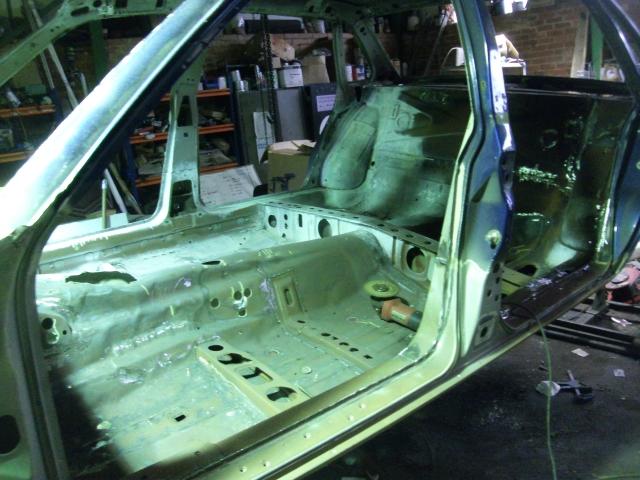
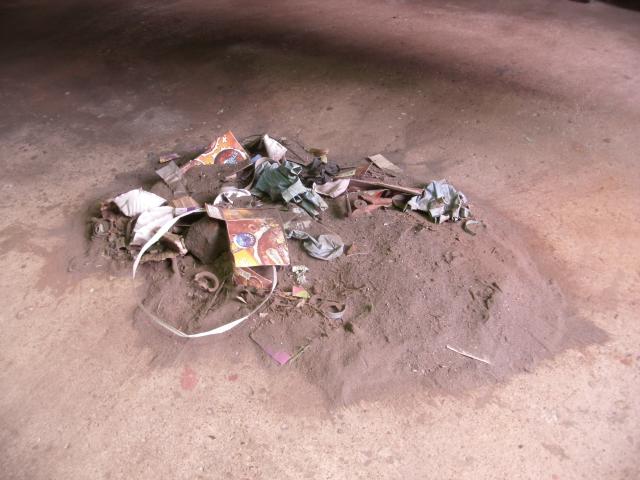
Steel has been trimmed from both ends in the rebuild, but there is a walkaround with a hole cutter to remove a number of captive nuts that serve no purpose, and a number of brackets go missing. Trim clips, rear seat fittings, those bloody captive screws that anchor the carpets, all fall prey to the grinder. There are a lot of those carpet spikes, bloody dozen of them. Every time you think you got the last one, there’s another. But we got them, we got them all. This car was previously race-prepped. It wasn't though, really. The idea is to make this step a big one, and the little details can be important, it is the cumulative effect that you're after, not the individual elements.
With that unpleasantness finished, time to grind it all up. It takes many hours to achieve this. Every weld that is likely to be visible is ground up, and then hit with a finishing disc. I say every weld, you’re bound to miss a few. There is also a degree of deciding whether to flat a weld down to invisibility or leave it proud to explain why this piece of car has a tiny ripple to it. All that welding does deform the panels, you don’t get a perfect flat finish after you’ve cooked something.
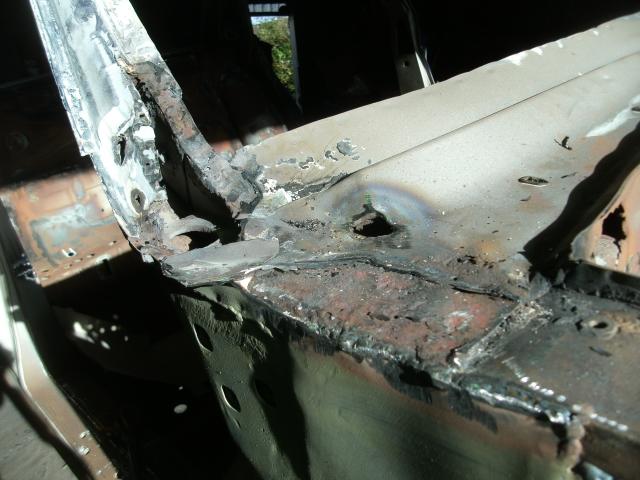
It does leave some panel beating to be done in places, because it’s only after the grinding is complete that we get a proper look at some of the floors, and some of the damage the car has taken over the years becomes clear. Usually seats, and bits of kit like extinguishers etc disguise it all, the cage breaks it up, but this vast empty cavern as we now see it shows every kerb ever to rattle along the underside, and clear evidence of someone having once missed with a trolley jack, and the dimpling of a great deal of repair. Beating some of the grosser imperfections out is a loud business.
The plan was to fit the battery in the rear seat, and a marine battery storage box arrives for adaptation. A dummy install of the exhaust, however, suggests that if we cut the back seat to recess this in, the air gap to the exhaust is such that it could become warm when the car is stationary. Batteries don’t enjoy that. A change of plan therefore moves the installation to the rear floorpan and we will re-site the extinguisher in the back seat. The battery used to be in the boot, but we try to get any weight we can inside the wheelbase.
As the drill churns its last hole, and the grinder’s rasp fades, the car is etch-primed. In fact we etched each section the moment it was finished, taking more care to fill seams and cracks with paint than usual. The problem with bare-metalled cars for the track is you put as little paint on as you can, and then water, any water, gets in, finds a single grain of shot somewhere, and the car bleeds a dribble of rust that doesn’t really sit well against the glossy newness of it all. You can’t rid it of all the shot, you just can’t, and it only takes one single grain to create a brown smear. Easier to try and secure adequate paint coverage instead, so we took more time on that this time.
There was a serious amount of work in that repair. It was a lot more than we thought we were taking on. The result should be a step-change in handling, and it will improve the pilot’s confidence. I would suggest this thing is stronger now, before we put the cage back, than when it came in.
The car is undercoated in Gentian blue, a lighter but cheap shade that retails at only £20 per litre, so that can be used to liberally douse the car with a couple of coats of colour. The compromise is coverage and protection v weight. We’ve tried the “light” route before, and glossed straight over etch primer, but then used huge amounts of gloss to get it to cover properly. The “heavy” option is to use primer grey first, and the gloss then covers properly using less paint, making the heavy option lighter than the light option.
There’s a lot of sanding involved. It’s not fun. It is far more difficult than doing the outside of the car, this is all corners and lumps, fingertip work and awkward angles. Some would argue that wet-sanding the engine bay of a track car is a bit pointless. It is. But it makes it shiny.
We're calling the car Moby. In white, untrimmed, they are truly massive inside.
Some filler is needed, mostly under the bonnet, because the repairs to the inner arches and chassis were from underneath, but you see the underbonnet from above, and it does matter. The firewall and inner arches therefore take a little time, and it has to be done by hand. Finally, after many hours have passed and much swearing has taken place, it’s ready for finishing coats. The one upside to all of this manual sanding is that at least it’s not cold. How many other people spent January in an unheated garage in a T-shirt? Also, I'm unlikely to suffer from bingo wings in the near future.
We would have deleted the original seatbelt anchorage plate were it not for the stupid crossover harness this car has, that demands a long run of the belts behind the seat. A better fitment would include a bar fitting to the cage to mount them to, but the design of the expensive belts the boy child purchased has the belts cross over behind the seat, and there simply isn’t enough distance to achieve that here without causing a rather dramatic angle on the belts, which we don’t approve of.
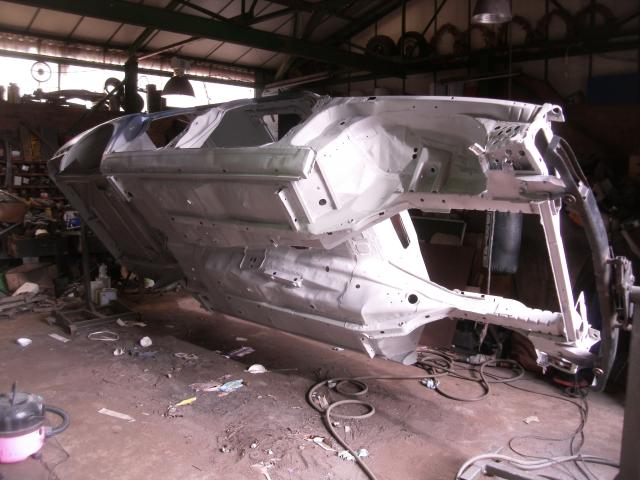
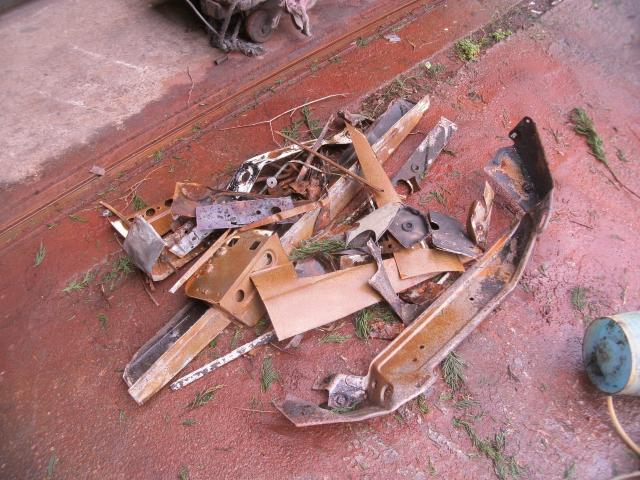
In fact the big change at the front is to make the car weaker, because we cut out the panel that houses the bonnet hinges and grills. A couple of angle grinder cuts, a few drilled spot welds, and it came away like we intended this all along, leaving the flimsy headlight pods behind. The idea is that with the swift removal of a couple of bolts we can remove this panel, complete with grille, headlight trims, radiator and fan, take the whole lump out in one. The slightly relocated oil cooler can then come out with the engine, and it all slides out of the car more easily because we have a big hole in the front end. We’re hoping that making it easier means we’ll never have to.
The general sizzle of the welder is ever-present as the various seams give in to the patient stitching of Mr Mig. 300 feet of seam welding, I jokingly predicted, but actually I don’t think that’s far off. There is over 100 feet just in the floorpan, once you get into it. But eventually, after the many burns have begun to throb and the tame welder has eased himself into the last monkey bath* that too is complete. *monkey bath – one so hot that the would-be bather upon entry makes a noise like a screaming chimp. Made worse if one has wounds, particularly those caused by heat, for example, say, welding spatter.
Until you’ve lurked beneath a shell holding the steel plate or hammer whilst a Bear beats the other side of a floorpan with a big hammer you have no concept of noise. We have a large and heavy hide hammer that says Thor on it, and we enjoy wielding that, but it’s no quieter than a steel hammer. Some dents can be erased in paint prep, but there is little sense doing that if it costs a couple of kilos in filler, and it can easily do so. To some extent you just have to accept that the interior of a racing car might suggest that it’s a racing car.
Finally, after a month of intensive work, we have a repaired, seam-welded body that is as light as it is going to get. I happen to think we could take it further, with more time, but we’re out of time. Little things like door mounting plates could all be removed, trimmed and refitted. If you wanted to go mad you’d weld the rear doors shut and lose more metal, but not this car, not this time.
That said, a track car wants a reworking every three or four years anyway, and we have gone to some trouble to try and get rid of any residual shot, but it continues to pour from the sills and roof on every rotation of the shell. The airline is inserted into the various cavities and used to create a grey snowglobe that will later make the monkey bath somewhat gritty. It's very glamourous this racing lark. All champagne and parties.
Paint is thrown. Etch, then high build primer. Sanding is mostly done by way of coarse grit paper to try and scour any spatter and painted-in grit from out of various corners. The grit is the major downside to the blasting. After Matt’s first run in this car it will need hoovering out, it’s only that final shake of track abuse that gets it out. When we first ran my own car my poor passenger on that trackday was subjected to her own sandblasting as Cadwell shook it loose from innumerable crevices, and this will be the same.
With that in mind, the moment the paint dries, we start throwing components at it. It’s spanner time.
Once glossed in the cheap blue, the expensive £50 per litre Antigua blue can be used to paint the areas of car that demand the proper colour, engine bay, boot, interior, wheelarches. It covers well over a solid blue, meaning we use far less and therefore save a bundle of cash. Lacquer, stand back and admire.
Then rectify the roof, which was clearly still tacky when we rotated the car and is now full of shot that couldn’t possibly still be there. Swear a lot, and re-do.
It looks alright. Very different to the scuffed brush-painted black it used to be. Not a pristine, perfect finish inside, it’s the right colour and it looks the part, but that’s all it needs. The place you’re going to put your feet doesn’t have to be as glassy as the outside. It will give Andrew Jeffery something new to clean though, so that’s a bonus.
It never used to look like this in here.
Hopefully the fittings will break this up a bit, because it's very blue.
The repairs have all but disappeared, the inner wing and firewall fixes are not too obvious.
The cage reinstallation will, I suspect, be something above and beyond our usual fitment, I think we can go mad with it. There are deficiencies in the original design that can be improved upon, and we can tie this thing to the car in many places. It will add weight, but it’s weight that is worth carrying. But we don’t do any of that just yet. Strange as it may seem, we will now assemble the car, and the cage will not go in until very late in the build.