LISTER XJ40
Part 11 - Spanner time!
When the shell was away, we had some time to kill. We modified a lot of the little pieces, to absorb some of it. We drilled holes in everything. Everything. I’d put holes in the tyres if we could keep the air in. This is that process whereby every component is looked at, and either discarded, remade in an alternate material, or lightened. Mostly it’s the latter, the bench drawers swiftly fill up with swarf as we blunt all the drills and sheer all the teeth off the hole saws.

An so it begins. You can bolt a lot of bits on very quickly. It's modification that takes time.
A man made entirely out of wool dances with a brake hose.
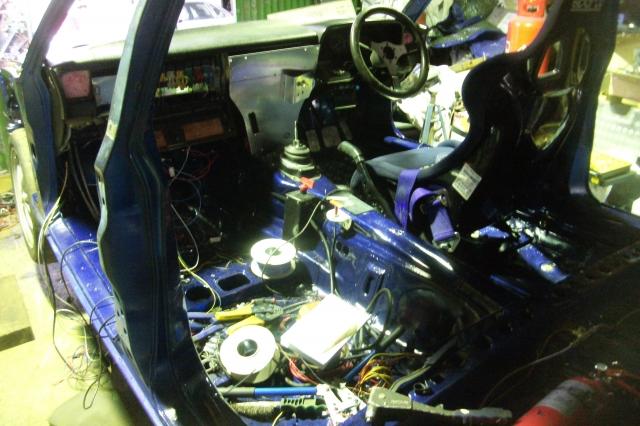
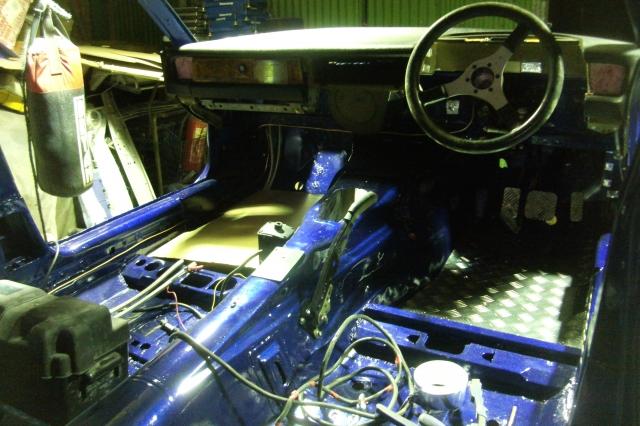
Dash, column, kill switch - these bits had to jump in fast, because they have to be in place when the wiring wizard arrives.
Controlled descent was easier than you'd think. I haven't done the maths, but it felt lighter than it should have.
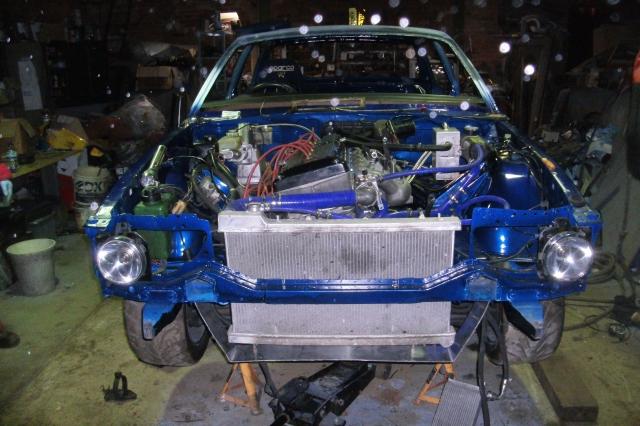
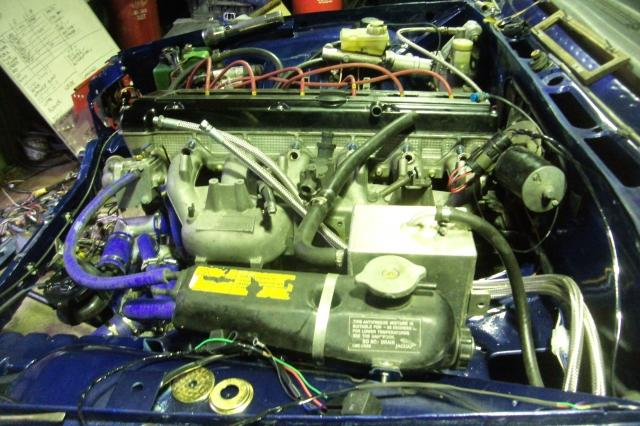
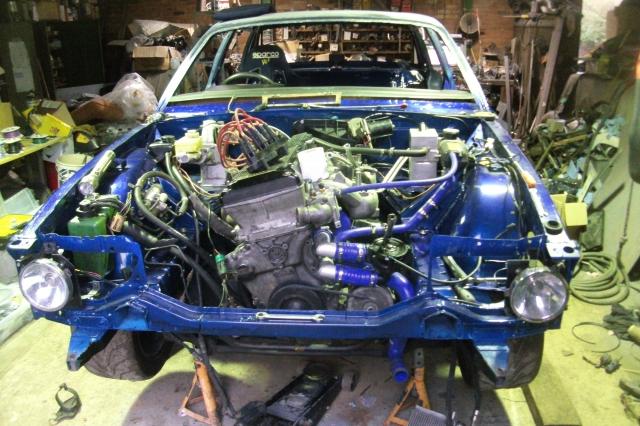
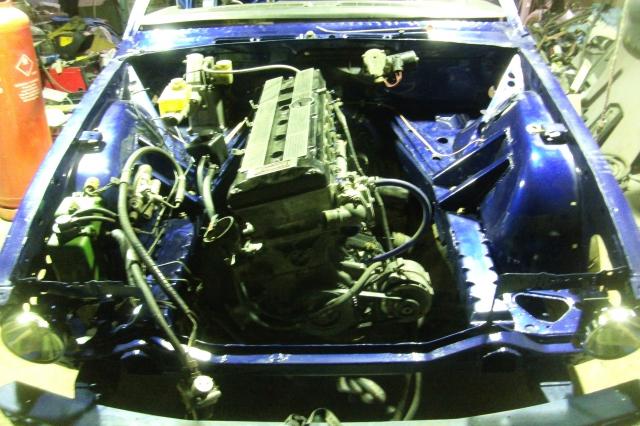
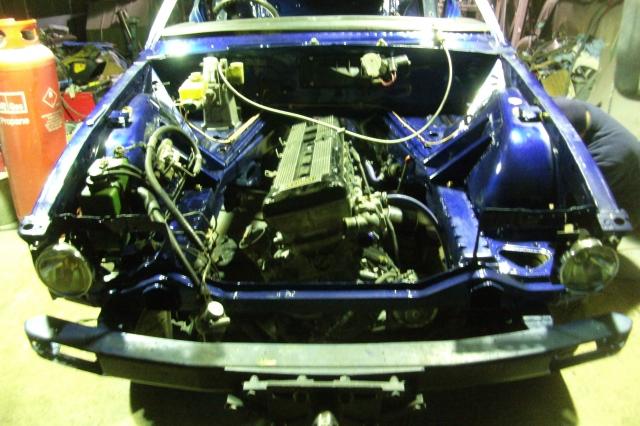
There you go, one engine. And suspension. Brakes. Gearbox. The little things...
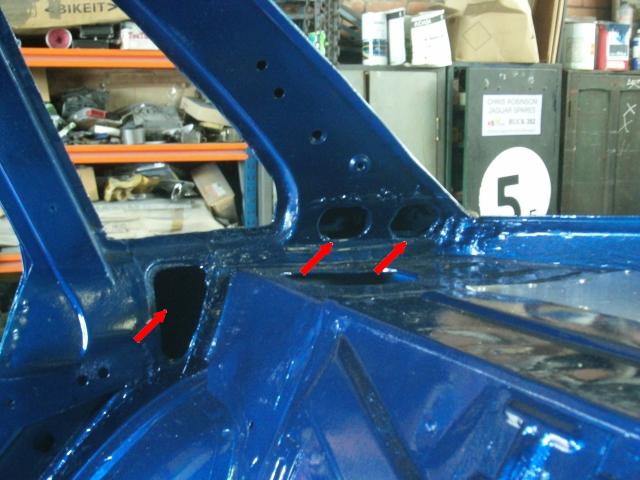
We identified that these holes go through into the boot. XJ40s do not have a proper rear firewall, you have to seal it.
Some of these components are going where they came from. They are the easy bit. The others, not so much.
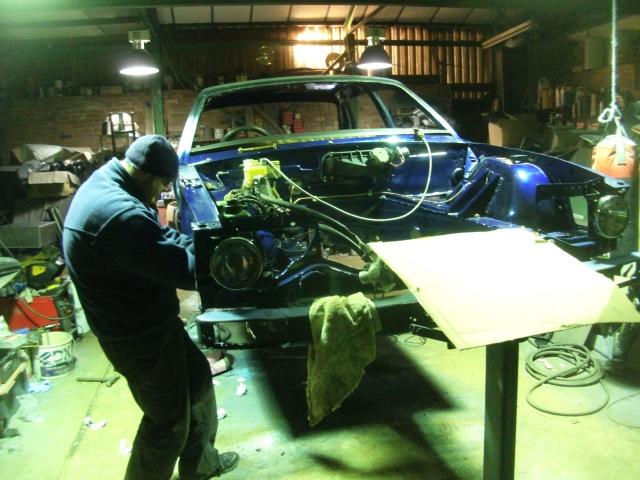
A week of graft, and that's looking a lot like a car again. We almost dare let the owner visit.
David must be here, that looks like wire to me.
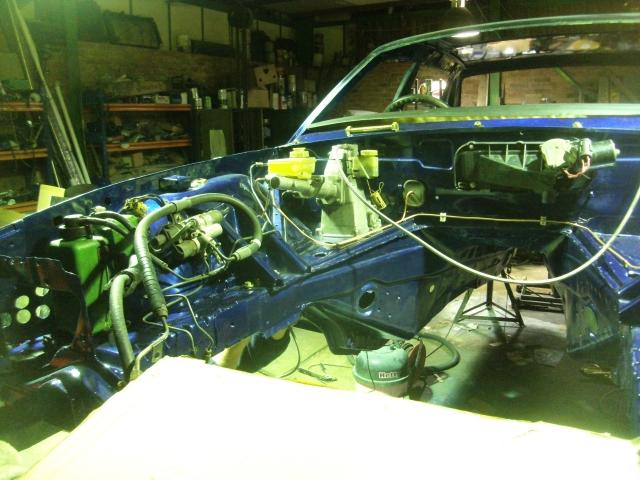
Early fit of the new aluminium radiator mount. Like the old one, but not bent, rotten, or steel.
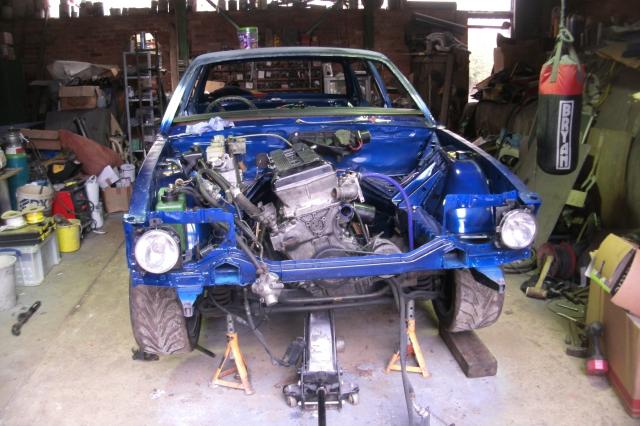
The cheat's method of engine installation. All you need is a casual disregard for the Manual Handling Regulations
The handbrake is actually going back on. That too is more religious than before. Holy. The headlights are modified, both had smashed lenses, so clearly lexan substitutes are required, after a swift test to make sure that the unbreakable lens can stand the heat. It can, as it happens. A by-product of this change is no need to tape the glass any longer. It’s also a hint lighter. Pun not intended.
Dashboard, on the bench, gets a few nips and tucks. A peek at this thing, and the welder rolls out of its corner. A few little welds to the steel frame, and you can then take all the bolts out, and the captive nuts that go with them. Small welds weigh less than bolts. It doesn’t need all that steel frame in there either. The pile of bits that gather around your feet as you work on this stuff is gathered and weighed. The dash vents are gone, not needed, nor are the many flaps, levers, valves etc in there, the car has no need to direct the air any longer. The air distribution system on the XJ40 is the dashboard itself. Having thrown away the heater, fans, and vents, the concept is to have a single blower straight into that main, fibreboard plenum to blow out of the screen vents. And that’s all. Air distribution now means on or off.
Tape next, that shiny aluminium stuff to seal some of the small holes that have appeared with the removal of many brackets, in a vain attempt to waterproof the car. We only use this tape because it is so very sticky, it resists water, and even some oil, far better than say duct tape. You don’t get rubber grommets small enough for some of this, it has to be tape. Very small holes can be sealed with a rivet.
The redundant air intakes to the cabin are closed off with aluminium plates, rivets, and then taped over. There is no requirement for engine bay air to be piped into the cockpit, so we have deleted that completely.
We have sufficient items fitted in this first, fast, week that we are already into some of the smaller details like where the extinguisher pipes will run, and where the switches are now to go. And that means it’s time to fire up the giant arc light with the Dangermouse logo into the night sky, to signal a David to come and wire the car.
He was last here to help remove the loom, and has been doing that strange wizardry he does, hundreds of miles away in a warm shed, where he was safe from the insanity and brimstone of the shell repair. Admittedly his shed is far more likely to end up under flood water than our hilltop eyrie. He brings news of fundamental errors in the old engine wiring, and an ECU installation that was wrong from inception. He also brings a bespoke engine loom, and a shiny coil pack to replace the dizzy. It all looks a bit complicated to our eyes, but our eyes are full of rust and bits of girder. Let wiring commence.
It looks like we've been working really hard. We were, but at the other end of the car...
Adding some weight to the car like this means that as we now jack the car into position, hovering high on axle stands (6 of them, plus 2 jacks) we get an idea of whether we made progress with shell rigidity. That a single jack can now lift three wheels, without the cage being fitted yet, suggests so. There ought to be a step change in speed from that alone.
The fuel tank has been casually thrown in the boot, and the task of creating and welding an alloy frame has begun. Alloy welding with the mig is not as easy as it should be, but two pieces can be joined together in a manner which survives the Bullworker test – grab the finished item and attempt to pull it apart like you’re using one of those 1980s chest expander devices. One helpful tip. Let the alloy cool first.
Steering column leaps in. It takes time to work out where the hell it was meant to go, because it is not intuitive. Why the bottom bracket hangs off the pedal box I cannot explain. Next in are the braided fuel lines, bespoke to the car with bulkhead fittings, and to the higher aerospace specification, rather than automotive, to ensure we’re not caught with the cheaper crap that can be palmed off on the unwary. The holes for these were drilled before we painted, as if we planned it.
Bear remakes the brake lines in cunifer, routing them inside the car. New braided hoses to the rear finally give the car a full set of proper pipes. Pedal feel ought to improve. Clipped up, and the wiper motor fitted, we’re ready for the engine.
Some of it is obvious. A bespoke wiring job means we can discard the indicator and wiring stalks, replace them with simple switches. A kilo thrown out there alone. The massive bracket that holds the steering column can be liberally perforated without consequence. It takes an entire episode of generic American comedy to do so. A swift paintjob transforms the assembly into something which looks like we meant it.
Shorn of the switchgear and shroud, it is far more purposeful. And lighter. We trial-fitted Matt in a slightly modified seating position before the car went, leaning him back a little more and getting the wheel away from the dashboard, his previous position was most odd, bolt upright and knuckles grazing the instruments. You expect even a saloon car to adopt about a 20 degree lean on the seat.
It takes some time, but once stripped out, and a blower attached with some alloy plates and judicious foil taping of anywhere air might otherwise escape, all that is left is to blank off the old ventilation exits with expanding foam. A couple of kilos of clutter on the floor attest to further weight saving.
As the paint sets, the very first thing fitted were the two headlights. Fitted to the car with aluminium nuts and washers to prove our intent.
Working up to bigger things, the pedal box is next, complete with rebuilt cylinders and braided clutch pipe. The brake pipes are to be remade from scratch, the car never had a full braided and cunifer system before, but we’re not messing about this time, a proper build gets proper parts. Throttle, the bracket suitably lightened, jumps in. Every component was looked at whilst the shell was away, to see if it could be made less without sacrificing its strength. Some gains were minor, the throttle shed only half a pound, but it’s weight we didn’t need, and it adds up if you do that twenty times.
The body is therefore lowered onto the subframe, newly-plated bolts and plates spin on, and in the space of under an hour the car gains engine, gearbox, front suspension and brakes. Definitely cheating, but this stuff was all looked at whilst the car was away, we front-loaded much of this prep to make this assembly job faster.
Another hour sees the rear subframe climb back in, it took longer to find the bolts and clean the threads in the shell than to fit the thing. The solid alloy mounts make this harder to line up, but patience rewards those who use it.
The brackets those headlight hang off have been previously modified too, but I only did it crudely last time. This time, with time and a critical eye, I can cut more of the metal away. I could go further still and perforate them to nothing, but there does come a point at which the time v reward balance stops making sense. It’s the difference between a modified component and a “full-race” component, a few grammes in weight but a fortune in cost.
We’re cheating here. The car is still on the rotisserie. The absence of major components make it light enough that we can lift an end of the shell by hand to get it up on stands, remove the spit, and then wheel the entire front subframe, still with engine atop it, back under the shell. With muscle power, and aided by the stiffness of the shell, one man can then lower the shell whilst the other runs about progressively lowering axle stands. The choice of who gets to lift and who gets to play with the stands would surprise you, but the larger one of us has a glass spine that has to be spared from such trauma.
NEXT TIME - Part 12, sparks of life.

David McGivern, in his usual attire.