LISTER XJ40
There is work to be done even whilst a David is wiring. There is a fuel system to construct, oil cooler and radiator to mount, a multitude of pieces to design and make, so whilst it’s tempting to put your feet up and watch him do all the tricky stuff, it’s back under the car.
Handbrake and propshaft refitted undercar. No changes to either, but it was a real pain in the neck, and arse, getting the propshaft crossmember on again. I blame the cold concrete floor.


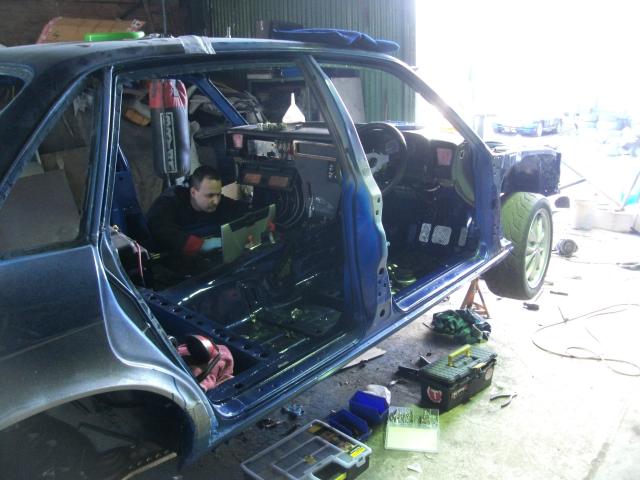
The chaos of wiring is something only David understands.
He swears he's not on Facebook.
Well now, isn't that looking neater? For the record I don't know what we'd used the big adjustable on.
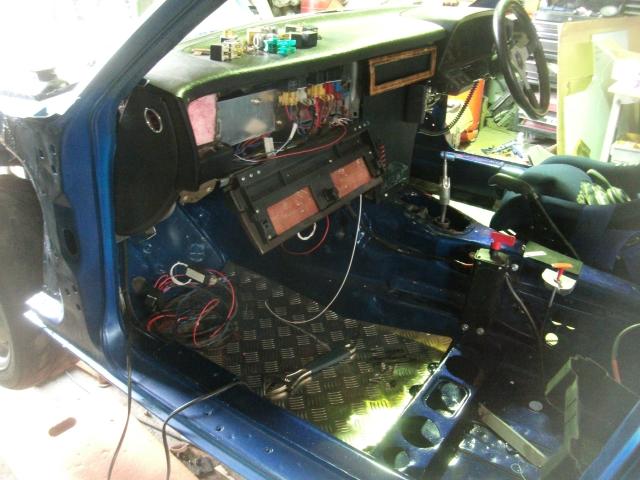
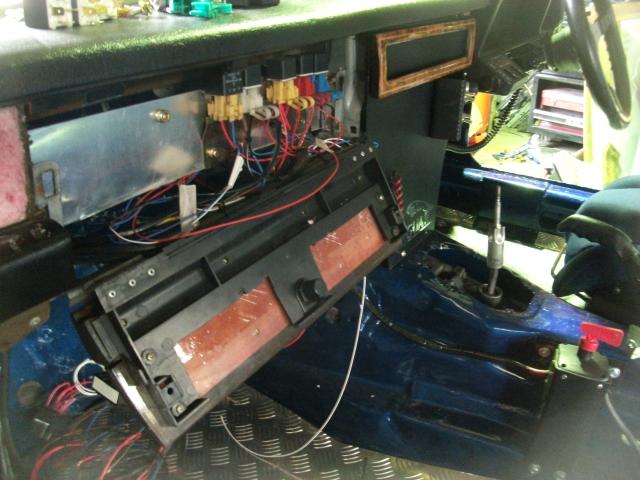
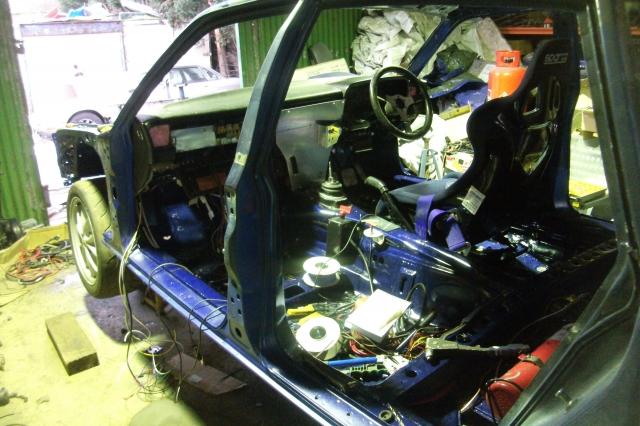
New centre console and switch panel. Might have to label this.
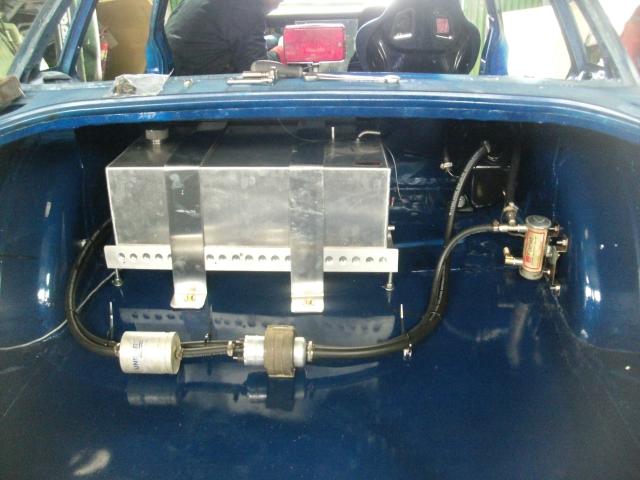
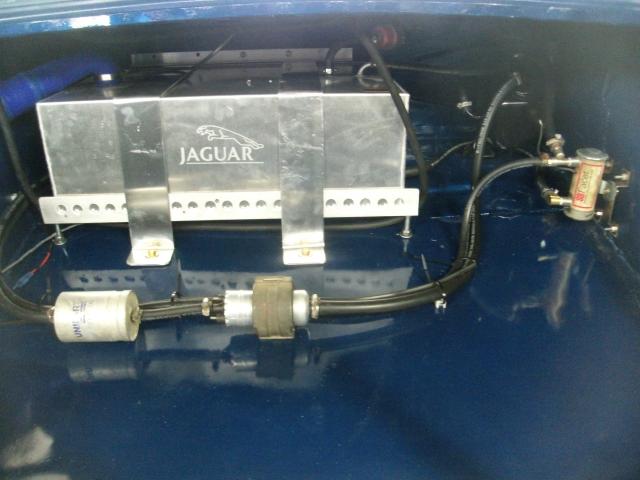
Fuel tank fitted, pipework complete. Facet pump replaces gravity.
Finished fuel tank installation with XJS swirl pot and pump.
A lot of time goes into creating as little wiring as possible. And to making it all disappear behind the glovebox lid.
Exhaust manifold jumps on, because we need to know where a number of components, including the new coil pack, is to go. In turn that means some of the underbonnet furniture needs to be fitted, so power steering reservoir and all that irritating hydraulic brake assistance stuff wants to climb back into place. It would be simpler to upgrade the car to later technology, but the car came fitted with the early equipment, and the owner wants to keep it. To some degree you have to say that if it’s not broken…
The tank is a bespoke 45 litre item to our specification, yet still surprisingly cheap. It has gained a fabricated aluminium cradle, which took forever. Alloy welding with the mig is not easy. I got better at it, but it’s not something I’d set about doing with carefree abandon every day. The frame has to hold the tank level on a floor that slopes in two directions, and then hold it down. It also has to be removable from the tank, it must not make any change to the car that prevents an original tank going back in, must not interfere with fuel lines, and it has to be light. It took a week to design and build, not least because I melted it into a puddle twice. In terms of time and material, this cradle cost about £1000. In steel I could have done it in an evening, and it would have only been a kilo or so heavier. Sometimes on these projects I indulge myself.
With that done, the fuel system can go in. XJS swirl pot, modified in our usual way. Facet pump does the job that gravity used to, an XJS fuel pump and filter takes care of the heavy lifting. It’s the setup that both Nessie and Christine use, we know it works to at least 350bhp. The hose runs can then be completed. From bulkhead to engine are bespoke braided items. In the boot we use standard fuel hose. To keep the filler in the same location, fuel resistant silicone hose makes up a short run that only just fits. A bit of fabrication to hold it in place, and the installation is complete.
We have established where we want the battery to go. The box it is to sit in is enormous, the installation looks rather ungainly, but it works. Again, a frame for the box to sit in and to be attached to, but the battery itself also needs holding in, and then the two frames to introduced to each other without compromising the integrity of the box. The box’s job is merely to substantially impede acid splash in a crash. It doesn’t have to be sealed tight, it’s to stop the pilot getting doused in the stuff.
Long term, it may well become obsolete. A small racing battery is probably going to end up on the owner’s shopping list. It’s not on ours, we like to carry a big battery, but if he wants to go after that last 5 kilos we’re betting that happens next time the car needs a battery. To wire the battery up, the David invents a cunning system that results in battery terminals appearing on the outside of the box, no need to open it up again once he’s done here. Little things make a big difference sometimes.
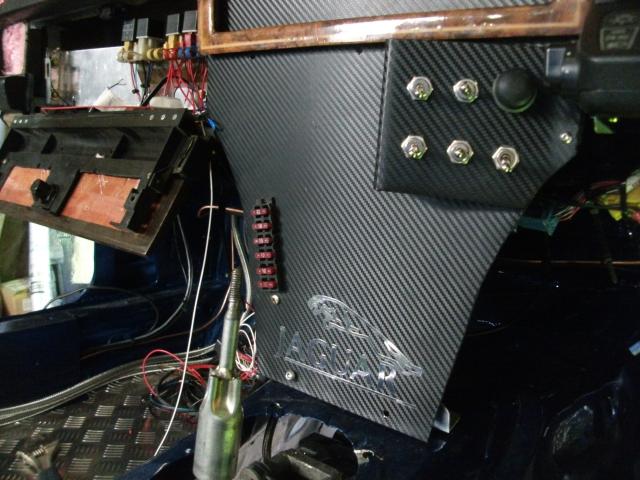
Because he’s wiring, there is a need to lay on a few parts that we’d overlooked, like the new centre switch panel. With the heater gone missing and the dashboard ruthlessly vandalised, a new one is needed. Thin aluminium is good enough, a smothering of fake carbon will follow, but there is nothing structural here, it’s just a place to put switches. Once installed, the boy pilot is summoned to check what he can actually reach. Adjustments are required, the switch panel must be angled towards him, and the extinguisher pull has to be moved. Confession that he sometimes struggled with 1stgear, and a concern about the angle on the steering column are addressed.
The column angle can be adjusted, the factory bits do allow for that if you have spanners handy, so it is adjusted to the shallowest angle possible. The wheel is also spaced slightly, and because he does things like this, Officer David mounts the starter button and shift light to the wheel whilst he’s at it. It all takes time, but it’s a very neat result.
A small angled panel is made for the switches to bring them within fingertip reach again. The panel also gains the fusebox. It had to go somewhere, and ease of access is important. A quick wave from the vinyl fairy makes it look like it was all intended. The relays all hide on a large aluminium shelf in the glovebox,which has itself, of course, been lightened. The mess of wiring that has gone from behind the dash is astonishing. There is room to put things like the ECU now.
The wiring disappears in this vast cave. We’ve got used to this by now, but it still makes us chuckle. A few strands of wire replace bulky snakes of the stuff. Bear has finished laying brake and fuel lines, and even when all bundled together and clipped up, there is less to see in the totality of this car’s service systems than there was in the original lighting circuits. All those modules, black boxes, supplementary fuseboxes, voltage regulators etc, gone. The difference that makes under the bonnet is startling. Suddenly there is a good deal more room. Even the giant bucket of an air filter fits now. Over 20kg saved in the wiring loom. And everything now works.
With the pumps in place, there is now a place to lay wires to, and Officer David falls on it like Pteranadon on a Coelacanth. He brings a bewildering array of equipment with him. There is a strange clicking of various tools I can’t spell, and I can spell pterodactyl, there’s a device I think is for castrating cats, probes with lights on, a laptop he swears he’s not using for Facebook, it’s all a bit much for me, I used to get defeated by the wiring of an MGB, a car which had only 4 fuses and 2 relays.
The rain light has been moved. The originals were in the bumper. Bear wants to use those holes for something else, so a single unit appears on the rear parcel shelf. Lighting otherwise is very simple indeed, only the basic functions for track use. We would have preferred the car to retain its identity so that it could be MOT-ed and driven on the road, but the Jeffery clan have committed to this becoming a track-only car, and it is therefore so wired. No need for side markers and 4-way flashers, fourteen wiper speeds or door locks now.
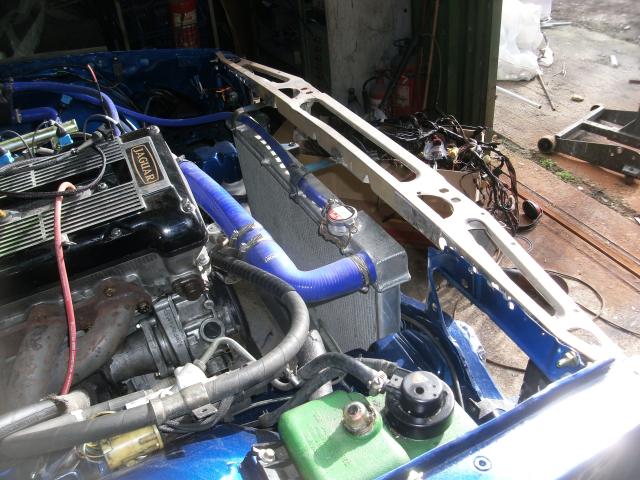
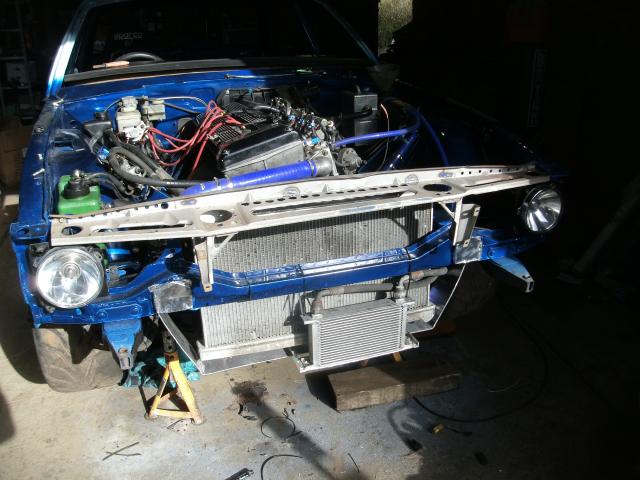
As the David wires, there are other things to be done. The oil cooler has been moved, no longer a bottom fill mounted behind the grille, it now sits in the mouth of the front spoiler, and is now a top-fill. It requires some fabrication to give it brackets to sit on, but in terms of airflow it is a superior installation now, far closer to the radiator than before.
That done, work can begin on that removable front end. Brackets to support the radiator are made and welded on. It is drilled to attach the fan and its wiring. Attaching to the car via the original spot weld holes and 4 bolts, it’s still a little more floppy than we’d like as it is attached only at the rear edge, so a pair of diagonal stays made from old XJS side impact bars brace it further. We do like to recycle, and those things are made of good steel.
Hole saws and angle grinders then lose some of the unnecessary weight, and it’s thrown outside for paint. If so minded, this panel will now, with the removal of 6 bolts, lift out complete with radiator, fan, and grille, all in one piece, whilst still appearing visually unaltered.
Wiring progresses. It will eventually expand to cover 5 full days, but as tools are downed at this early stage in the reassembly process, and for the first time in 4 months, a jab on the starter button produces that familiar wheeze under the bonnet. The dash pod itself arrived with a David, already rewired. This is one of those early dashboards with the red and green digital displays, only now all those flashing warning messages have gone, and the bloody thing actually works.
It is what we call a good start. The puns here are free.
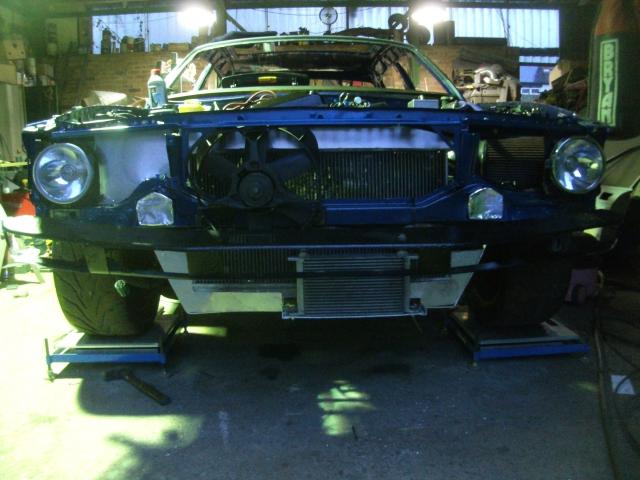
Oil cooler mounted, front panel modifications underway.
New look front end is so skeletal that we feared something was missing. It isn't.
Aluminium sheet panels in the gaps to ensure airflow through the rad and intake.
Next time – Part 13, Light(e)ning strikes.