LISTER XJ40
I like fitting the roll cage. I do. I like fitting the roll cage. If you say it enough, it becomes true.

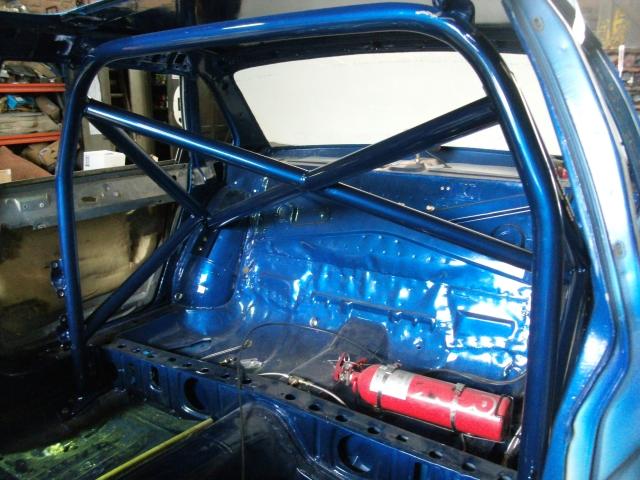
Tacking in the missing diagonal. Having the right kit made it far easier than usual.
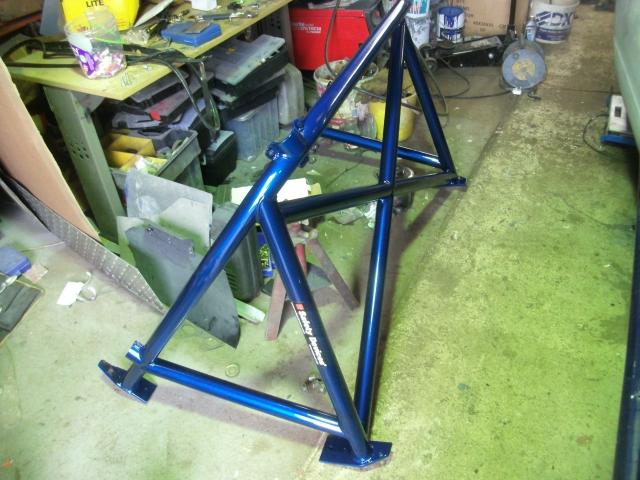
Painted. Took a while, but its all shiny now. The pilot likes shiny things.
And fitted. Only took three men to get this in here without murdering the interior paint.
You must gloss them using an old post trolley and the leg from a marquee, it's the law.
High tech firefighting equipment as we weld them to the shell.
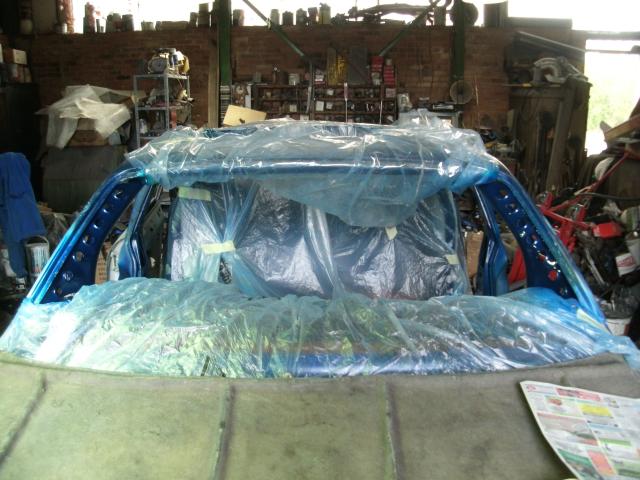
Then mask the entire car up again, but from the inside, to repair the damage the welding caused.
Then you make some of these curious sculptures, grind and paint them. For fun.
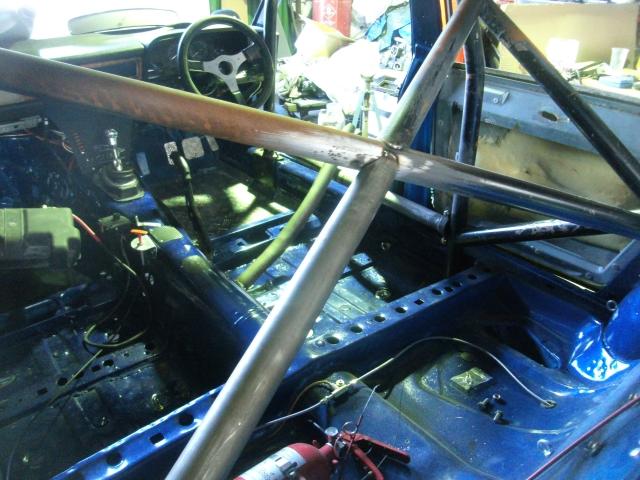
A low door bar is nice, until the nose of another car hits you in the B post. The bumper of any Jag is higher than these bars. For a start then, we’re going to add a second bar to the driver’s side. Nothing lairy, just one more diagonal from main hoop to the existing bar. With the cage in it’s not a long job to bend a piece of 2” CDS to fit, and tack a bracket to the main hoop. Getting the cage in without taking all the paint off the interior was another story. The cunning part is that we also worked out we could bolt the new bar to the B pillar, in an attempt to involve the shell’s roll-over protection in proceedings. In an XJS, for example, the main hoop is where the B pillar is, the driver is well shielded. Not in the XJ40. This little tweak ought to help a bit.
A piece of 3mm plate is welded to the B post, and a bracket on the new door bar, nothing more complex than that, because you can get in behind it to put nuts on, no need to make them captive here.
The rear cage gets the missing diagonal fitted. It sounds hard, but I cheated and bought one of those cunning tube profiler tools, which meant the piece I made fitted first time, slick as a duck’s bathtub.
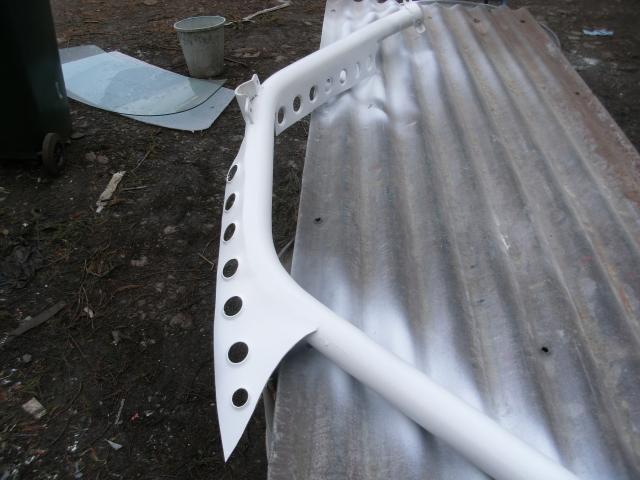
Sand the old hand-painted black paint down to erase the runs, then throw etch primer, grey, blue, dark blue, lacquer. It’s nice when it’s done, very nice. These bits will be going in as they are, and with some new gold bolts it all looks most professional. I thought the Bear was going to start touching himself, but it was just an itch. Probably lice. I assume Bears get those.
The front legs, however, once ground, finished and painted, well, these are annoying, because I’m now going to fit them and set fire to them as I weld them to the shell. You have to do it this way to make sure the cage is actually painted properly. I’ve done it the other way, there are places you just can’t spray paint with the cage fitted. Better to paint it then partially ruin the paint in limited places and repair the damage than to do it in situ.
Took over a week. But this is how we achieve the ever-higher standards we’re striving for. I suspect some people rail against that, that it’s unfair that we can spend so much time on something, and that they cannot compete with that without spending vast sums. It’s rubbish really. If I can do it, anyone can. Nothing done here is anything I have been taught. There is no special equipment. It’s time, observation, and patience. Match the level of obsession, and you’ll do a much better job faster.
But the cage is in, and that means the interior can be finished. Seat, belts, wheel etc. Easy stuff. That leaves one elephant. Panels and paint. Bollocks.
Next time – part 15. Blue Harvest.
Part 14 - cage fighting.
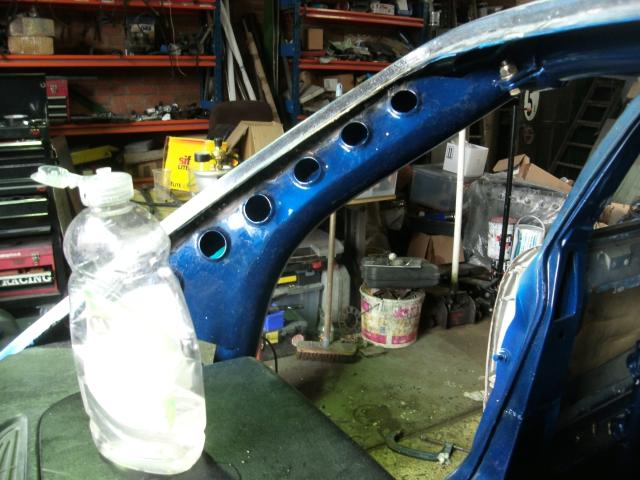
Welding takes time, and patience, nerve, and a Fairy liquid bottle of water to squirt about every half inch of weld to stop the heat spreading too far and the whole thing going up in a run of flame that spoils the paint. 4 hours to weld about 6 feet, and the mess is amazing. Water everywhere, and dust and paint flecks and by god did I burn my bicep. But the car is undamaged. It takes an hour with the grinder to make the welds disappear.
There is some disguising with filler too, for cosmetics. It’s on display, it’s right over the driver’s head, and right in the windscreen, it’s on show, so it has to be done. Sanded, etch, primer, blue, blue, lacquer. Shiny. Not perfect, but not half bad.
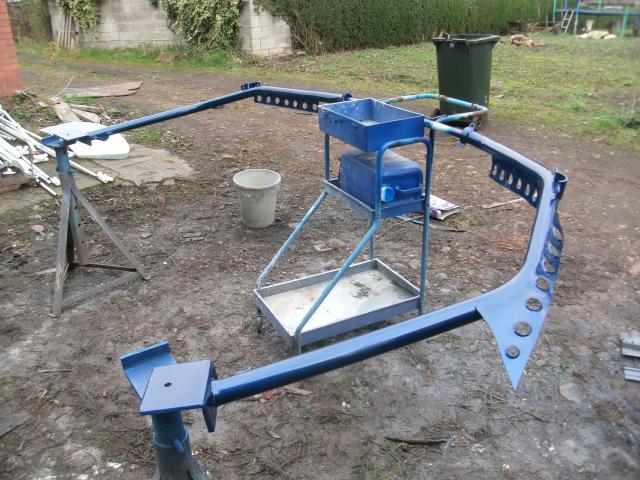
Cardboard templates are made to tie the cage to the car. We always weld the front legs to the A post with swaged steel plates. It enhances both elements. From a structural perspective the result is greater than the sum of the parts, and we like that. Given the gap between main hoop and B post, we can’t do the same there this time, so we went a bit to town with the rest, the screen pillar pieces are bigger than usual, and we made tie ins for above the doors, so the cage is tied in from dashboard up as far as the main hoop. That’s as good as anything we’ve done before.
The steel pieces are fabricated and swaged, then tacked in place to the cage on the car. Then the whole cage comes out, and all the welding is done, ground where needed, and out for paint. The main part of the cage, the door bars, and cross-screen piece can be finished.
The cage in this car is a bit crap. It’s extremely robust, and it is mounted to the car more substantially (now) than any other, with massive, thick plates on both the car floors and the cage feet. It’s just that the shape is nothing like the shape of the XJ40. It looks a lot like a standard rear hoop that fits A N Other car was simply copied and tossed in the back, then front legs made to fit. It was a custom cage though, one diagonal missing to allow a small boy to sit in the back seat, low door bars to avoid shredding your business suit when alighting, but those omissions, in our opinion, were errors. I know, who are we to question professional design? Well, nobody, but we can read a blue book, and we have eyes.

And there you have it, one fitted, tied in, painted cage. Only costs four thousand pounds.