LISTER XJ40
The repair of the shell is always the dangerous, dirty part. This is where you get burned, cut, and battered. The permanent risk of losing a finger from one inadvertent hand placement whilst using the cutting disc, the more serious possibility of a big grinder grabbing and leaping off the job to kill you, burns from mig and acetylene, and all amidst the filth of the job.


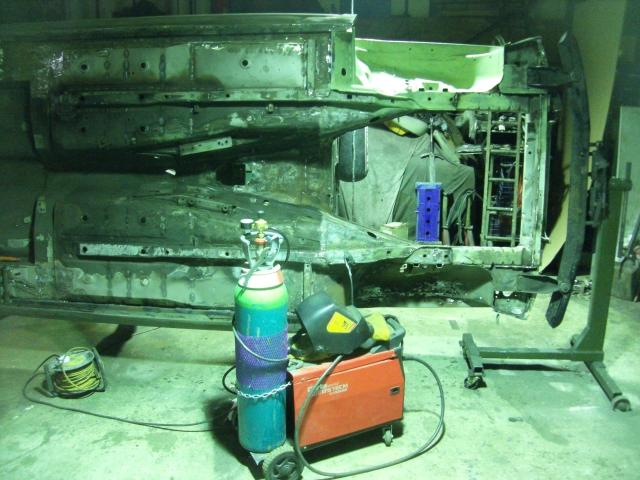
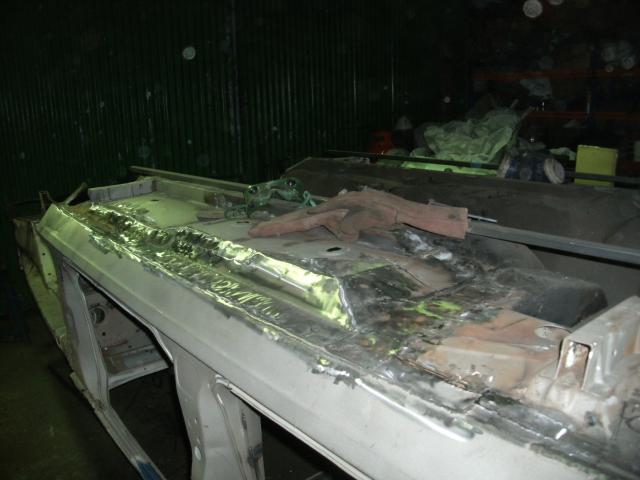
Light a fire and let's cook this fat hog. The XJS spit only just takes the XJ40's mass and height.
Early in the repair, the Mig's being enthusiastically applied and the steel is still grey.
That's a firewall. It's a bit Colin Chapman for my taste, but if that's as bad as it gets.
This side already bore the scars of previous repair, but then much of the car did. We were still calm at this stage...
Low flying XJ40 aerobatic display strikes bystanding Bear. I wonder what the underside's like?
Well, that looks disappointingly crunchy. The new patch was put on from the inside. I think there might be more needed.
Chopped the lip off, and found nothing left underneath it. Curses and drat.
Hell's bells and bloody ding-dong, the entire sill's knackered, the patches put on the floor are the only bits left.
Has also been seen fighting Batman.
Fixed that. It took a while. No, longer than that.
Well, we knew it needed work to the floors to stop Matthew's tootsies Flintstoning along the track...
No matter how much falls out, there is always more, and it’s like working on a volcanic beach, the floor underfoot is half an inch deep in grey sand, except where the rain leaks under the doors and it turns the vivid, shocking red/orange of rust. Best time to paint the garage floor is immediately after the shell repair, all oil stains erased by the sand!
It gets everywhere. Even if you’ve no hair left, it gets in your hair. And ears. Or ear hair, if you have that. Then there is the grinding and cutting disc, which turns into its own grit, and the metal you have ground, which has to go somewhere. When grinder touches hidden rust, with a nice pocket of unexpected sand, a dervish of filth whirls through the car, sticking only to organic items as if prejudiced against metal.
Seam sealant doesn’t really get touched by blasting, that has to be tackled by heat and by hand, the propane torch and a chisel. The smoke and ash add to this satanic beach. The first couple of days of the shell repair are therefore a horrible time. It’s not mechanical work, or engineering, this is more like mining. The owner, of course, has no idea what’s involved in this mess, so far as they knew this was a shiny classic car that needed a patch putting on one of the floorpans, they have no idea how messy, difficult, onerous and painful the job is, or how much of our lives we’re sacrificing to the task.
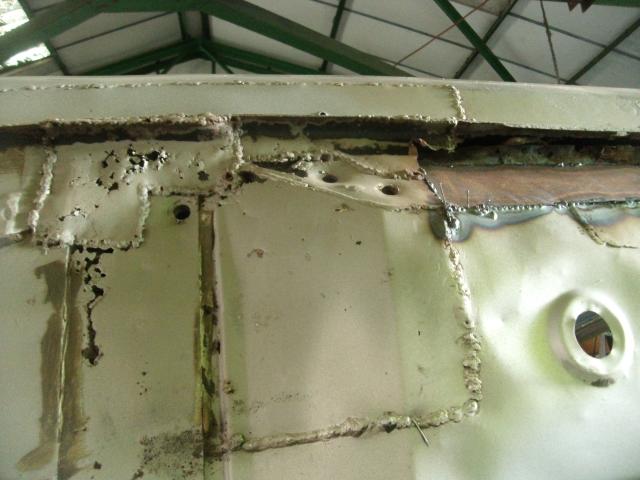
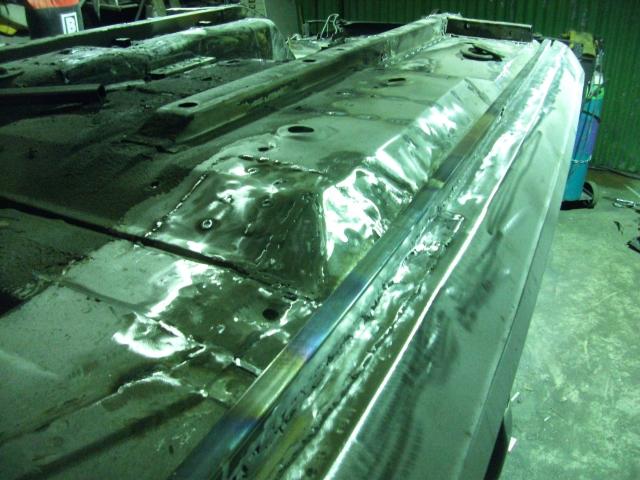
The first seams sizzle as I get my welding eye back in, there is no better practice than flat, horizontal seams of just-blasted steel to stitch. Not only is this getting repaired, but seam welded for stiffness. Nobody as yet, we understand, has ever done a seam-welded XJ40. Probably because nobody who could afford to have this done would bother racing an XJ40. Well, they may have a point.
Anything I can reach, right-side up, gets welded in an initial 3-hour assault. As metal cools, a more careful eye reveals much to do. The interior reveals a need for substantial work, both sides of the car are gone in several places where floorpan meets sill, which is a critical area of the car given how the cage mounts to the shell.
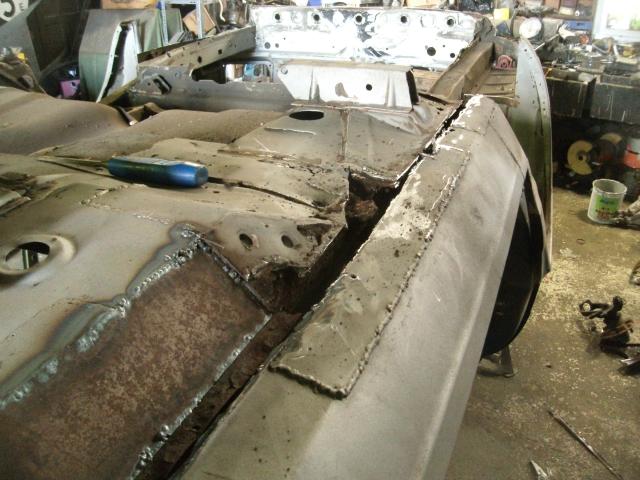
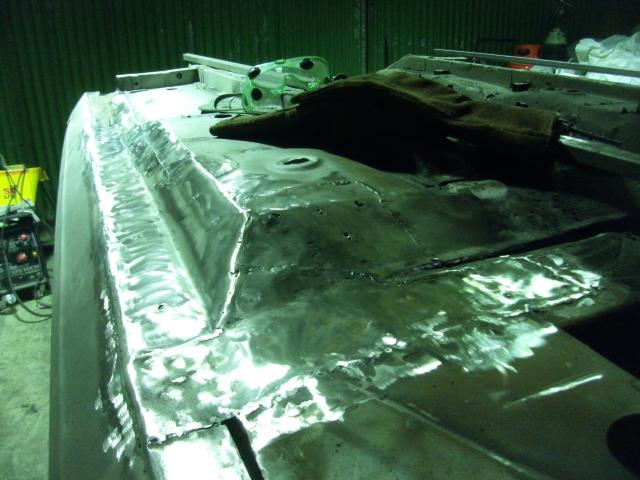
Instead of repairing it as original, clean it up and repair it with a flat bottom, losing that vertical lip and welding outer sill both to inner sill and floorpan. The inner sill is already attached to the floor, we did that inside the car. This repair will catch both the inner sill and the floor, for a stronger repair. It will duplicate about a 2” section of metal for about 6 feet, but if it’s a kilo it’s worth it. What of that missing lip? A length of thin walled ¾ box will be welded to it all afterwards, to add some minor additional reinforcement. In theory it directly links the cage feet together front to rear, which cannot hurt. It’s a 2kg weight penalty each side, but there is no sense having a light car that falls in half, shell rigidity trumps weight. In itself that box section adds very little, but combined with the rest it does more.
It takes a full day to achieve, but once cleaned up the box is welded on, tied to the new, smaller jacking points (the car being so low you couldn’t get a jack under the originals, so we raised them an inch!) and it looks like we meant it. It’s the original construction, with a twist. Most of what we do could be described like that. By my best guess we come out about 2kg heavier (3.5kg or so added, but offset what was cut or ground away) than we started. It’s worth it.
The garage looks like the outskirts of Hades, but that was a big step. A visit from junior Jeffery at this point causes a dropped jaw as the scale of the problem dawned on him. Lucky he wasn’t here before we did that sill. The trouble is, there are two sides, so guess what happens next?
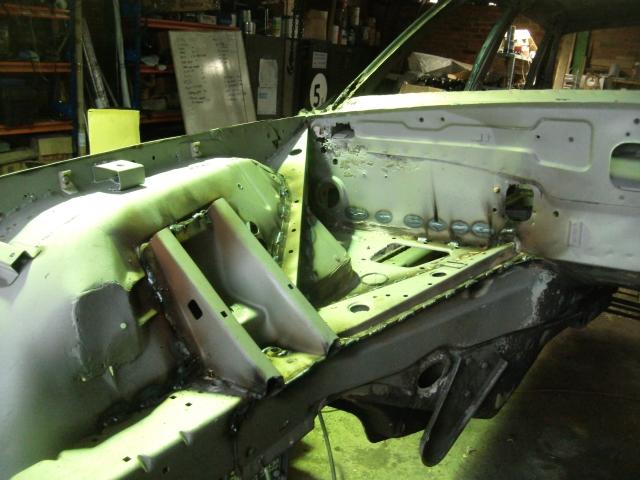
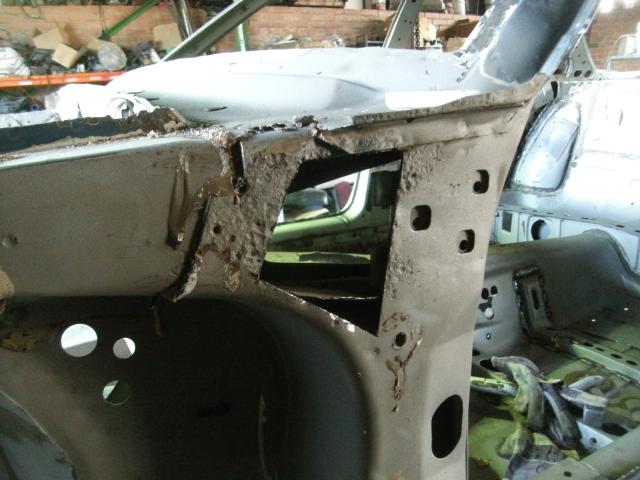
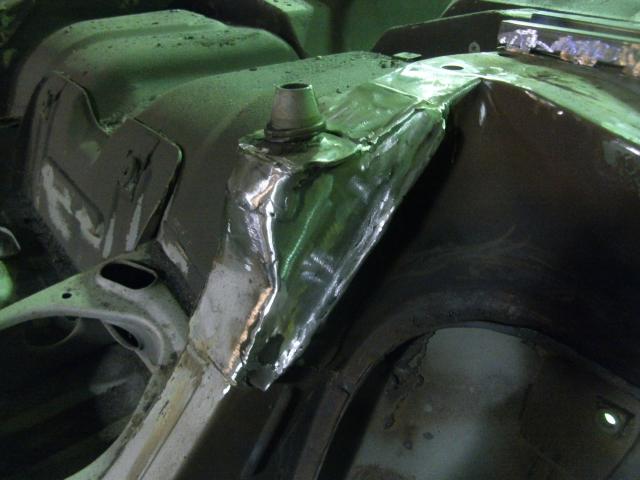
The A pillars are in trouble where they branch out to become the upper chassis legs. These too take time to repair with sufficient strength, the places where the inner structures have started to corrode have to be captured with new metal and joined to the exterior before the whole thing is over-plated. There’s no point fixing the outside if you miss the inside, and these are structural elements to the car. If the machine can do 150mph, you have to assume it needs to be strong enough to take an impact at a good proportion of that speed, and though you cannot render any car wholly safe, we can help it towards greater survivability.
The nearside sill transpired to be less onerous, a good dose of coffee and another long day saw us through it. It was a really long day, if I'm honest. That left one more tricky task, the missing screen pillar. That does take some messing about, it has to be far neater work than the sills because the screen has to fit and look right. But with patience and the power turned down, it magically fixed itself. Not an easy repair that, but a crucial one.
The repair was done in four seperate pieces, a flat piece to bridge inner and outer, the actual strength to the repair first. Second, a formed, curved piece that is the external shape, copied from the other side of the car. Third, the formed shape with the inbuilt gutter that links pillar to scuttle, and last, a tiny curved piece to make the corner of the screen. Took me four bloody hours. Not exactly the shape Jaguar intended, but the screen still fits. I checked. Always check it now, rather than later.
That was merely the repair stage. Now we have to weld it, lighten it, and do the various modifications we want to see. Welding complete, time to start welding.
It is a curious thing when you look at the shells, mentally you’re trying to piece together what you want to happen in a huge accident. The destruction of Vanessa to a large degree gives that answer, the completely destroyed front and rear ends of that car, yet the damage progressively absorbed such that the cockpit was unaffected. So we don’t look at this as a Jaguar, we look at it firstly as a cage for the driver to sit in, fastened to it in many, many places, with a big sacrificial structure around him that we’re happy to see crumble and flung to the four winds with increasing vigour the further away from the pilot you get. Hence the sills gain strength, but the front bumper will be made from tissue paper. You don’t build a solid block of a car, it’s not a top formula stock car.
For some light relief the smaller grinder is waved at a few bits we think we can do without, Bear decided that in some places on this car we should get radical. He wants to mount the radiator to the front subframe instead of the shell. Same location, just a different method. That means parts of the shell, including that flimsy rotten steel radiator mount, can be deep sixed. Distance tested. Thrown away.
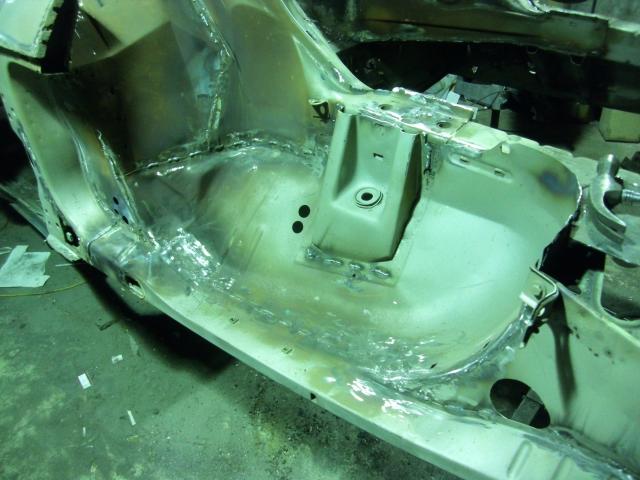
The engine bay bulkhead/firewall has more holes than swiss cheese. We could patch it, probably with aluminium plates, or we can fix it properly. It’s the firewall, and the more it presents as an unbroken piece of steel the better, so the offending areas are cut out and replaced. Better the scars of repair than the scars from a fuel fire breaking into the cockpit.
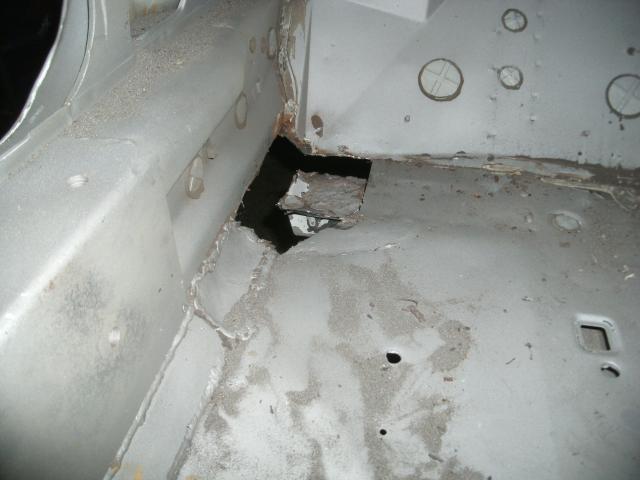
Well, in a word; shit.The really bad part is that this is where the rollcage foot bolts down inside the rear floor.
It’s not going to win an concours contest for originality, and I’m sure a professional Jaguar restoration specialist would have a heart attack at the cavalier approach we take when it comes to simply welding everything to everything else. Plug weld placing is not planned per se, you know roughly what’s where, and from the sound and feel of the weld you divine the presence of more metal beneath, crank up the power and melt down to get hold of it as you pass, which is not the factory-approved method. Mind you, the factory method appeared to miss one weld in three from what I’ve seen, and the more pieces of car we can introduce to each other the happier we are.
This is not a Jaguar, it’s a racing car. If you want a string of neat spot welds and the original sill construction, look somewhere else. This is strong. You can smack it with a hammer in a way the original would have shivered at. The boy pilot I suspect might prefer this.
The cage mounts themselves are very thick, and sturdy, far heavier than any other car we’ve ever seen, but there is precious little car left to attach them to.


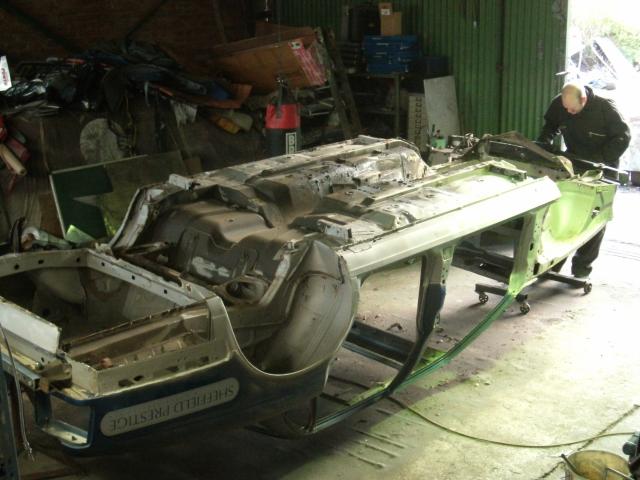

First there is the residual shot from the blasting. Thousand pounds per tonne, apparently, so we must have fifty quid’s worth here. It pours out of every panel and cavity, and boy are there a few of those in one of these shells. Our car-roller is only just tall enough for the job, the roof misses the concrete by scant millimetres but a miss is as good as a mile, and as the car rolls, it snows shot. Every hammer blow and it snows. Every touch of the grinder and the vibration makes it snow. A gossamer curtain of light grey, captured by the faintest gust of wind to ripple its way to the floor, with a slight sparkle in the sun, it might be enchanting if it weren’t so bloody annoying.
Initially it didn't look too bad. There is a worrying amount of the offside screen pillar missing, and the floors are a bit ropey, but I've seen and welded worse. The excitement of a freshly-blasted shell and all those clean seams to attack does put a rose tint on things, and I hung a new 15kg reel of wire, treated myself to a new tip and fired up the welder within an hour of the shell being mounted on its giant rotisserie.
A full day of feeble winter sunlight, however, seals those up, including putting rather tricky corners in the front of both floors. Oddly, the increase from 0.6 to 0.8 wire allows better control over the welder, the lower wire speed appears to result in neater work, and the floors come out well enough that some careful finishing will make most of the repairs largely disappear.
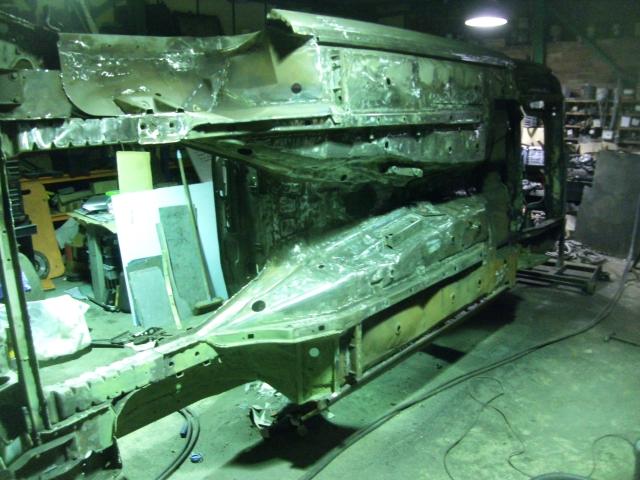
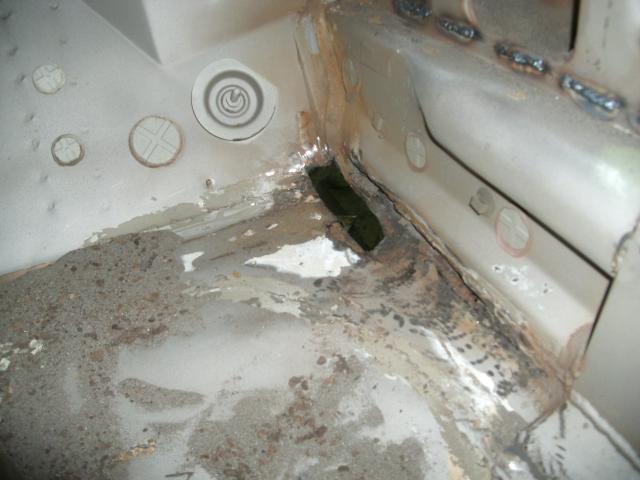
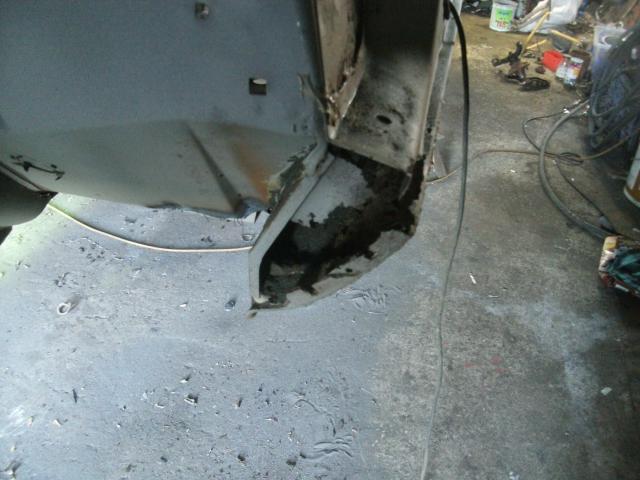
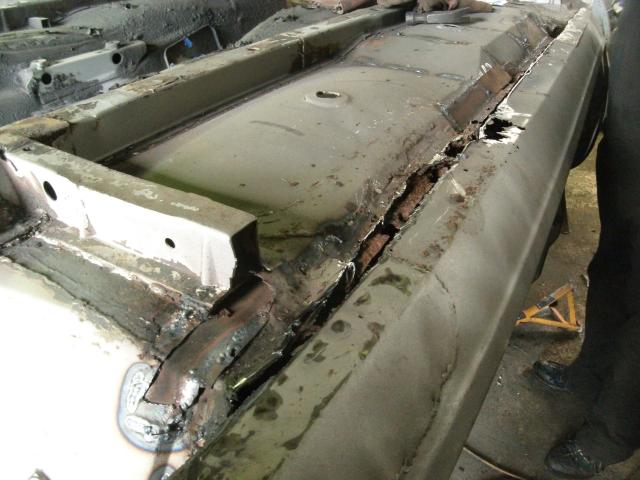
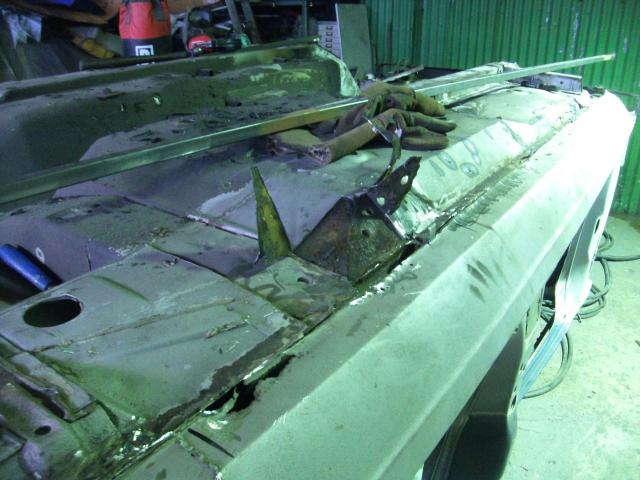
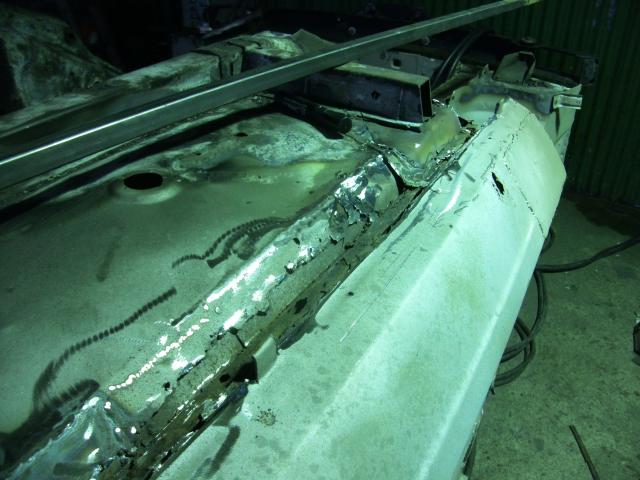
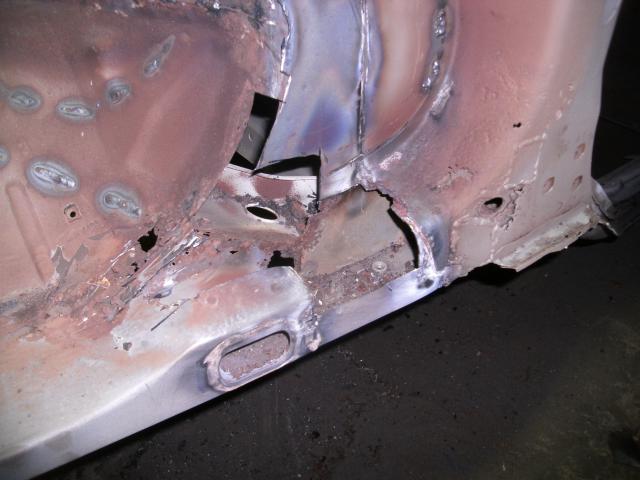
Feeling pleased with our little selves, the car is inverted in a snowstorm of grit, and the true scale of the task becomes clear. This thing was in deep trouble. The sill assembly on these things is a fairly classic design. Inner sill joins the floor, outer sill joins inner sill about an inch outboard with a spot-welded vertical lip that joins the two elements. The outer sill here is no longer joined to the inner. It is barely joined to anything along its entire length. That then becomes problematic, because to the rear is no longer just floorpan, but a series of important structural elements. Rot beneath the rear seat bulkhead/crossmember arrangement is fairly advanced, the problem being that this important corner of the car was where the rollcage mounts.
The rot is extensive. There is little sense panicking about it, it merely means more to fix, more time, delay, dirt and pain. The big angle grinder surfaces. and in one of our bolder moves the lip that joins the sills is cut off, revealing the extent of what lies beneath. The shower of sparks that resulted did for a perfectly good woollen jumper. A smaller grinder can then clean it all up, and some head scratching and a cuppa formulates a plan. It's a little unconventional, but it gets the Bear's stamp of approval.
It's a lot of patching. Hours of it. It's faster writing about it than doing it. The irony here, and think it really is irony, is that the cage mounting plates were originally custom made to fit the shell precisely, and with the shell rusted away I'm now custom making the shell to fit the feet. It's about eight feet of patching, which means over 16 feet of welding, plus extras, and the occasional plug weld that plunges down to grab hold of handy structures underneath as we pass by.
The driver’s side A pillar was in a real state, and took six hours to reconstruct, as some of the internal structure had also failed, not just the big and obvious external patches. This is the same side with the missing screen pillar, and the worst sill. Analysis of the load path through the shell suggests that it was the cage bridging from rear arch to forward sills, together with the tunnel, the offered the only real rigidity in the body. The cage’s main hoop was not actually adding a great deal, bolted as it was to a pair of sills that were not attached to the floor, whilst the roof was not really assisting a great deal either. However, we can now use the past tense to describe those problems.
That took some time. There were three major patches let into the firewall, and not simply slapped over the top but let in, delicately butt-welded (who knew that the welder had a "1" setting for the power!) and then ground up and finished to largely disappear. A flash with a torch checks for pinholes. We don't usually go to such trouble, but then we don't usually have to put the firewall back in a car.
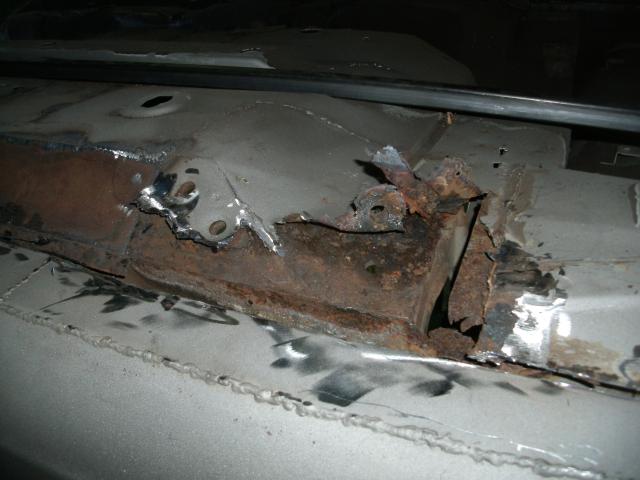
The rear subframe mounts are a little crunchy on the passenger side. By "a little crunchy" I do mean completely buggered. It’s been repaired twice before, but it is time for a more substantial, definitive repair. It says a lot about the depth of the sill repairs needed that we distract ourselves with these “little” jobs to avoid tackling it! For some folk the firewall alone would be a major project, but the scope of this task is such that it’s a nice and easy job. You cut out the affected section, draw round it on the new steel, cut it out, let it in, weld it, grind it up. It’s not rocket science, it’s just effort. Same with all the rest really, none of this is highly skilled, technical work, you chop lumps of steel sheet, bash things with a hammer and squirt hot steel glue about to stick all the bits of tin together. I also do medical negligence work.
The fundamentals are therefore addressed, the car has inner and outer sills, with floors. The places that the roll cage bolts to are now attached to the shell. The place that the driver occupies now has metal above, below, astern and ahead, with a steel cage to the sides. At that we can now look to modification and lightness. Shell repairs, as it transpired, took just under 3 weeks, but we were working at a pretty ferocious rate.
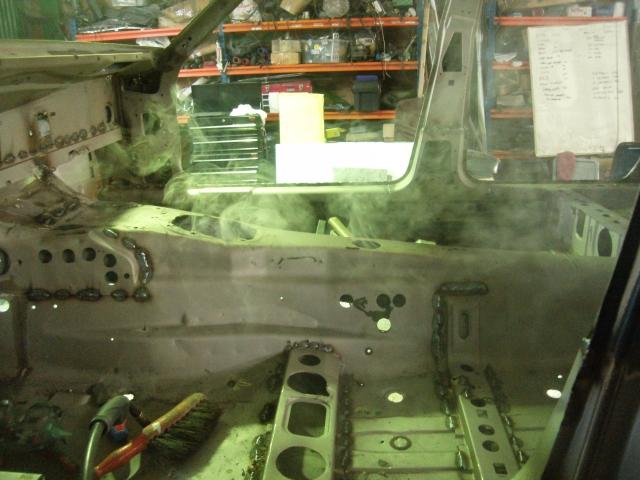
There are a number of cosmetic repairs still to address, however, but that was the structural work done. Bear periodically fires up the propane and burns off residual underseal that the blasting missed. You expect the transmission tunnel to have some left, the years of oil leaks and exhaust heat keep the underseal softer here, and the shot won't touch it. Burning underseal without warping the metal is difficult, and the heat sweats moisture out of the steel, which then tries to go rusty, the car comes in pale grey but goes light brown in about a week.
The missing front to the offside sill is repaired. Not as original, with a flat face that is set back from the leading edge, but with that face moved forward. There is no sense to the original design, it adds nothing, it's just for ease of construction. Well, there's been nothing easy about this repair so far, and my fix is a hell of lot easier than trying to copy the original, so it's getting what I damned well think it ought to look like. In the process that gives something for the bodykit to get hold of, because the two remaining holes in that lip were attached with hope.
The boot floor disappeared some time ago. That is now cut and ground to an acceptable shape, and Bear starts work on the box-section frame to replace it. It's a tested design that happens to incorporate a place for the towing strap and an anchor point for the magic shackle that allows this car to be loaded into the top deck of a lorry. It's also very strong, and happens to reinforce the rear mounts for the rear subframe. Things that do more than one job are our favourite modifications.
The boot floor disappeared some time ago. That is now cut and ground to an acceptable shape, and Bear starts work on the box-section frame to replace it. It's a tested design that happens to incorporate a place for the towing strap and an anchor point for the magic shackle that allows this car to be loaded into the top deck of a lorry. It's also very strong, and happens to reinforce the rear mounts for the rear subframe. Things that do more than one job are our favourite modifications.
Then there is the misery of seam welding. You just keep finding seams. The rear seat/parcel shelf/fuel tank aperture is a real combination of pieces, and it's only when upside down you see some of them. With time and experience, however, I have learned not to fall for that old trick of double seam welding. Where two panels overlap by an inch and get spot-welded, you seam-weld one of them, stitching your inch-long welds merrily along, then later you have the car the other way up, and you end up doing the same to the other seam, resulting in two parallel sets of welds an inch apart doing the same job. Well, not this time mate, I'm on to you.
The seams are everywhere. The floors and interior of the XJ40 have fewer than an XJS, but then crop up in places you don't expect. And they all have to be cleaned, flamed, chiselled, scraped, then welded, and ground. It takes time. Lots of time. It is thankless, hard work that nobody will ever notice, but it changes the nature of the car. The last car we did we jacked three wheels off the floor using one jacking point only, and that was before the cage went in. You can't hire someone to do this to an XJ40. The Jeffery clan can only have this done because it's amateur work done in our spare time. The lack of a formal certificate hanging on the wall is the difference, our only qualification is that occasionally people have crashed the hell out of cars we've built and they failed to fall apart. One might argue that's the only certification you need, I suppose!
This process will continue as we move from repair to modification of the shell. We start out fixing the car, then we lighten and modify it. Of course there is a great deal of crossover to that, and we do build some of the changes in as we fix it, but this stage is primarily a repair job. When we started this we thought we were going straight in for a modification and seam-welding job, turn it round fast but adding quality. As it turned out, this was actually a fundamental, car-saving intervention. One mild collision and the shiny Lister would have come apart pretty badly. More importantly, that small organic nut may have come to some harm. We think he now stands a better chance.
To add to that, we provided some additional footwell protection on the driver's side, just a couple of pieces of box section to try and prevent wheel intrusion. It's our standard mod ever since we saw Comer's accident at the end of 2012. His seat crossmember also gains a piece of box, both to raise the front of the seat and thereby lean the pilot back a bit, his position in the car was far too upright before, knuckles grazing the instrument binnacle, but it also adds just a hint more side-impact protection. Every little helps.
We're now calling this thing fixed. I think I’ve inhaled half of the car. I nearly lost a nipple. I’ve certainly burned my forearms, that one intrepid little blob of spatter got my attention in particular as it burrowed through the wool of my sleeve and raced down my arm into the gauntlet, down my hand to the fingertip, then sat there glowing as much high-pitched flapping went off and gloves were thrown, but for the usual entertainment the one that went in my ear has to be my personal favourite. So far as I can tell, that’s still in there. I am starting to think that we need a branding iron, to sear the flesh of anyone we have to do any welding for. Just to let them know. It might be time for a beer.
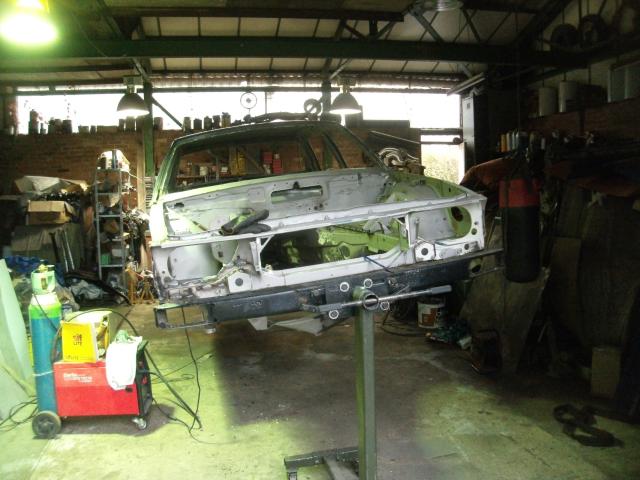
But it was so shiny we took many pictures. Box section lurks in the background for reinforcement.
The presence of some remaining underseal can create slight smoke issues, but she is old enough.
Oh no, the other side's the same. Why me? Why? I could be at a bar, one with girls in.
Did they make Jaguars out of dissolvinium in the 80s or what? Both sides were totally detached from the floors.
Rear subframe mount gains a more substantial and definitive repair.
Fixed that one too. That also took a while. Box section reinforcement in place, as if we meant it all along.
That's the driver's side A pillar. Only upside down. It looks as if it is unhampered by the constraints of structure.
Cut away the decay, and let's see what's left. Oh dear. Better fetch my larger hammer for this one.
Fixed that. It took a while. Someone "seams" to have been welding elsewhere here too. I'm here all week.
Look out, a Bear!We dropped this XJ40 on him, but he just kept right on coming...
Not an aerodynamic modification, this is what we call tinworm.
Another A pillar in need of some TLC. For American viewers TLC does not mean Tomato, Lettuce, Chicken.
Solidity restored the wheelarch and upper chassis rail, seams welded, grind it and throw some paint.
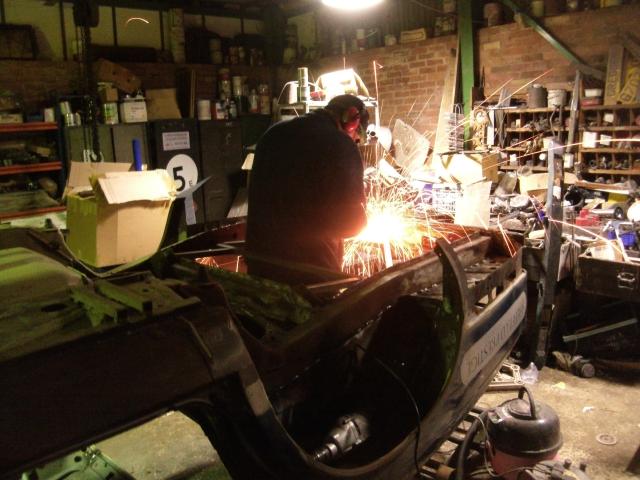
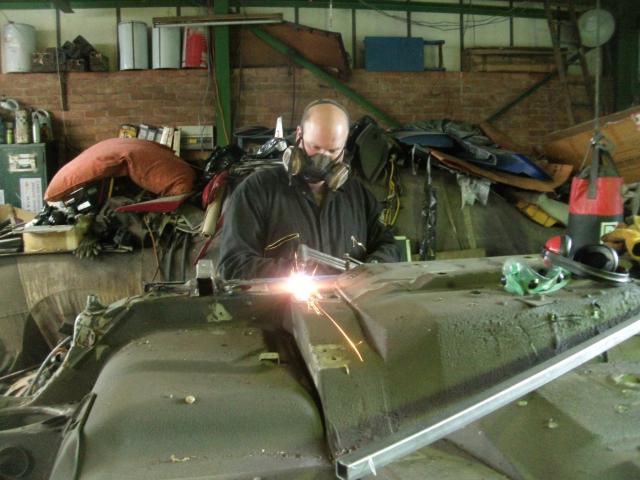
Engine bay repair and seam welding in process. It all takes time, there are dozens of man- days of work in every shell.
But it's nearly there. The Mig's on the second bottle of gas though, that's a lot of welding. A lot.
Fixed that. Now we start the job we thought we'd taken on to begin with. Bloody Jaguars.