KATY - Part 1
With the death of one car comes the birth of the next. So it is with racing cars, the body was merely the common point of reference for all the components to fly in formation with. Kill the body, but all those parts can soon find another to fly alongside, and do so in the same manner as before. They don’t care which shell they are bolted to, they just need one.
The major part to a rebuild of this type then is really the preparation of the new body. And with every new build the shells we prepare get more complex and involved, each body is stronger and stiffer than the last.
The shells are, however, to a large degree built to a template now, they only differ in the details, depending on which series or which class they are going into. A car built to say JEC roadgoing specification has a shell that is 90% the same as we’d build for the CTCRC Pre-93 series. This one will be built to do both.
This approach has occasionally caused some controversy amongst those who like to whisper and cast idle aspersions, but we care not, the concept is sound. It matters not what the class of car is to be, the basics to each shell are simple. No rust. Solid, strong, robust. Extra strength added where it needs it for stiffness and driver safety.
In some areas the car may be allowed to be weak, in others it must be far stronger than ever before. The cage is the key to it all, our thinking has gradually moved away from building a Jaguar to a different starting point altogether. We start now with the idea that we’re building a survival cell for the pilot, and work outwards from there.
With that in mind the cage attaches to massive anchor plates in 6 locations. Those locations then need to be linked to each other with the strongest car we can make. Extended forwards on the driver’s side to add some footwell intrusion protection, this is the heart of the car. From there the subframes want strong, stiff anchor points, and those want to be attached as firmly to the survival cell as we can, but you cannot make the whole thing one big solid mass of metal.
In a crash, and it's a racing car so someday it will crash, something has to give, you must shed the energy somewhere. There is no such thing as crash-proof, because if nothing crumpled up then you’d turn the driver into strawberry jam. The car is going to bend in a series of well-recognised locations, and there is nothing you can or should do to stop that. Which is not to say that you can’t ask those places to absorb more energy than they planned to.
With those concepts in mind, the basics to any shell the Bear and I turn out of here have a large number of common features. Big anchor plates for the cage. Extra steel and bracing and gussets to help strengthen the suspension mounts. Larger jacking points. Extra footwell protection. Rear wheelarch reinforcement to allow greater survivability to minor body contact from astern. Seam welding to stiffen the entire shell. Extra bracing to the front chassis rails. Extra side-impact crossmembers for the cockpit.
For many people, seeing this sort of work on a roadgoing class car is somehow against the spirit of the class, but we consider such objectors to be living in a soft-focus misty-eyed world of nostalgia. The harsh reality is that the days of showing up to the track in your old shed of an XJS road car, peeling round playing bangers for fifteen minutes or until the brakes caught fire, those days are gone.
The current Jaguar paddock is stuffed full of scratch-built cars pulling serious power, on sticky tyres. Accidents, when they happen, are at high speed. You have to come equipped for it. The roadgoing class car needs it more than any, because it carries the highest weight on the least amount of grip with the poorest handling characteristics, when they go off they tend to keep on going. The pilot of the 1500kg+ tank needs a car built to take it. Just because he is the “poor relation” to the 6 litre V12 at the front of the grid doesn’t make him less vulnerable, it makes him more so. 10mph slower at the end of a straight, but 100kg heavier means there's more energy to shed if you fall off, and the mandatory wobbly suspension and narrower tyres of roadgoing class cars makes it more likely that you will.
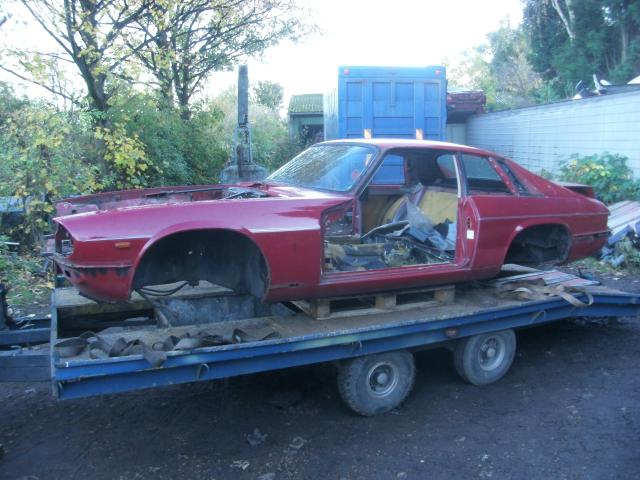
So it is that Katrina II’s build starts with some serious welding, but first we need a shell. It is getting harder to find a good XJS shell out there without breaking up a good car. Our hunt took us first to Roger Webster, whose spares car turned out to be more rotten than he had any idea about, completely dead. From there we tried West Riding Jaguar, who had only a facelift car in stock, which we were less than keen on given its sunroof, and the inherent problem racing a facelift machine.
Finally we ended up at Jagcats, and the bizarre world inhabited there by the character who stacks old Jaguars in towering and poorly-supported piles, then drink-drives forklifts across uneven ground with an XJS swaying wildly in the forks at maximum extension. When the Bear and I stand well back to watch you know it’s pretty bad. Anyway, we bought a shell off Jagcats, and to be fair we got a little bit done, it looked OK ish, but really wasn’t. We got into more repair than we had bargained for. You expect to do radius arm mounts, maybe some floorpan work here and there, front shocker turrets, and the outer ends of the sills, it’s pretty much a given these days.
This car appeared to have decent radius arm mounts, the floors looked fairly intact, but the car had gone in new and exciting places, making for more extensive repair than perhaps we’d planned.
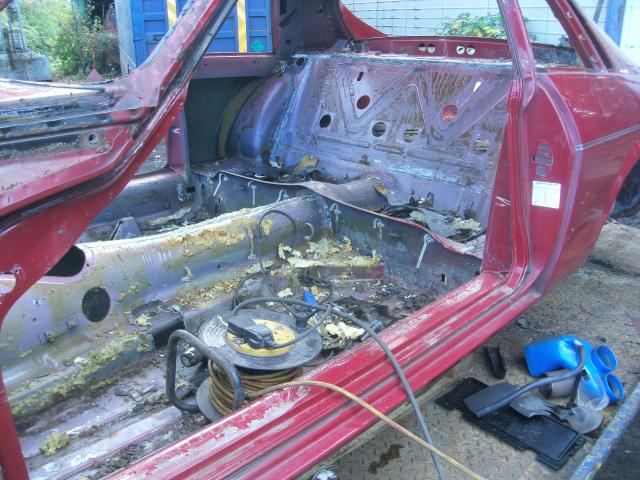
Repair is a systematic process, and it absorbs a lot of time. It’s made worse by the fact that we’re getting into this as we enter November. We strip the car of all insulation and all fittings, brackets etc down to a bare shell in just 2 days, and it’s straight off for shot blasting.
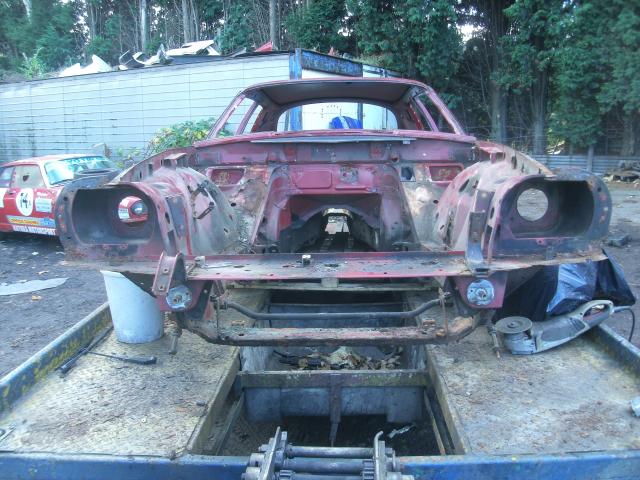
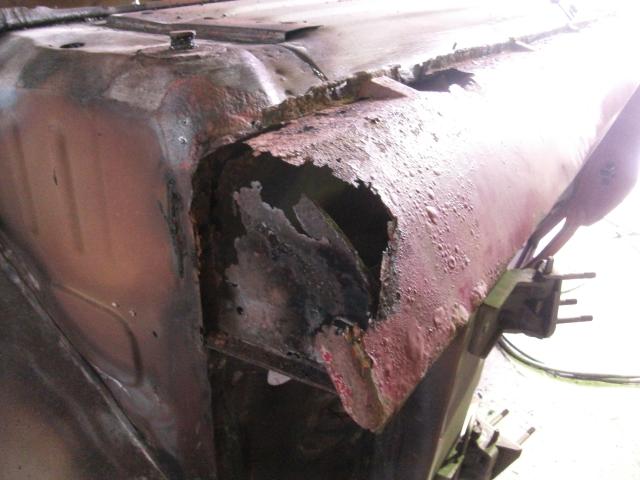
Post-blasting inspection suggests we have a fair amount of work to do, though in areas not always anticipated. The front chassis wants repair. At the rear end, whilst radius arm top plates are intact, have nothing beneath and will require major surgery. The offside rear lower wheelarch wants a substantial repair. The rear bodywork, so often a bit ragged, in this case is worse than normal. And yet the floorpans themselves aren’t that bad, the tunnel is fine, but the secondary skin where floor and tunnel overlap does need repair. Radiator crossmember is holy, and the front turrets need hefty repair both sides.
Some of this was inevitable, but some of this caught us out a bit. We did pay too much for this.
No sense whining about it, repairs begin immediately. There are no published regulations this point for 2013, so we’re guessing a little here, but the basic template doesn’t change. Repair the car into a solid Jaguar-shaped shell, then start chopping and welding into a racing car, then adapt that to whatever class and regs are necessary.
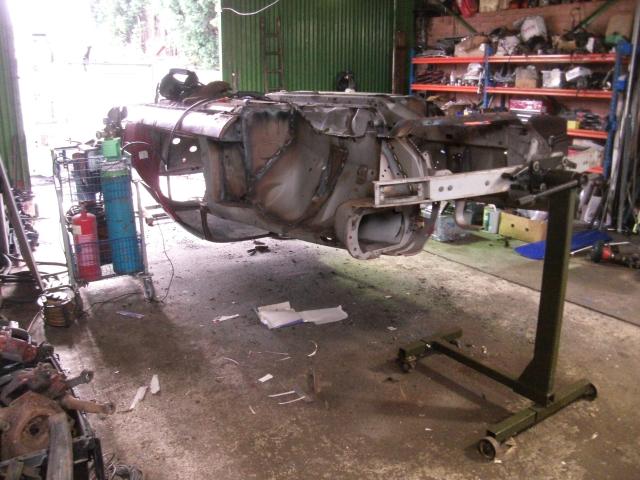
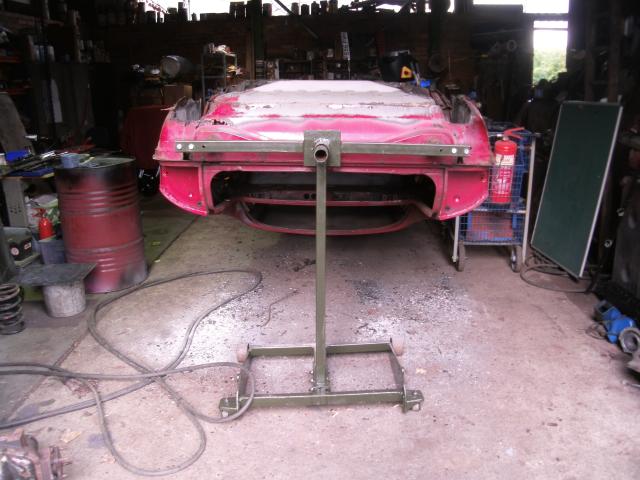
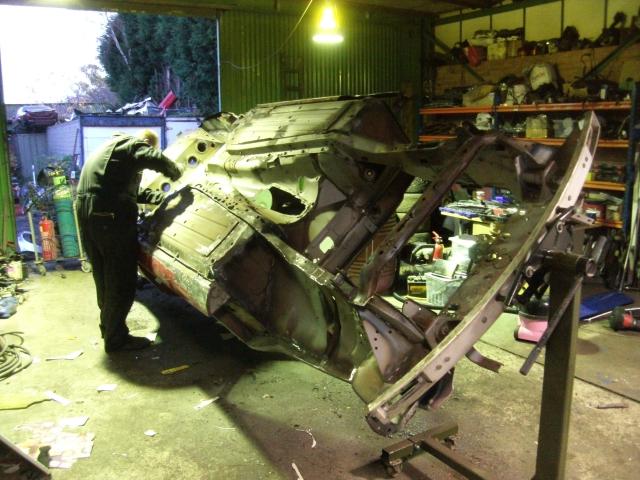
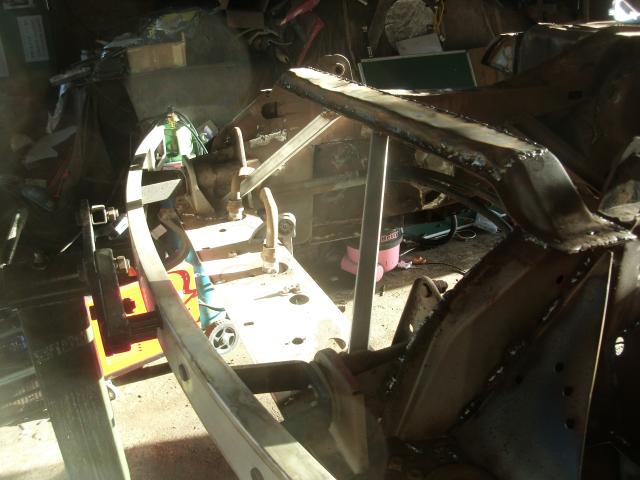
To make life easier, Bear was set the task of making a stand that would allow us to rotate the bodyshell all the way, an XJS-sized rotisserie. Usually we pick the shell up by hand and roll it from side to side, but this time we’re going one better. He buys a second hand, heavy-duty engine stand, then makes it a foot taller. Why they aren’t this height to begin with we fail to understand. That affixes to a front bumper, and to the rear he then makes a similar device out of an old trolley jack chassis, suitably widened. Why he painted both in army green I am unclear, temporarily the two olive drab steel-castored lumps of heavy metal suggest we might wish to invade
The blasted shell, raised to the correct height and bolted to these, can now be rotated through 360 degrees with ease, and importantly held in increments of 45 degree angles throughout, allowing all angles to be welded, and later painted, without excuse for poor access. An early spin drops a couple of hundredweight of shot out of the car.
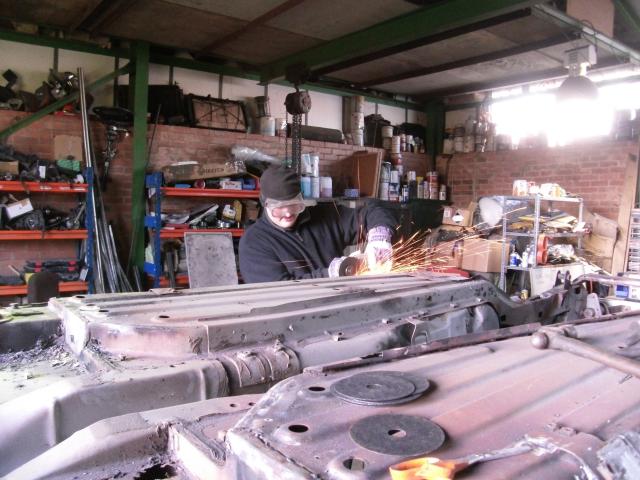
Repair is onerous work. BOC cost us some time when my not very old welder died and they replaced it with one that didn’t work at all, but these are but minor bumps in the road. The real slog is to cut and make and beat and weld and grind steel patches into a recognisable car. We’ve been down this road many times now, and other than that I’m getting ever better at welding there is little new here.
Some of the repairs gain extra strength. I’m not averse to slipping a piece of box section steel inside a complex repair as both extra strength and a datum point. This trick is my particular favourite when tackling radius arm repairs, the odd shapes that Jaguar decreed necessary here take some duplicating, even when you consciously decide not to go to too much trouble to get it looking like original. It is a pure racing car, it’s never going on the road or to a show, the goal is a strong, solid repair you can hit with a big hammer, not one that someone in an anorak is going to count the spotwelds on in a quest for concours perfection.
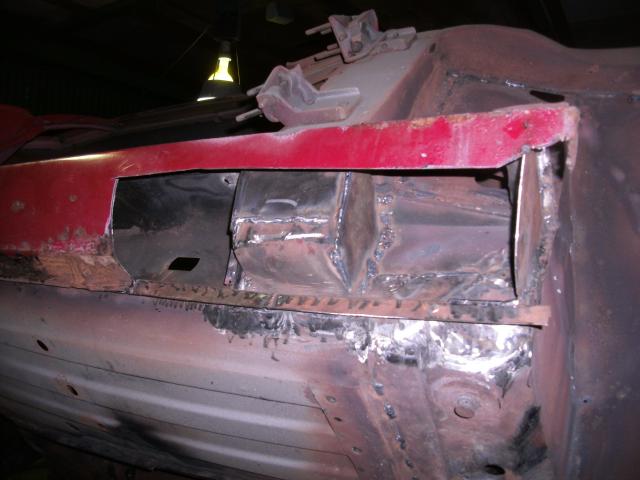
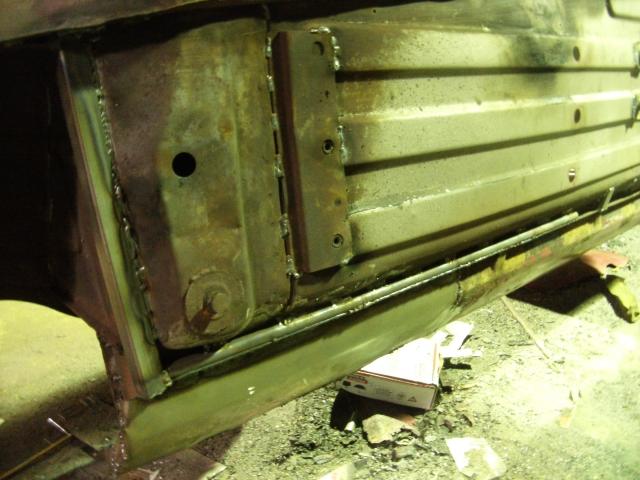
Repair to the driver’s side sill takes longer than planned. It does need some substantial work. It being the driver’s side, and with some memory of what could have happened to Philip’s feet in that last crash, the smart move seemed to be to chop out the whole front of the sill and add some extra steel to the repair. We actually extended the A pillar downward in this car, and there is a little steel tube added as an extra diagonal inside the sill, then the whole thing was closed up again with a new piece of steel. It is all hidden by bodykit anyway so there is no attempt to make this as neat as it could be.
To finish this section a length of CDS now runs down the floorpan/sill join, abutting both the hefty new seat crossmember and a new extra piece of box steel that runs across the front of the floorpan. This idea is to try and protect the driver’s feet more adequately. It is not very scientific, but it should help.
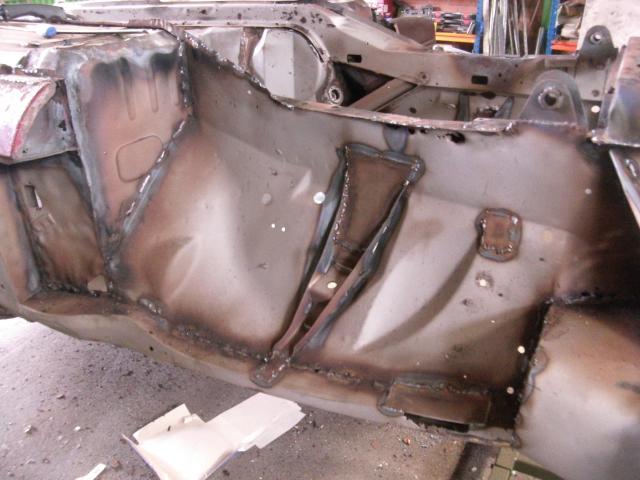
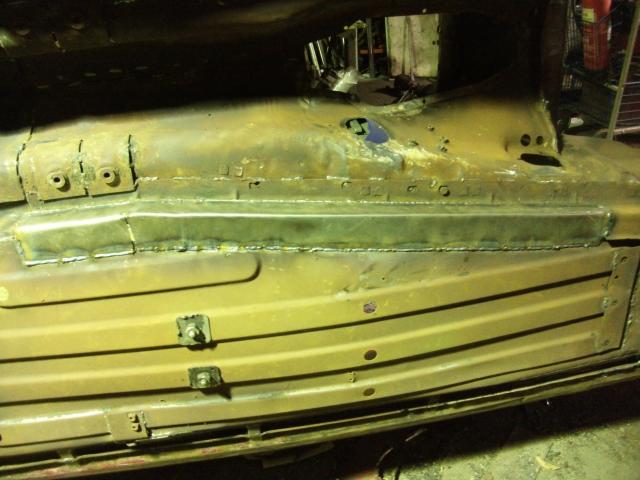
The radiator crossmember is re-skinned, but then reinforced with some angle, and two diagonal braces that join it to a new piece of box that runs full width across the car’s front end. This structure allows for some extra strength in the event of a big crunch, protecting the oil cooler, but its primary purpose is to become a central jacking point and tow-strap anchor point. No need to get a jack all the way under to the suspension crossmember, meaning no need for a low-slung, long-reach (read expensive) jack.
The front shocker mounts take 1.6mm plate for both inner and outer skins. Too heavy, yes, but not really. We think this helps tie the top and bottom rails together, finishes off the box structure, thereby assisting with subframe location. We might be wrong, but this is the way we’re thinking. The lower chassis is welded up with similar steel, though the odd lip that the original cars sport gets bent over, it makes fitting the subframe a little easier and you never know when you’re going to want to swap one in a hurry.
The rails atop the inner wings are a little corroded in places, and they just seem a bit thin. You get a sense when working on any shell just how strong it all is, and even when there are no holes and therefore obvious signs of corrosion this shell feels thin, as if it’s been acid dipped. By time and oxidation, or “organic lightening.”
The driver’s side therefore accepts another skin, just in case, seam and plug-welded to what lies beneath. Better safe than sorry. Both sides of the car gain a long piece of CDS tube now, running from headlamp pod along the top rail, curving down to meet the A pillar. It’s not a lot of weight, and it does add a remarkably strong new load path. It is a development of some previous designs here, only Christine’s elaborate shell took this concept further.
To get to this point takes about a month. But at that we've acquired a shell, stripped it, blasted it, and done all the front end repairs and modifications. The rear will take, we hope, less time.
That might be a faint hope, however, as the repairs will be substantial.

We're now in late November, and the weather is jnot helping. Bare steel and the cold, wet air of a Yorkshire autumn is not good for keeping the bloom of surface rust at bay. Better wrap this one up fast and get some paint on. Oh yes, and there's that roll cage thing we fit....
Bought from a drunk man with a death wish, a 1983 6 pot.
Stripping is swift, heatguns and chisels denude the interior of sticky sound deadening.
Completely stripped down, and heading for the shotblast.
Home-made Jaguar hog-roast.
Yes, the welding trolley is the old post-cart from my office.
And on with the welding.
You expect to weld the struts, but there was more to this one!
Driver's side sill was screwed to a degree not seen since, erm, the last one. It's getting hard to find good shells.
This used to be my old trolley jack.
It certainly changed the way we go about building these cars.
Bear gangs into it.
It looks like he knows what he's doing, but I'm not too certain...
The ability to work at fixed angles like this meant no back issues this time round.
Inner wing/shocker turret repairs come out quite neatly these days. Not that it matters.
A pillar repaired and extended. Sill to floorpan join repaired. Time to reskin this thing.
Floorpan to tunnel repair was somewhat epic in scope, but didn't turn out too shabby, if I say so myself.
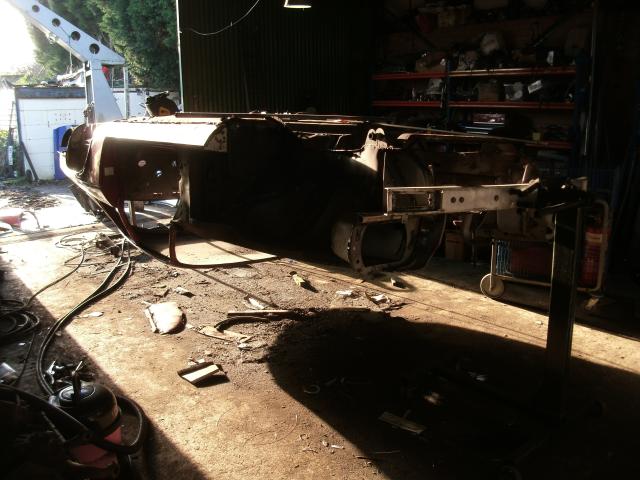
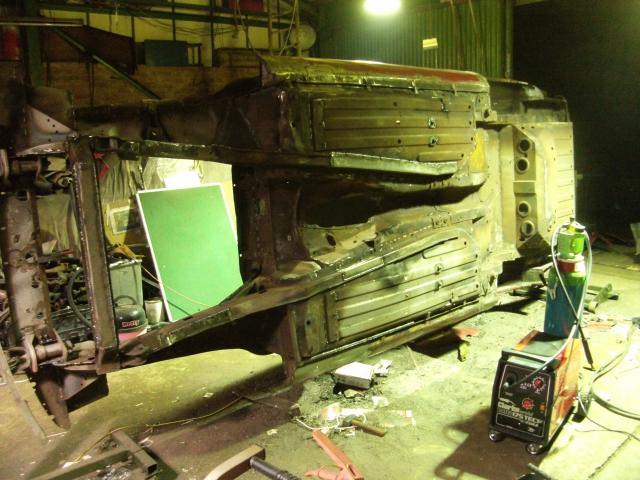
Upside down XJS, feeble winter sun, lurking crane.
The morning coffee can have a peaceful backdrop.
Footwell protection consists of CDS tube along the sill, and box section across the front. We hope not to have to find out if it works.
With the crossmember reskinned and box section V added, you can now jack the car up here. Whether it stiffen the shell or not, that alone is worthwhile.
Front end finished.
But by this point we've forgotten that it's a car at all, it's been over and angled so often that it stopped being a Jaguar.