DIAMOND?
STAGE 2.1
SPRING 2011
Injury of the month: oh I don't know. It all hurts, OK, all of it. We hit things with hammers and miss, chisels miss their targets, angle grinders bite and drag your hands into sharp things, it's all one big, long, painful, hot, sharp experiment to see how much you can bleed for fun.
REPAIR
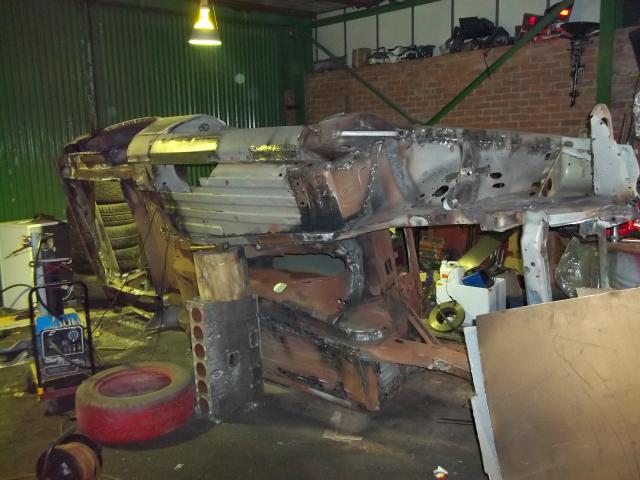
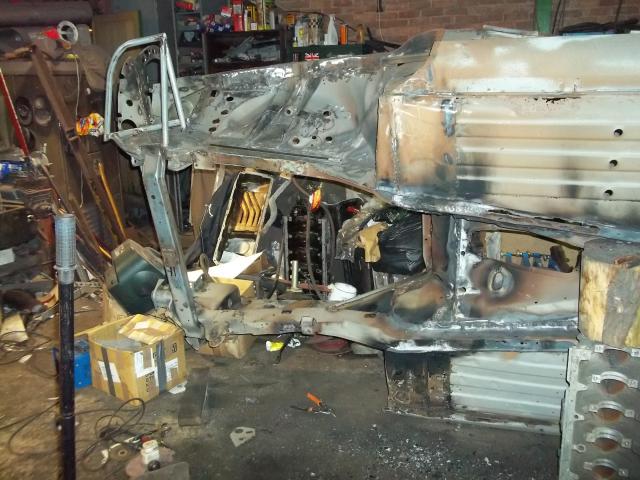
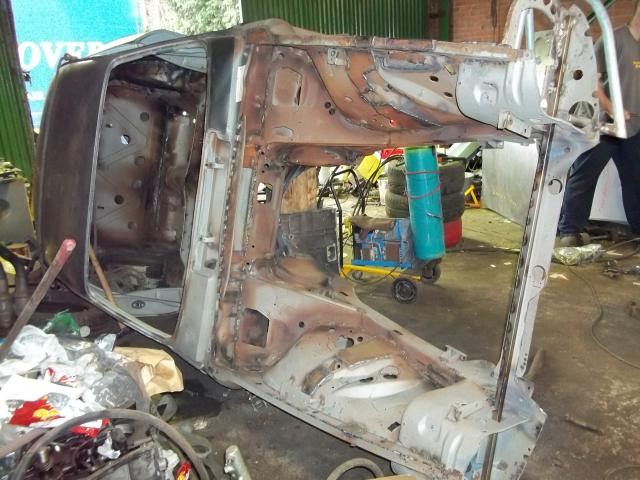
The shell was stripped last winter, and has spent nearly a year on its side, getting regularly sprayed with paraffin to loosen the underseal and interior glue. I cut the boot floor out of it on a whim last Autumn. It is now sent for blasting, and comes back looking like something you’d use to drain your pasta. That said, it’s clean steel, the welding and modifications begin immediately.
You might question why we elect to save such a complete basket case, and there are several reasons. The first is by chopping out all the suspect steel and putting it back in, no matter how big a piece we might be talking about, we know that it’s in correctly, strong, and with no suspect metal. If you have to chop it out, at least you know that what’s put back in is good.
Secondly, we modify a lot of the shell anyway, jacking points are hugely extended in our cars, reinforcement is added to key areas to make the car more impact resistant. This doesn’t mean we want the driver to play dodgems, but we’ve seen how even little nudges can put a car out of the race – rear wheelarches that fold down onto the tyre, front bumpers that people put through your radiator – so we build the car to survive these little accidents. We know these mods work, and finishing the race is the first goal.
Thirdly, this is the car that started it all. This was my first XJS, a V12 auto I spent the vast sum of £1800 to buy, and after about six months of fun it rapidly slid downhill into a bit of a banger as all the filler erupted from underneath the sell-it-quick respray and I took to deliberately knocking over road cones in hospital car parks. I lived in fear of this car, it was a Jaguar for God’s sake, you can’t fix Jaguars, they’re those high class luxury cars, what if it goes wrong? One brave day I removed the rear subframe to do the inboard brakes, lost all fear of Jags, and bought a boot spoiler in celebration. The spoiler came from a site called jagracing, and within 3 months I’d bought Angelina… It’s tough to let the shell go after that, this is the origin, the prime, this is Eve. Yes, we can get sentimental over a rusty bodyshell. Don’t like people very much, but this car is family. That we like.
From the holes in it though, it would appear that the insane tricks I used to pull in this car were done whilst separated from the road by just the carpets. A memory of driving a drunk Bear home in the early hours, flashing through the roadworks one wet night with bald tyres and all the suspension broken, pulling 110mph through the cones with hands twitching on the wheel fighting the soggy shocks and the self-disconnecting anti roll bar, it does make me go a little bit cold now I see the steelwork we were sitting in!
Step one is to repair the shell, and we’re looking at a big job here. The front end of the sills is gone, the floorpans are a serious mess, and one of the rear radius arm mounts is still there at all only because we welded it up about four years ago. The chassis needs repair, the front inner wings are through, and there’s a rear wheelarch that has a strip missing. Little of this was visible under the underseal. Still, we’ve done worse.
Anything we know we don’t need simply gets cut off, the early phase of the prep is always the violence of two angle grinders running in tandem, erasing Jaguar’s original plans. The fundamental goal with this car is a solid, robust, reliable car. It’s not intended to win races, it’s a workhorse, so when it comes down to a choice between “do we leave it in, or risk the damage if it hits something with this piece missing” we leave it in, but we can still lose a lot of bits of Jaguar.
Where the red car is a more weight-conscious machine, we anticipate the customers driving it will have a few knocks, it happens. It would be nice if a tiny nudge didn’t destroy the wings, bumpers etc, so we build the car to take it. Not a lot, not a banger we’re building, but we do, for example, fit bars to screw the bodykit to, designed to catch it if dislodged such that you should never lose the fibreglass except in a serious impact. The rear arches are reinforced so that a little rub doesn’t push it onto the tyre. It's a question of building the car to take the things we've had happen to us before. It won’t be as light, but it will be more rugged, and you want your customer to get his track time.
We start at the nose and work back, repairing and modifying as we go.
Headlight pods, as usual, bite the dust early. Large pieces of the front end are cut off, but then conversely we weld a piece of box section in to run the full width of the car here, the oil cooler will look as if it’s hanging on skyhooks, but the car is actually stronger here than before, and lighter. How is that possible? Well, we don’t need to hang bits of trim, horns, air con parts, fans etc off that panel, we just don’t need it there, we’re not trammelled by the requirements of a road car. If you’ve ever dismantled an XJS, what were they thinking to have a row of 6 11mm bolts holding on a single piece of lightweight plastic trim?
Front strut mounts are, as ever, rusted to hell. They had previously been patched, and the bits the patches were welded to, badly, had then rusted away. Lots of work to put this right, only not really. It sounds bad, but it takes what, an hour, to make the pieces and weld them in. We’re talking a split open cereal box and a pen, make your template, cut the steel, weld it on, grind it up. It’s not fun, but it’s not tricky or technically demanding, it’s just fabricate and fit. If you’re an office worker there is something satisfying about coming home of an evening to this sort of work.
The lower chassis here is usually holed, and so it is here too. Plating this is crucial, it must be done properly. No matter how big a piece you have to make, it has to be put in, if it’s at all crusty it has to go.
The car is on its side, we do one side at a time, which makes it a strange build. You do, for example, the outside of the offside strut mount, and the inside of the nearside, but neither is completed until you flip it the other way. We have a whiteboard to keep track of which bits have and have not been done, it’s the only way!
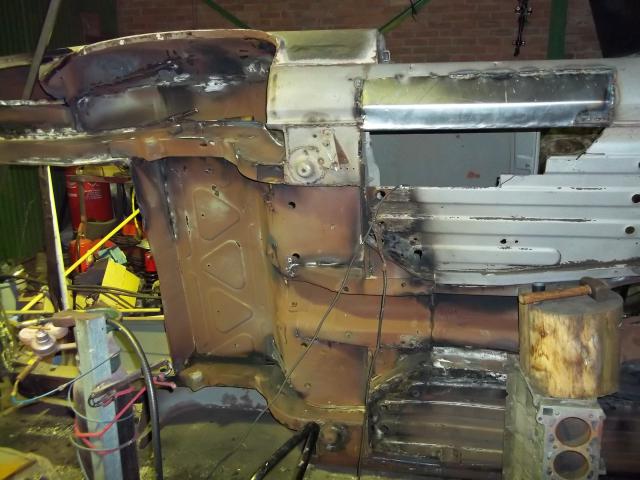
The repaired chassis is then deliberately linked to the repaired shocker mounts with a big piece of thicker-gauge steel, which is the final link in a strong piece that joins top chassis box to bottom, reinforcing the entire inner wing. Taken with Jaguar’s original brace bars and the extra box brace we weld in to link A pillar to top rail, this part of the car is greatly stiffened. When we say “thicker” we’re not talking quarter plate, merely heavier than car panel gauge, just a hint more than used in the original construction. Don’t think that the Jag chassis is made out of girders, it’s actually very thin metal.
The box sections that form the top chassis rails are, as usual, holy. It’s always this way, and the repairs are a hint more difficult, but it is important to get it right, no sense spending money on shocks if they’re bolted to inner wings that flop about like a wet deckchair.
The shell is perforated in a number of surprising, and helpfully unimportant places that merely highlight areas we can cut out and throw away. At least it will be light.
Any brackets under the car, of any kind, are cut off and thrown away, as nothing runs underneath the car but the exhaust.
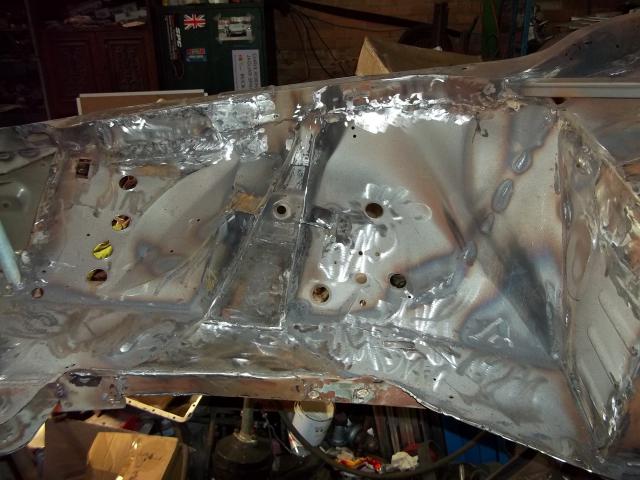
Floorpans, as ever, show annoying amounts of corrosion. Fortunately a lot of this area gets seam welded or beefed up, or welded to, so it’s not quite the same as if we were restoring this beast, we were going to tinker with most of it anyway, and chopping it out to put it back in again is not quite the same exercise as rebuilding a road car, it doesn’t matter if it bears the scars of repair. Lucky, as there will be a lot of scars.
As the patching gets underway, so does the seam welding. It’s a thankless task this, but it is so helpful, it makes it a very different car, and when you’ve got a bare metal shell to go at, it’s rather therapeutic, that sizzle of the welder laying down inch strips of flat, neat steel glue is one of those satisfying noises. One day I’ll buy a visor that works properly, and more than 2/3 of those welds will actually be on target, nothing so annoying as a beautiful weld that curves off and away from the seam because you couldn’t really see.
The sequence is familiar to us by now. Topside first, then the car gets flipped onto its side, welded, then flipped the other way. It’s just easier this way, and given the shell is sub 300kg it is possible to rotate it by yourself. Easier with a Bear’s help of course, less likelihood of it crushing you to death.
We can’t recall how we supported the last car, but an engine block and a large log seem to work well. Sure we did it differently last time, something involving a lorry tyre and a stack of old Pirelli P6000s.
Acetylene flashes around the shell as Bear heats and beats flat any lip that gets in the way. Jaguar did like an edge or two when they built these, and I know that a lip adds a little something to rigidity, but really I think it was done for ease of spot welding rather than anything else, the design on the car is actually quite crude, and frankly we’re doing so much better in terms of stiffness that we can lose these, making for easier repair, and installation of other pieces.
The welding takes many days, because we do a full job. Both radius arm mounts are to be replaced as a matter of course, just because they always want doing, so we do them whether they need it or not. Yes, we’re that daft. The trick here, however, is that one has already been done, I watched my father do it 5 years ago after it tore itself out of the car one wet November evening and put the car out of commission for about 4 months. It shows how far we’ve come that this repair which I watched with helpless impotence, utterly unable to fathom how he did it, now fails to meet our standards, and out comes the grinder to remedy the perceived flaws.
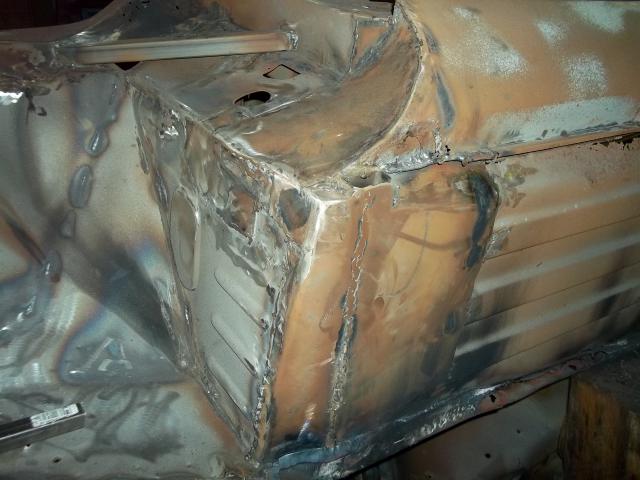
Front jacking points are done very differently. On a wet day, changing tyres, who wants to kneel on the floor to check you hit Jaguar’s jacking point? You just want to sling the jack under, so we enlarge the target you aim for. A lot. We first remove the entire floor here. The original design is the flat firewall that is the rear of the front wheelarch, and then a second skin in the footwell, slanted for your little footsies. There is a triangular-section void between, quite a big one. In there are the two triangular pieces that form the jacking point, with that daft little plate on the bottom and Jaguar’s mammaramic nipple.
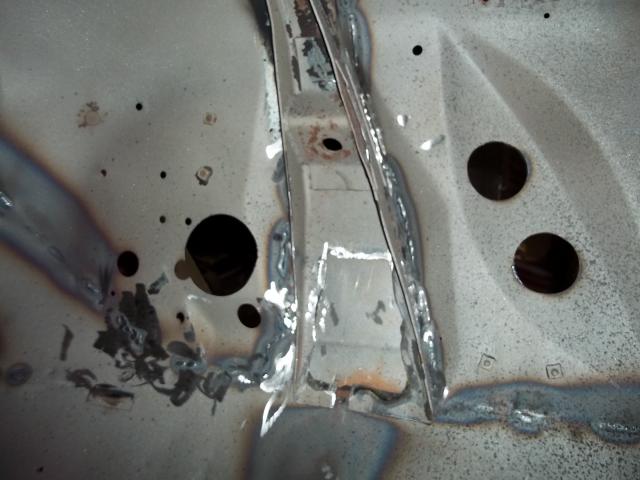
So we cut off her nipples. Both the wheelarch and the inner skin stay. We’re not losing either, but we take out the floor between, exposing the jacking point. To be fair, on the nearside, rust helped. The nipple and plate go too. A length of 2x1” heavy box is then welded inside, and the floor is then closed up with heavier gauge steel, making this area of the car about a kilo heavier than original, but much, much stronger, and giving you a jacking point a foot square. The driver’s feet are also now better protected. You have to think of these things. We can lose that kilo we put in somewhere else, but a robust shell is our grail.
That's the front end about done. Now for the horrors of the floorpans, and the rear.
REPAIRS - PART 2 TO FOLLOW...
.


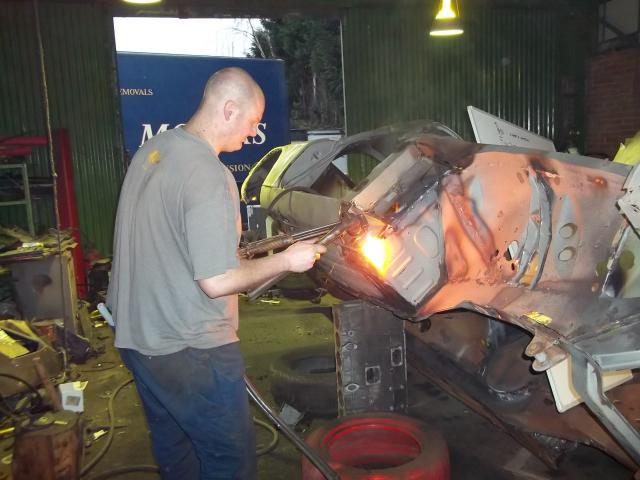

Work begins.
Acetylene to sear off the old seam sealant, pop any residual rust, and as you can see, scorch off all the Bear's hair.
The AJ6 safety stand was Angelina's first ever engine.
Blew up at Snett, bless her.
Don't try to keep track of which side it's on now, it changes daily.
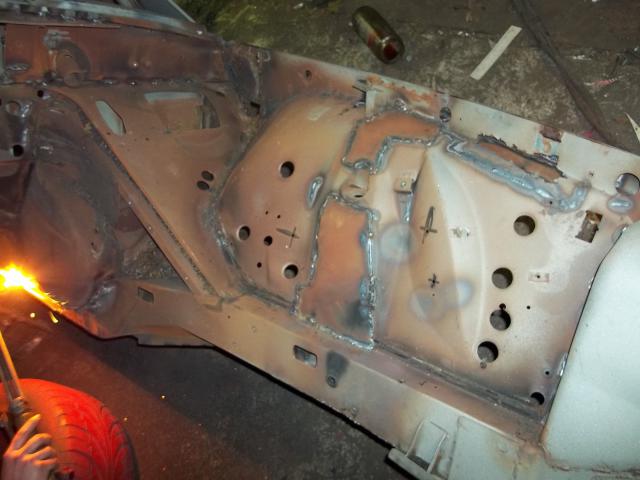
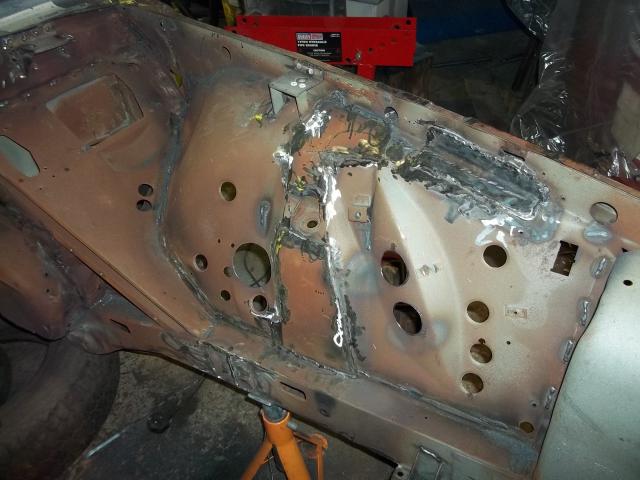
Front struts appear to have gained repairs, the headlight pods have disappeared, oil cooler panel has been chopped, and there's about a mile of seam welding on show already...
Front shocker "turret" had gone, as usual. Previously repaired by someone with defecatory matter substituted for cerebral.
This may not be pretty, but it's strong. The aim is to link the top rail to the bottom. This is just the start...
..and the second part of the solution. The inner part of the strut is plated, then the strut is extended down further all the way to the bottom of the (repaired) lower chassis rail.
Extra bracing then added. Anything to help keep that front crossmember in place!


New jacking points. Throw away the old, and put something more substantial in.
Between the arrows doth 2 x 1 box lurk.
The steel is also somewhat thicker than before. But when it comes to changing tyres, this will all make sense...
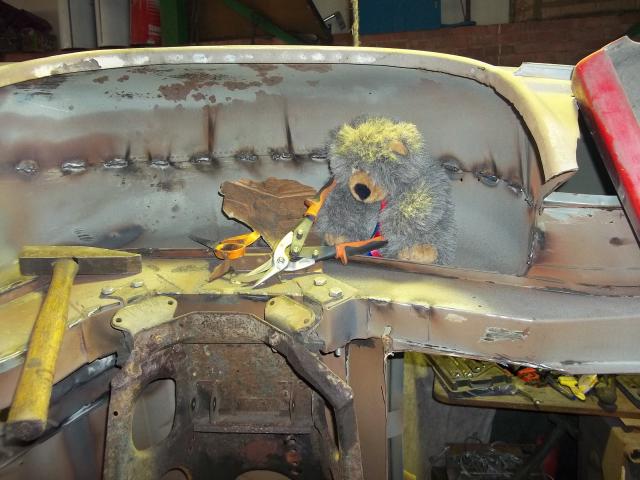
Look, he's back again.
Doesn't his hair grow fast?
Safety equipment now includes both the AJ6 axle stand, and Larry the log.
Just because you patched the inner, doesn't mean the outer is fixed too.
Both sides need attention, it wasn't just a single skin originally, and it shouldn't be now either.

Note the changes to the bracket, cut in half and relocated, caused by the need to move the header tank.
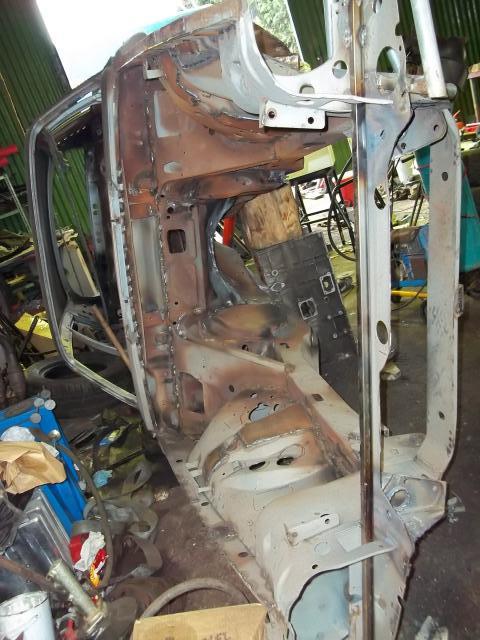
Strut and chassis repairs complete.
Surface rust is caused by the moisture "sweated" out by the heat of welding.
The grey ash is all that remains of the seam sealant.
The peculiar construction at the front is lightwieght tubing that will protect and carry the front bodykit.
We're on the second new angle grinder by this point...
Ted assists making templates.
Rear subframe in place to allow the mounts to be welded solid.
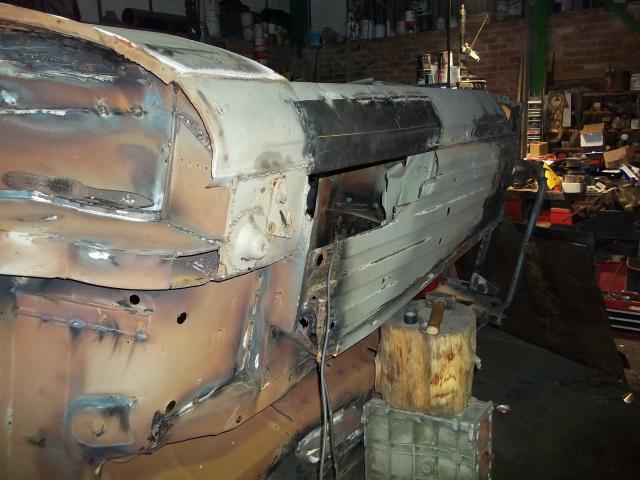
Some vandal has stolen the boot, and lower rear wings. They'll nick anything round here.
Now we're getting somewhere. Front end done, half an acre of steel sheet in stock, a welder that's actually working for once.
Just as well, because someone seems to have stolen the floor.
With the front complete, we move to the floors.
Time for a game of spot the difference...
This one is the easy side. Why the car rusted so much more thoroughly on the driver's side we'll never know.
Patches in, and this side's floor is done.
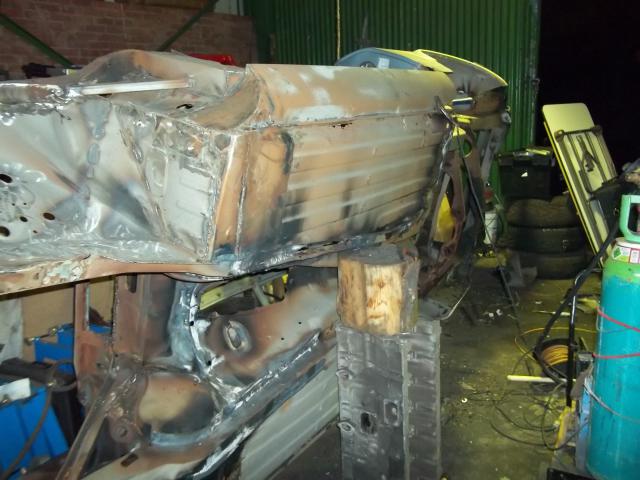
The rear end though, oh dear.
The acetylene has been busy again. You can't do this with a fuel tank in...
This floor was in a rather worse state. That's a 27" piece of sill that has been replaced, for those who like statistics. I even learned how to bend steel vaguely accurately. The trick is the pair of 4' pieces of angle trapped in the jaws of the vice. How I didn't figure that out years ago I don't know.
There are moments, sometimes, when you look at it and wonder why you ever started. Oddly, that's usually as you're nearly done.
At least the radius arm mount is intact this side. Ironically, we'll remove the jacking point so carefully fitted 5 years ago.