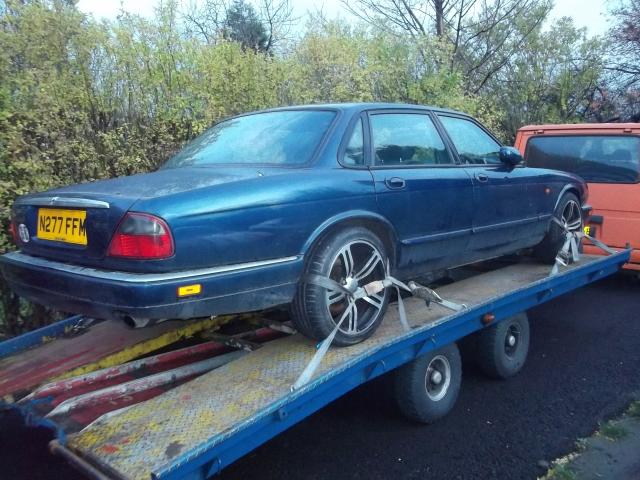
HELEN - Resurrection
Stage 2.
Well, the car has to be rebuilt, no matter where it’s racing, or who with. She’s tired and wanting to look smarter, so whilst we’ll keep under review precisely which race series we’ll be playing with in 2012, the basics to what we’re doing here are going to be the same.
If I build her to JEC regs, we’ll be fine, there are no other series I know of with such restrictive rules, so she’s bound to be legal, and the other thing is with grids the way they are I’m bound to find a club who’ll want me to race her with them at Cadwell. The trick to this is that we build our cars to a template anyway, the changes to turn her class F or class E take place later in the build, we have time to review what we’re up to and to see the final calendar before we commit.
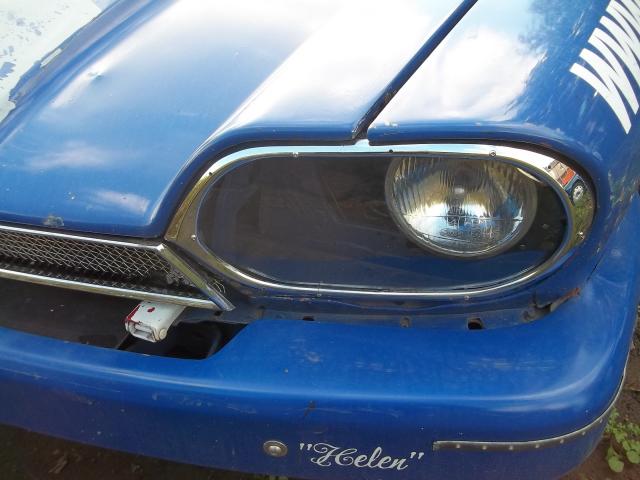
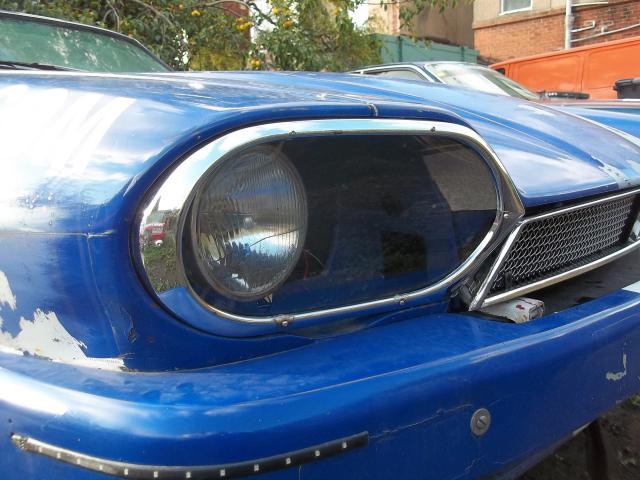
For now though, she has to start coming apart. It takes two minutes only to cut, unscrew and chop the tie wraps, screws and rivets that hold on the headlight surrounds, grille and spoiler. Then the difficult job of peeling off all the stickers. Some of these have been on nearly 5 years, the doors and boot belonged the old car, and the livery has really got hold. Leaving only the name on the car, she looks so very different without all the advertising. Not right at all. Pretty, actually, the car in raw blue is actually quite dramatic, but not like “my” car.
Unsurprisingly the removal of the livery takes some of the paint off, but given a full respray is in order anyway that’s no problem.
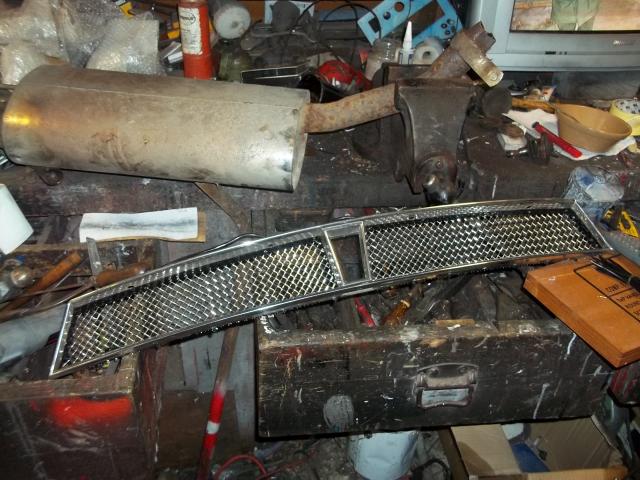
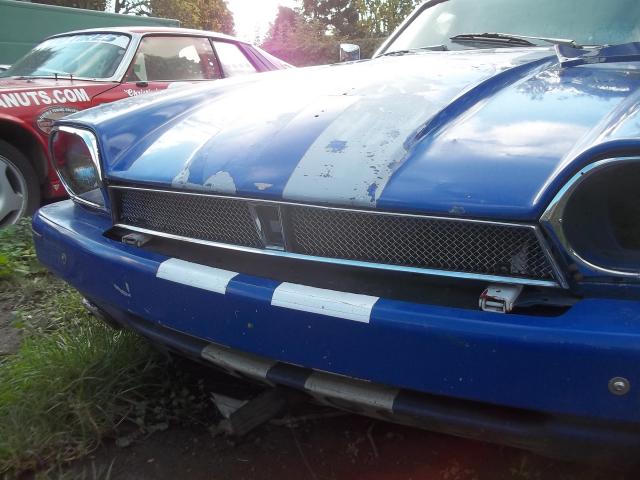
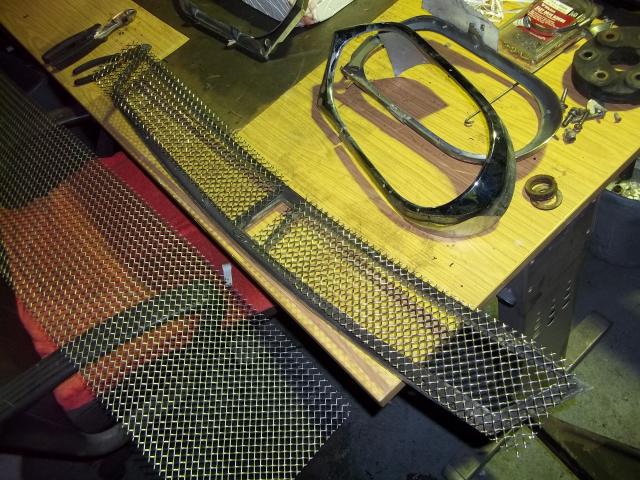
As we’re beginning more gently the removed pieces are snaffled away for cosmetic attention. The mesh and rivets are removed from the headlight surrounds and grille. The grille is cleaned, masked and painted, and the old aluminium mesh is replaced with heavy stainless diamond cut mesh as you’d find on say an XKR. I’m not sure anyone does a mesh kit for XJS road cars. They should, it looks great, but the point is that it’s really tough, gravel will not get through this.
The headlight surrounds are also cleaned, repaired, and then 2mm clear Polycarbonate is cut to fit inside them. Applying weight and a heat gun forms the new lens to the shape of the surround.
This is then fixed in with tiny M3 button head bolts, and the alloy air intakes will later be fitted. I was going to get fancy and try to heat-form the air intake into the Perspex, but both cosmetically and from an airflow perspective this was never going to be as effective as simply cutting a hole and slapping the intake on the outside. The aim is to mock up the quad-headlight look, despite it being nothing like the quad headlight look.
In the interests of drag and cosmetics, the mirrors are coming off. Sure, it sounds like nothing, but that square foot of wind resistance equates to about 5bhp at the end of Revitt. To replace them takes little by way of cunning, just technology. Two small lcd screens and a pair of reversing cameras. The world has cottoned on to the idea of rearwards cameras in cars, if I recall even the prototype Jag supercar featured cameras in pods in place of door mirrors, and the idea is hardly new.
The cameras go on the doors in small teardrop-shaped carbon fibre pods, home-made of course. Why carbon? Well, it’s pretty. In fact carbon is to feature as a cosmetic addition throughout this rebuild. I can’t use it for panels etc because I’m a steel and glass car, but I can use it for cosmetics, it’s pretty.
The pods have little to no air resistance, and the screens go inside the doors, attached so that they sit exactly where you would usually look for the mirrors. This means that your muscle memory, that glance for the mirror, simply has you look at a screen of the same size, but it’s inside the car, not outside. There’s no need to ever adjust the mirrors again, the camera is fixed, all you move is the internal screen.
Less drag, less prone to damage at Cadwell. Where we’re not racing. In fact the temptation is to move those screens to either side of the dashboard, so that you have the rear view mirrors in your peripheral at all times, you can see behind without moving your head. After some thought this plan is abandoned, too distracting. Probably. Quite how these “mirrors” will fare at MOT is unclear.
Whilst I’m playing with carbon fibre – and it’s so easy to use, don’t be fooled, just like fibreglass except the matting is black – some of the dash trim gets the same treatment. I have both fake ABS plastic carbon, and the real deal. The real stuff just looks better. The plastic is cheap and fast to make, but can’t be formed in the same way, so a mixture is needed, large flat sheets get plastic, curves need the real stuff. The effect does darken the interior somewhat, but it’s also very clean, very glossy and very purposeful, I like it. I wonder if I could make the entire centre console out of this stuff? That would look awesome. Yes, the closet Pimp My Rider in me appears to be coming out.
The ¾ window panels will also be replaced in carbon or carbon-look, it’s an area of the XJS I never really liked much, and I can now “fix” that.
The spoiler is more of a quandary. I have a choice of four ways to play with the rear spoiler. All of them entirely pointless, this is sheer cosmetic frippery. Probably. We know from a wool-tuft test just how little the rear spoiler actually does. It does look good, though Vanessa proved that you can look good without it.
Option 1 is simple therefore, throw it away. But then she wouldn’t look like my car. And there are holes in the bootlid to fill. Option 2 – repair, repaint, refit the existing spoiler. Maybe with a tiny gurney flap on the bootlid itself. Option 3 – dig out that Camaro-style spoiler I made 2 years ago, and lower it to reflect the current regulations. Option 4 – pure Nascar style, angular, aggressive, ugly.
Option 2 seems the way forward. It’s Jaguar, with a tweak. I think we’ll go with 2 and 3, but make them swappable, depending on my whim.
I think some additional diff cooling is also in order, and I know that some class F cars put louvers in the boot to cool the inboard brakes. I wonder if I can do the same trick with the diff?
Some thought goes into airflow generally. The basic principle is very easy indeed, air that is underneath the car wants to come out as quickly as possible, preferably heading upwards. All the scoops, ducts and intakes you see on the upper surfaces of some cars, designed to push air downwards to brakes etc are, in my opinion, going the wrong way. The classic trick of scooping air from the ¾ window panels down to the rear brakes is absolutely back to front in terms of airflow.
It’s not a lot, but it’s there. Helen’s cooling wants to work in reverse. Air from beneath will be heading upwards. Same effect, but aerodynamically a little purer in concept. Look, it’s my car, if I want to waste a month of my life making an F class XJS lose ten pounds of positive lift then that’s my problem, alright? I’m not asking you to help.
With a few other projects out of the way, Helen can come apart in earnest. Her front wings are a bit rough, the driver’s side was scrap when it went on, and it hasn’t got better after three years. New wings would be good, but for now, the old will be sanded and flopped and sanded on the car, repairing them off the car was the mistake I made last time. When they were fitted, the tension of the bolts pulling at the put-of-shape wing put what for all the world looked like an arse-print in the driver’s side.
Bonnet and boot jump off, neither of them troubled by any Jaguar wiring. The cut-down hinges will be retained, though I may lighten them further, they are hugely over-specced for the job they do. Ironically the piece which does fail is the pin that forms the actual hinge, which is grossly under-engineered for the job. I had one fail at the end of 2008, chasing Chris Palmer around Snetterton with one side of the bonnet no longer attached because that pin had simply given up after too many years. Jaguar clearly learned, the enormous piano hinge on the XJ40 is a rather more industrial solution.
Fuel tank out is one of the first jobs. It’s easy to forget it, and one wield of the acetylene or even the Mig, and it’s goodnight from him. Fortunately, again, as a previously-Kutuka-ed car, she comes apart very easily.
When she was first built, Helen was built to be as light as a D class car could legally be, because it was alleged to be impossible to get a car and driver to 1510kg, so we were attempting to do something that couldn’t be done.
As usual the popular myth was complete hogwash. Despite complying with every last regulation to the very letter the car came out so far under that I carry great chunks of lead about to get the weight back up. The low initial weight was simply the result of building the car from a shell up instead of stripping a road car down. With hindsight I could have gone another direction and met class E weight limits without a deal more effort. But this does mean that Helen is not bolted together in some ways as robustly as she might, if there was a choice of using four bolts for a piece of trim or just splodging the thing on with some silicone, she got the silicone in the interests of weight saving.
It did get a bit silly in places, and over the years this has started to come back to haunt me, the wood falling off the glovebox lid in the middle of a corner race at Anglesey nearly had me fall off the road in panic, I left some of the screws out of the trim when putting it back on, and it seems two weren’t enough, the strain of Rocket2 simply ejected it into the passenger footwell.
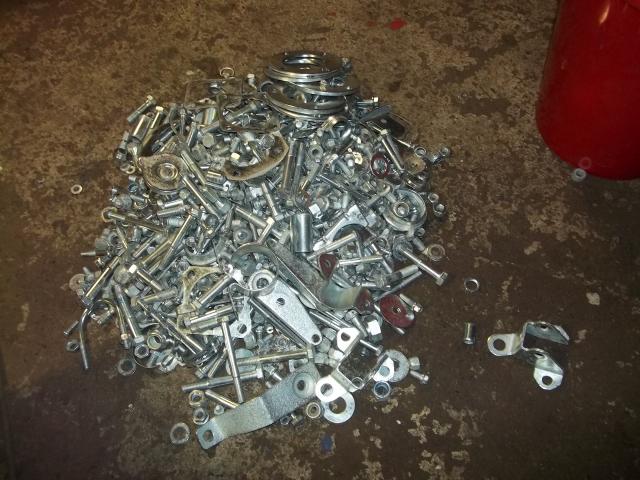
So when she goes back together this time she’ll get a bit more in the way of fasteners. Not a lot more, I have learned a great deal more in the three years since we built her, and all hail whoever invented the plastic rivet, but there will be a bit more robustness in the mix. For now though, what this means is she comes apart rather swiftly. It will take under three days to completely strip her down to a bodyshell.
However, before we do that, there are other things to consider. The point to this rebuild is to make a few changes here and there, and the way to do that is as she comes apart, not as she goes together.
Once again, the ethos is ease of repair and maintenance. After 5 years at the track, we know what it takes to fix an XJS, even major surgery, with limited time and facilities. We also now know how to change the car to make that easier. Any modifications that we make need to factor this in. It’ll all very well adding this and bracing that, but if it doubles the number of bolts you have to take out to replace another component, are you going the right direction with the change? I did once fill in the area between front spoiler and subframe with an undertray. The undertray may have improved aerodynamics by 0.01%. It also made getting to some things a complete pain in the bum.
Careful thought as to any further modifications is therefore paramount, and removal is nearly as critical as performance.
One in, one out. That's how we roll. Rebuilds require parts.
Standard protocol also involves blasting, stripping, and then plating a big sack of components.
Replacement of the grill mesh involves a lot of swearing, and many, many finger wounds.
We could almost pretend to look as if we know what we're doing.
Shiny. The polycarbonate window in the middle is to take the camera.
Bulletproof headlights!
Polycarbonate, tiny bolts, and some time. Nothing we do is difficult, it just requires dedication.
Imagine the car has been freshly painted, and she'd be really quite pretty.
Bringing up the presentation standards, just as JEC wanted.
And here's one just like it.
Many of the best things in life come in pairs...

Lorem ipsum dolore
Consectetuer adipi scing elit. Mauris urna urna varius et interdum a, tincidunt quis, libero. Aenean sit.
Consectetuer adipi scing hauris Urnasylo urna varius et interdum as Tincidunt quis libero uenean sit amturpi massalo laoreet iaculipede. mnisl ullamcorpermassa, ac consectetuer. feipsum.
- Consectetuer adipi scing hauris
- Urna urna varius et interdum as
- Consectetuer adipi scing haur
- Urna urna varius et interdum
- Tincidunt quis libero uenean sit
- Amturpi massalo laoreet iacul
- Ede mnisl ullamcorpermassa
ipsum dolore
Consect etuer adipi scing elit. Mauris urna utruyq rna varius et interdum a, tincidunt quis, libero. Aenean sit.
Lorem ipsum
dolor sit ambient nulla
Lorem ipsum
dolor sit ambient nulla
Lorem ipsum
Lorem ipsum dolor sit amet, consectetuer adipiscing elit. Pellentesque massa. Nam ultricies mauris eget metus. Aenean sit amet risus.