VANESSA
STAGE 4.2
SPRING 2011
Injury of the month: shoulder ache - although Mr David is well into the wiring, there are still body panels to be finished off, and power sanders are for wimps.
Mind you, the cage went back in again, so put me down for three or four nasty cracks about the head too.
FUEL, SPARKS AND LOUD NOISES.
Although he's been here a couple of times already by this stage, it's time for us to watch Officer David do his thing with the wiring.
There is 4 stone of wiring in an XJS usually. He gets it down to about 4kg. As the McGivern lays a cable, so we can turn our attention to the firewalls, because now we know what is to go where we can eliminate all the other holes.*
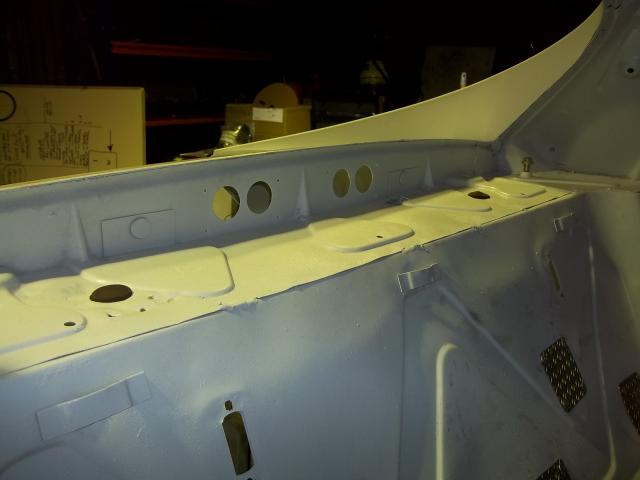
The firewall between cockpit and engine bay has holes everywhere, and not just those that you can see directly. The holes for wiring, now left open because David has eliminated the wires, are now indirect holes between engine bay and cockpit, and must be closed.
*In practice it is near impossible to seal a car completely. Later testing has revealed that if you put a wheel on the grass, you get a few random blades of greenery appear in the cockpit. Where the hell they are getting in I cannot fathom!
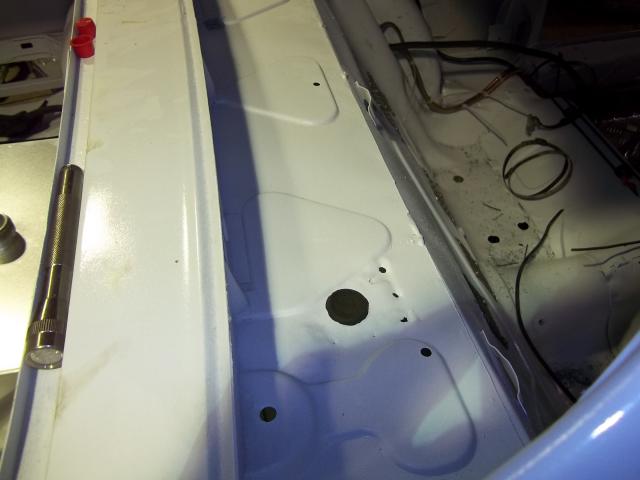
The rear firewall twixt cockpit and petrol, well, that is much easier, but again there are more holes than you imagine. Every hole we’ve drilled, spot weld we’ve broken, that hole has to be sealed. There are the standard 8 holes into the car in the rear bulkhead, plus the quad set up high that used to house the Jaguar venty flap things, something to do with airflow when you shut the doors, plus anything else you’ve done. In our case, fuel lines and battery cable need grommets, wiring holes need to be closed, because once again someone has deleted all the cable.
Once you’ve done the rear firewall and won’t be poking a drill into the boot from inside the car any longer, we can play with the fuel tank.
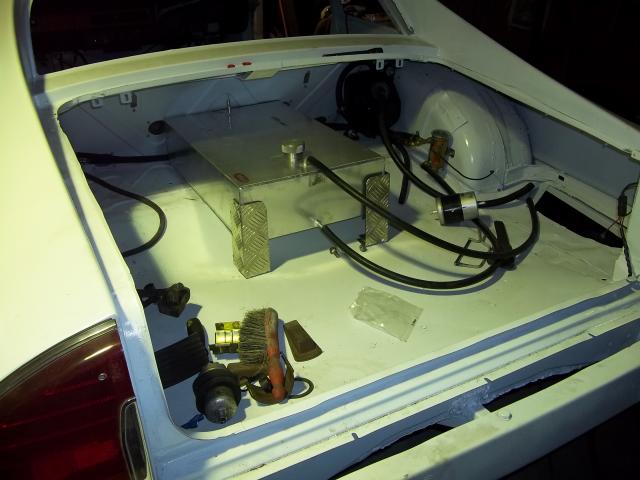
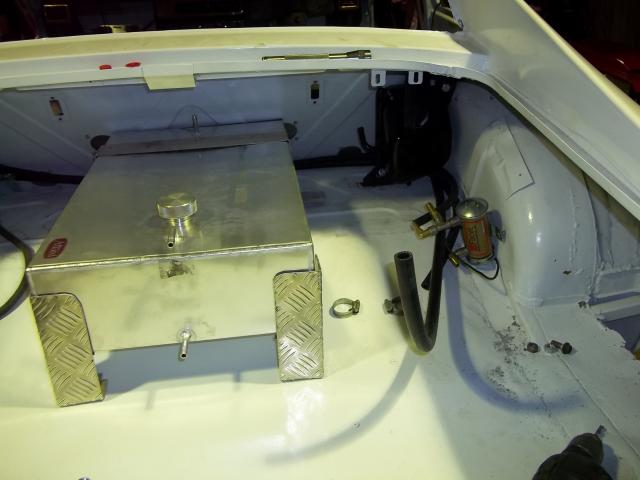
Fuel tank is an alloy item, a 30 litre baffled but un-foamed item, cost of £89. We’ve gone this route because David erased the fuel filler flap in the shell prep process, rendering a standard tank useless. Kutuka North are therefore fitting, for the first time ever, an aluminium tank. It restricts the car’s range to only about 20 minute sprint races, and the lack of foam filling restrains this car to the UK circuits only. But the weight, oh boy, the weight, it’s just nothing at all. Over 15kg saved in the tank alone. Don't panic, gentle listener, we offset the tank cost a little by Ebaying the V12 instrument pod that came out - £25! Every little helps.
It requires all new plumbing, and a custom cradle to sit in, because there is no reference point in this boot for it at all. We elect to orient the tank such that a custom periscope-type fuel filler neck, which we make our tame McGivern tig-weld for us as punishment, will poke straight through the boot lid. This avoids the need for a splash bowl and drain, because the filler is on the outside of the car. It also means we can fill it up without taking the bootlid off, and the limited tank size means we can just brim it, no need to measure the fuel load, ever.
Running low fuel levels with a standard tank can be an issue. We have, for example, generally had to keep 20 litres extra in any road-car setup to avoid issues of fuel surge. Some alterations to the plumbing on Helen allowed low-fuel running, whilst Christine’s additional thirst required an extra fuel pump to ensure the swirl pot was constantly full. Vanessa gets the best of both because she needs a completely bespoke arrangement.
The swirl pot is usually gravity fed. We can’t do that here, because we threw away the boot floor, the swirl pot now nests where the tank used to live, right alongside the offside rear wheel. A lovely gold Facet pump (£70) draws fuel from the tank to feed that, and we re-route the return from the engine to the swirl pot too. The Jag pump then draws from the swirl pot to feed the engine.
The tank is mounted, to begin with, on steel stilts, with aluminium corners to locate it. We quickly dismiss the aluminium parts as insufficient for the job, and a steel box frame appears instead.
This leaves room for the battery alongside the nearside rear wheel, and the original Jag carrier is simply welded in place.
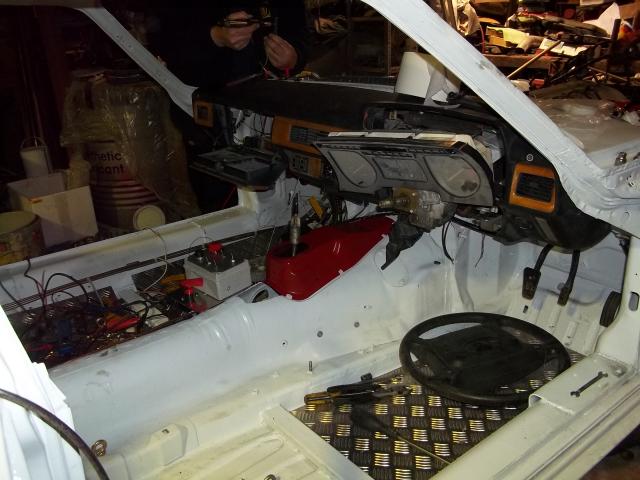
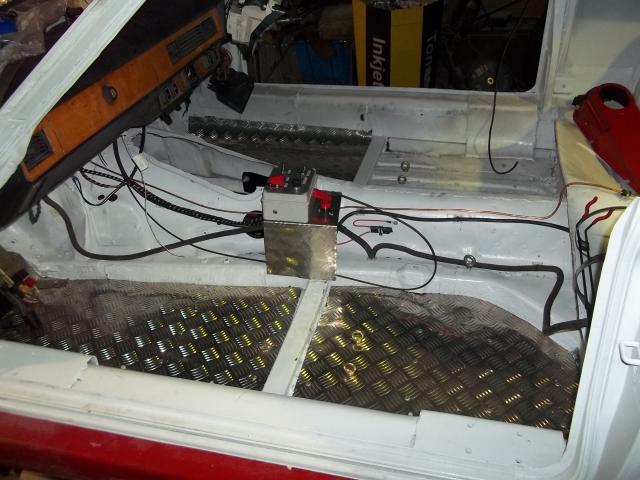
David’s wiring job is amusingly small. There’s just nothing to it. On the Saturday morning he can be found in a sea of spaghetti, with wiring diagrams. By Sunday night, there will be a small ribbon of wire, and yet all the bits we need a race car to have, work. It is a skill beyond my ken. Or Barbie.
A seat is thrown in the car, and a man sat in it. Whilst the Jaguar dash has gone in, we’re missing some controls. The idea is that if you have an XJS, you can get in this car and it will feel like an XJS. The headlights remain on the rotary control as usual, all the wood trim is still here. Because he can’t help himself, David saved and wired up the clock. Most road cars have it broken, but it works in this race car!
But, though it feels like your XJS, it’s not. The stalks have gone, the radiator fan is no longer automatic, the heater has got out and the controls for the demister have gone missing. As has the Jaguar demister setup, 50kg of dead weight in the conventional Jaguar heater and fans! An auxiliary switch panel sprouts alongside the driver, and it for this that the seat is chucked in loosely. Once seated in the car, we need to know the average driver’s reach, so that panel can be mounted. We call it ergonomics, but it’s really just about not looking daft later when the pilot needs a stick to reach the wipers because we didn't check this.
The switch panel is again a David creation, small, neat work that he does so well we sort of hate him a little bit. You know when someone’s working at something, and it’s coming out better than you can manage, and you know it’s because they’re better than you? It makes you a little bit sad. He makes you fully depressed. Really want to slap him sometimes.
The master kill switch, ignition and starter all make their way to this panel, it's a little bit jet fighter. It’s quite nice actually, a strange mix of “my wood-trimmed grand tourer” and “driving this would cause tourettes.”
The master switch is on and off all day like a whore’s drawers, as lights, wipers and fans get installed and tested.
Suddenly we’re at a point where we can pump petrol, and there is a device to provide sparks to the loud thing in the front.
The car is running the later-type engine management, with air flow meter, the distributor that has nothing inside, and a crank sensor. We’ve never done one of these before, we use older stuff usually as it’s proven, it works, and we can tinker with it. This is pretty simple stuff, in that if we’ve got things lined up, it ought to fire, but there is some doubt to this. In theory, with the engine at TDC and the dizzy even vaguely in the right place, the sensor and ECU do all the rest of it, but it somehow seems a bit easy, I can't quite believe that it will work that way.
The cooling system is finished to allow engine start. We replace all hoses with silicone. It’s not cheap, but we’ve had hoses burst before, second hand rubber hoses have no place in a race car, and new from Jaguar are every bit as expensive as buying silicone. Given we need bespoke hoses for the ally radiator we fit, and the fact that we’ve moved the header tank, thrown away the heater, and changed the take offs to the thermostat housing there really isn’t a lot of Jaguar left in the cooling department anyway.
Silicone hose for this lot comes in at about £130. In theory it’s better stuff, longer life, better sealing etc, but the reality is we’ve got to do the plumbing from scratch anyway, and it’s going to cost this much money no matter what we buy, some things should not be scrimped on.
As this phase concludes then we have fuel, electrics, and water. The oil cooler is on, and there’s oil in the engine. I know of nothing more required to allow us to find out if it goes….
…But we’ll let you know next time. Maybe.
4.3 COMING SOON – PANELS AND LIGHTNESS.
.


Might not look like much progress, but alloy radiator being fitted, and there is wiring here now.
Many hours of work to create those thin little ribbons of cable, but that is the art of our tame David, he puts a lot into delivering the least.

Firewalls being sealed. Alloy patches rivetted over the larger holes, see bottom right, but don't forget the holes up top too. Those clever little vents that used to allow air through into the boot are now a direct route for fuel to come in.
Any hole whatsoever between cockpit and boot must be sealed.
Each of these missing spot weld holes needs a rivet, larger holes for the missing captive nuts etc need a grommet, but everything must be fully sealed.


30 litre alloy fuel tank getting a trial fit.
This installation did not pass careful scrutiny, we decided it was insufficiently robust. There is no truth in the rumour that the tank is a Cylon.

Fuel plumbing starts to come together. Nothing fancy here, Jag swirl pot - relocated top right hand corner - Jag fuel pump, Jag filter. Just with a couple of extras that take our simple little brains a bit of time to figure out. Like the extra lift pump because we've not paid the gravity bill.

Switch panel supplements the primary controls.
This really is all the wiring we let you have, I mean, this is it.

Dash electrics fitted, pod going back in. Someone should fit that brake pedal at some point...
Oh, and a roll cage. Where did we leave it?


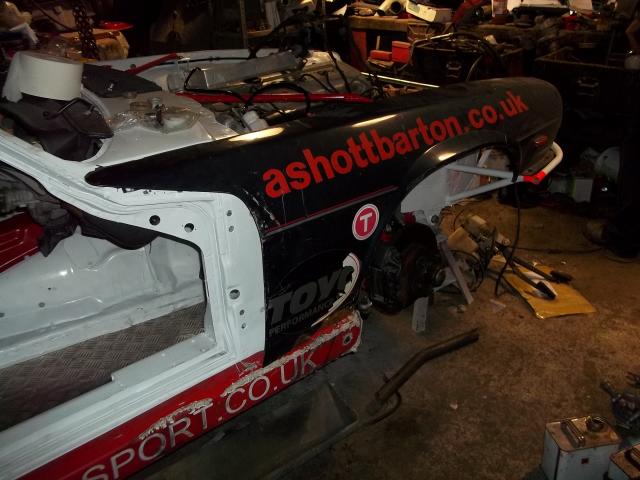
This wing had had it. It's from the old Comer machine, and it had taken a right old thump.
But necessity is the mother of invention, and fixing it means we don't spend any money. With big hammers and time, they can be made to fit once again. The panel recycling department is about to go into overdrive...
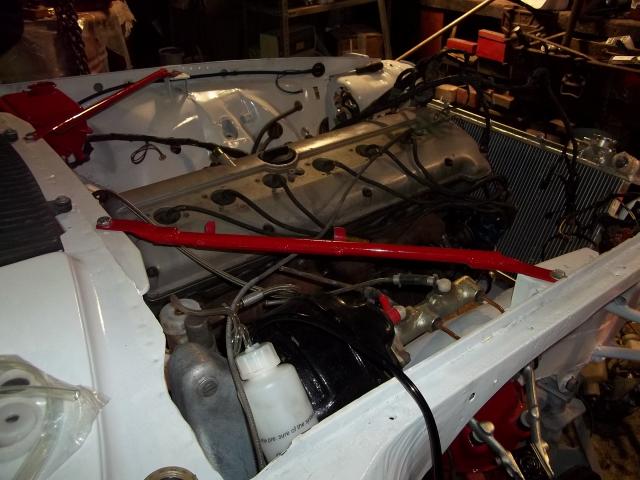
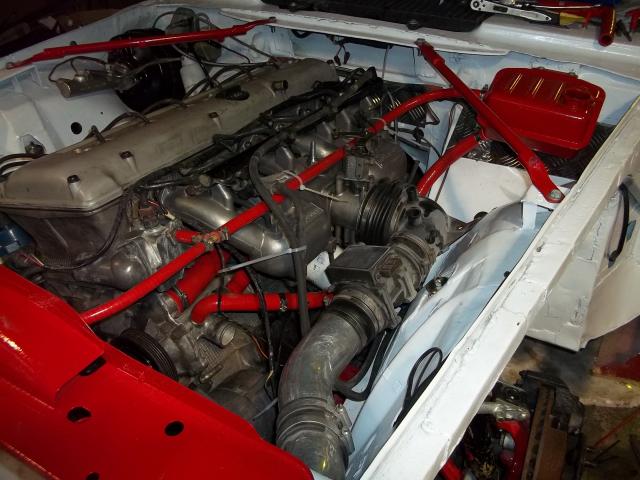
Engine bay now coming together fast.
Resited expansion/header tank, revised plumbing in expensive silicone, inlet, airflow meter and inlet air feed all fitted.